

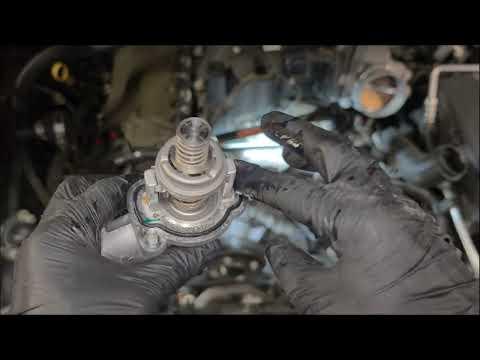




How to Replace the Thermostat Housing on a 2016-2022 GMC Canyon 2.8L Duramax (Engine: Inline 4 2.8L)
Step-by-step instructions with tools, parts, torque specs, coolant bleeding, and safety tips for 2016, 2017, 2018, 2019, 2020, 2021, 2022
How to Replace the Thermostat Housing on a 2016-2022 GMC Canyon 2.8L Duramax (Engine: Inline 4 2.8L)
Step-by-step instructions with tools, parts, torque specs, coolant bleeding, and safety tips for 2016, 2017, 2018, 2019, 2020, 2021, 2022


🔧 Canyon - Thermostat Housing Replacement
Replace the complete thermostat housing assembly. The thermostat is integrated into the plastic housing, so replacing the whole unit gives your Canyon a fresh seal and avoids reusing heat-aged plastic.
Assumption: These instructions cover the stock 2.8L Duramax cooling system. Confirm the fastener torque against current GMC service information if your replacement housing includes different instructions.
Difficulty Level: Intermediate | Estimated Time: 2-3 hours
⚠️ Safety & Precautions
- ⚠️ Let the engine become completely cold before opening the coolant reservoir.
- 🧤 Wear gloves and safety glasses. Coolant is poisonous and must be kept away from children and animals.
- 🚫 Never remove the coolant reservoir cap from a hot or pressurized cooling system.
- 🛞 Support your Canyon with jack stands if you raise it. Never work beneath a vehicle supported only by a jack.
- 🔋 Battery disconnection normally isn’t required, but keep tools away from the positive terminal and alternator connections.
- ♻️ Capture every coolant spill and dispose of used coolant through an approved recycling facility.
🔧 Required Tools
You'll need the following tools for this repair:
- 1/4-inch drive ratchet
- 3/8-inch drive ratchet
- 7mm socket
- 8mm socket
- 10mm socket
- 13mm socket
- 6-inch socket extension
- 10-50 Nm torque wrench
- Hose-clamp pliers (specialty)
- 90-degree hose-pick set
- Plastic trim-removal tool
- Flat-blade screwdriver
- Coolant drain pan (3-gallon minimum)
- Spill-free coolant funnel (specialty)
- Floor jack (rated 2-ton minimum)
- Jack stands (rated 2-ton minimum)
- Wheel chocks
- Nitrile gloves
- Safety glasses
Hose-clamp pliers securely hold spring-style coolant clamps open while you move them off the hose connection.
🔩 Required Parts
HowToo sells all the parts you need for this repair:
- Four Seasons integrated thermostat housing with thermostat and seal - Qty: 1
- 50/50 premixed DEX-COOL-compatible coolant - Qty: 2 gallons
- Coolant hose clamps - Qty: As needed
- Distilled water - Qty: 1 gallon for cleanup only
The integrated Four Seasons assembly is the sensible pick here. Fresh thermostat, fresh housing, fresh seal. Nobody wants to drain the cooling system twice for one tired piece of plastic.
📋 Before You Begin
- 🅿️ Park your Canyon on level ground, select Park, apply the parking brake, and chock the rear wheels.
- 🌡️ Allow the engine to cool for at least several hours, preferably overnight.
- 🔍 Check the new housing before disassembly. Confirm the thermostat and sealing ring are installed and undamaged.
- 🧴 Use only DEX-COOL-compatible coolant. Premixed 50/50 coolant avoids mistakes with water concentration.
- 📸 Photograph the hose and wiring routing before removing anything.
- 🧼 Clean dirt from around the thermostat housing so contamination doesn’t enter the cooling system.
🔨 Step-by-Step Instructions
Follow these steps in order:
Step 1: Release Residual Cooling-System Pressure
- Verify the upper radiator hose is cold and squeezes easily.
- Cover the coolant reservoir cap with a shop towel and loosen it slowly by hand.
- Stop if you hear pressure escaping. Wait until the pressure is completely gone before removing the cap.
Step 2: Raise and Secure the Front
- Place the wheel chocks behind the rear tires.
- Use the 2-ton floor jack at the approved front lifting point.
- Lower your Canyon onto the 2-ton jack stands at the approved frame support points.
- Gently shake the vehicle before working underneath it.
Step 3: Remove the Lower Splash Shield
- Position the 3-gallon drain pan beneath the radiator area.
- Use the 7mm, 8mm, or 10mm socket, as equipped, to remove the lower shield fasteners.
- Use the plastic trim-removal tool for any push-pin retainers.
- Set the shield and fasteners aside in installation order.
Step 4: Drain the Coolant
- Place the 3-gallon drain pan directly below the radiator drain fitting or lower radiator hose.
- Open the radiator drain fitting carefully by hand if accessible.
- If the drain fitting can’t be accessed safely, use the hose-clamp pliers to move the lower-hose clamp back, then carefully loosen the hose.
- Drain enough coolant to bring the level below the thermostat housing.
- Close the drain or reinstall the lower hose before proceeding.
Step 5: Remove the Intake Ducting
- Use the flat-blade screwdriver or appropriate socket to loosen the intake-duct clamps.
- Disconnect any attached breather hose by releasing its locking tabs by hand.
- Lift out the intake duct without pulling on wiring or plastic sensor bodies.
- Cover the open intake connection with a clean, lint-free cloth.
Step 6: Expose the Thermostat Housing
- Trace the large coolant hose to the integrated thermostat housing.
- Release nearby harness clips with the plastic trim-removal tool.
- Move the harness aside without stretching its wires.
- Disconnect any coolant-temperature sensor connector attached to the assembly by releasing its lock by hand.
Step 7: Disconnect the Coolant Hoses
- Use the hose-clamp pliers to compress each spring clamp and slide it several inches back.
- Use the 90-degree hose pick only between the hose and fitting to break the seal.
- Twist each hose gently, then pull it straight from the housing.
- Do not pry hard against the plastic fitting. A broken hose neck turns a straightforward job into a long afternoon.
Step 8: Remove the Thermostat Housing
- Place the drain pan beneath the housing to catch the remaining coolant.
- Use the 10mm socket, extension, and ratchet to loosen the housing bolts evenly.
- Note each bolt's original position if their lengths differ.
- Remove the housing and its sealing ring.
- Keep coolant away from electrical connectors and the alternator.
Step 9: Clean the Sealing Surface
- Wipe the engine-side sealing surface with a clean, lint-free cloth.
- Use a plastic trim-removal tool to remove stubborn gasket residue without scratching the aluminum.
- Make sure the old sealing ring didn’t remain stuck in its groove.
- Do not use abrasive discs or power tools on the sealing surface.
- Clean and dry beats extra sealant.
Step 10: Install the New Thermostat Housing
- Verify the new seal is fully seated and not twisted.
- Do not apply RTV silicone unless the housing manufacturer specifically requires it.
- Position the housing squarely against the engine and start every bolt by hand.
- Use the 10-50 Nm torque wrench and 10mm socket to tighten the housing bolts evenly.
- Torque the housing bolts to 10 Nm (89 in-lbs), unless the supplied housing instructions specify another value.
- Do not overtighten the plastic housing.
Step 11: Reconnect the Hoses and Wiring
- Push each coolant hose fully over its housing fitting.
- Use the hose-clamp pliers to return each clamp to its original position behind the fitting ridge.
- Replace any distorted, heavily corroded, or weak clamp.
- Reconnect the electrical connector until its lock clicks.
- Reinstall all harness clips so nothing can rub against a belt or pulley.
Step 12: Reinstall the Intake Duct
- Remove the cloth covering the intake opening.
- Seat the intake duct completely at both ends.
- Use the flat-blade screwdriver or appropriate socket to tighten the duct clamps snugly.
- Reconnect the breather hose and verify its locking tabs engage.
Step 13: Refill the Cooling System
- Confirm the radiator drain and lower hose are secured.
- Install the spill-free coolant funnel at the coolant reservoir.
- Slowly add 50/50 premixed DEX-COOL-compatible coolant until the cold-level mark is reached.
- Pause frequently so trapped air can escape.
- Gently squeeze the upper radiator hose by hand several times.
Step 14: Bleed Air From the System
- Leave the spill-free coolant funnel installed with coolant covering its outlet.
- Start the engine and set the heater to full hot with a low blower speed.
- Watch the coolant level and add premixed coolant as the level falls.
- Allow the engine to warm while monitoring the temperature gauge.
- Look for a steady return flow and wait until cabin heat remains consistently hot.
- Shut the engine off immediately if the gauge climbs abnormally or coolant erupts from the funnel.
Step 15: Check for Leaks and Reassemble
- Switch off the engine and inspect the housing, hoses, drain fitting, and clamps with a flashlight.
- After the engine cools, adjust coolant to the cold-level mark.
- Use the original sockets and plastic trim-removal tool to reinstall the lower splash shield.
- Use the 2-ton floor jack to lift your Canyon clear of the stands, remove them, and lower the vehicle.
✅ After Repair
- ✅ Run the engine until it reaches normal operating temperature and verify the gauge remains steady.
- 🔥 Confirm the cabin heater produces stable heat. Heat that repeatedly turns cold usually indicates trapped air.
- 🔍 Inspect the thermostat housing and hose connections for seepage during and after the first drive.
- 🧊 Let the engine cool completely, then recheck the reservoir level and top it off with premixed coolant.
- 🚗 Take a gentle 10-15 minute test drive while watching the temperature gauge.
- 📅 Recheck the coolant level and surrounding area again the following morning.
- 🧽 Rinse coolant residue from painted or metal surfaces with distilled water and dry the area.
💰 DIY vs Shop Cost
Shop Cost: $450-$750 (parts + labor)
DIY Cost: $140-$220 (parts and coolant)
You Save: $230-$530 by doing it yourself!
Shop labor rates vary but typically run $100-$150/hour. This repair takes a shop approximately 2-3 hours.
🎯 Ready to get started?
HowToo makes it easy: same-day/2-day shipping on every part, plus all the tools and specialty tools you need! Check out the parts and tools sections below to add everything to your cart.