

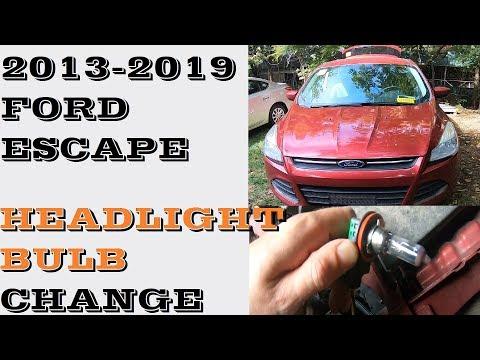






How to Replace the Thermostat and Headlight Bulbs on a 2013-2021 Ford Escape (Trim: SE)
Step-by-step DIY guide with tools, parts, coolant bleeding, torque specs, and safety tips for 2013, 2014, 2015, 2016, 2017, 2018, 2019, 2021
How to Replace the Thermostat and Headlight Bulbs on a 2013-2021 Ford Escape (Trim: SE)
Step-by-step DIY guide with tools, parts, coolant bleeding, torque specs, and safety tips for 2013, 2014, 2015, 2016, 2017, 2018, 2019, 2021


🔧 Escape - Headlight Bulb Replacement
Replacing both headlight bulbs on your Escape is a beginner-friendly repair. You’ll access the bulbs from behind each headlamp assembly, twist the bulb out, unplug it, then install the new bulb without touching the glass.
Difficulty Level: Beginner | Estimated Time: 20-45 minutes
⚠️ Safety & Precautions
- ⚠️ Turn the headlights off and remove the key before starting.
- ⚠️ Let the bulbs cool before touching the back of the headlamp area.
- ⚠️ Do not touch the glass part of a halogen bulb. Skin oil can create a hot spot and shorten bulb life.
- ⚠️ Replace both bulbs as a pair so brightness and color match side to side.
- ⚠️ Battery disconnect is not normally required for this bulb replacement.
🔧 Required Tools
You'll need the following tools for this repair:
- Nitrile gloves
- Safety glasses
- Clean microfiber towel
- Small flashlight
🔩 Required Parts
HowToo sells all the parts you need for this repair:
- Low beam headlight bulbs H11 - Qty: 2 - Replace in pairs
📋 Before You Begin
- 🅿️ Park your Escape on level ground, shift to Park, and set the parking brake.
- 💡 Switch the headlight control to OFF.
- 🧤 Put on nitrile gloves before handling the new bulbs.
- 🔦 Use a small flashlight to look behind each headlamp housing before reaching in.
- 📝 This procedure is for replacing both standard low beam headlight bulbs. The high beam/DRL bulb is a different bulb.
🔨 Step-by-Step Instructions
Follow these steps in order:
Step 1: Open the Hood
- Pull the hood release inside your Escape.
- Lift the hood and secure it with the hood prop rod if equipped.
- Use a small flashlight to locate the rear of the headlamp assemblies.
Step 2: Locate the Driver-Side Low Beam Bulb
- Stand at the front of your Escape and look behind the driver-side headlamp.
- Find the low beam bulb connector on the rear of the headlamp housing.
- The connector is the small plastic plug attached to the back of the bulb.
Step 3: Remove the Driver-Side Bulb
- Use your gloved hand to press the electrical connector release tab.
- Pull the connector straight back from the bulb.
- Use your gloved hand to rotate the bulb counterclockwise about a quarter turn.
- Pull the bulb straight out of the headlamp housing.
- Do not force the plastic tabs.
Step 4: Install the New Driver-Side Bulb
- Use nitrile gloves to hold the new H11 bulb by the plastic base only.
- If the glass is touched, wipe it clean with a clean microfiber towel.
- Insert the bulb into the headlamp housing with the tabs aligned.
- Rotate the bulb clockwise until it locks in place.
- Push the electrical connector onto the bulb until it clicks.
Step 5: Locate the Passenger-Side Low Beam Bulb
- Move to the passenger side of the engine bay.
- Use a small flashlight to look behind the passenger-side headlamp assembly.
- Find the low beam bulb connector on the rear of the housing.
Step 6: Remove the Passenger-Side Bulb
- Use your gloved hand to press the electrical connector release tab.
- Pull the connector straight back from the bulb.
- Use your gloved hand to rotate the bulb counterclockwise about a quarter turn.
- Pull the bulb straight out of the headlamp housing.
- Keep the old bulb for comparison.
Step 7: Install the New Passenger-Side Bulb
- Use nitrile gloves to hold the new H11 bulb by the plastic base only.
- Compare it to the old bulb to confirm the tab pattern matches.
- Insert the bulb into the headlamp housing with the tabs aligned.
- Rotate the bulb clockwise until it locks in place.
- Push the electrical connector onto the bulb until it clicks.
Step 8: Test Both Headlights
- Turn the headlight switch to ON.
- Walk to the front of your Escape and confirm both low beam bulbs are working.
- Switch between low beam and high beam to confirm you replaced the intended bulbs.
- Turn the headlight switch back to OFF.
Step 9: Close the Hood
- Use your hand to make sure no tools or towels are left in the engine bay.
- Lower the hood and latch it securely.
✅ After Repair
- ✅ Check headlight aim against a wall at night. Both beams should sit at similar height.
- ✅ If one bulb does not work, turn the lights off and recheck that the connector is fully clicked in.
- ✅ If a new bulb fails immediately, inspect the connector for heat damage or corrosion.
- ✅ Dispose of old bulbs safely. Do not leave broken glass in the work area.
💰 DIY vs Shop Cost
Shop Cost: $90-$180 USD equivalent (parts + labor)
DIY Cost: $25-$70 USD equivalent (parts only)
You Save: $65-$110 by doing it yourself!
Shop labor rates vary but typically run $100-$150/hour. This repair takes a shop approximately 0.3-0.6 hours.
🎯 Ready to get started?
HowToo makes it easy: same-day/2-day shipping on every part, plus all the tools and specialty tools you need! Check out the parts and tools sections below to add everything to your cart.