





How to Replace the Starter Motor on a 2018-2019 Honda Odyssey (Trim: EX | Engine: V6 3.5L)
Step-by-step DIY guide with tools, parts, torque specs, safety tips, and cost savings for 2018, 2019
How to Replace the Starter Motor on a 2018-2019 Honda Odyssey (Trim: EX | Engine: V6 3.5L)
Step-by-step DIY guide with tools, parts, torque specs, safety tips, and cost savings for 2018, 2019


🔧 Odyssey - Starter Motor Replacement
Replacing the starter motor on your Odyssey involves disconnecting the battery, removing nearby intake parts for access, disconnecting the starter wiring, and unbolting the starter from the transmission housing. The starter is a high-current electrical component, so clean battery disconnection and careful wiring handling are very important.
Difficulty Level: Intermediate | Estimated Time: 2-3 hours
⚠️ Safety & Precautions
- ⚠️ Disconnect the negative battery cable before touching the starter wiring. The large starter cable is always hot when the battery is connected.
- ⚠️ Let the engine cool before working near the intake, exhaust, and engine bay brackets.
- ⚠️ Keep metal tools away from the positive battery terminal and starter power cable.
- ⚠️ Wear safety glasses and gloves. You will be working around sharp brackets and electrical terminals.
- ⚠️ If the battery was recently disconnected, idle relearn may be needed after repair.
🔧 Required Tools
You'll need the following tools for this repair:
- 10mm socket
- 12mm socket
- 14mm socket
- 17mm socket
- 3/8-inch drive ratchet
- 3/8-inch drive 6-inch extension
- 3/8-inch drive universal joint
- Flat-blade screwdriver
- Needle-nose pliers
- Trim clip removal tool
- Torque wrench 10-100 ft-lb range
- Battery terminal brush
- Digital multimeter
- Fender cover
- Mechanic gloves
- Safety glasses
🔩 Required Parts
HowToo sells all the parts you need for this repair:
- Starter motor - Qty: 1
- Starter terminal nut - Qty: 1
- Battery terminal protector spray - Qty: 1
- Dielectric grease - Qty: 1
📋 Before You Begin
- Park your Odyssey on level ground, shift to Park, and set the parking brake.
- Open the hood and place a fender cover over the front fender to protect the paint.
- Save radio presets or other personal settings if desired. Battery disconnection may reset some settings.
- Use a digital multimeter to verify battery voltage is healthy before replacing the starter. A fully charged battery should read about 12.6 volts with the engine off.
- A universal joint is a small swivel adapter that lets your socket reach bolts at an angle.
- Dielectric grease is a non-conductive protective grease used around electrical connectors to help keep moisture out.
🔨 Step-by-Step Instructions
Follow these steps in order:
Step 1: Disconnect the Battery
- Use a 10mm socket to loosen the negative battery terminal clamp.
- Lift the negative cable off the battery post and move it aside so it cannot spring back.
- Use a 10mm socket to remove the positive battery terminal if extra room is needed.
- Use a battery terminal brush to clean corrosion from the terminals if present.
- Negative cable comes off first.
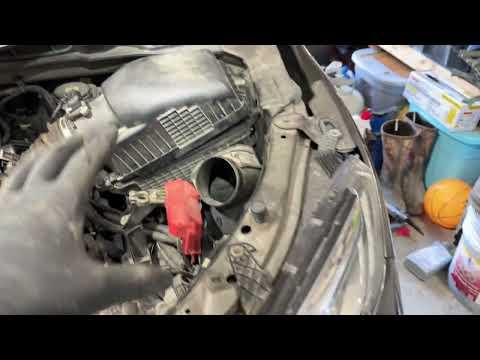
Step 2: Remove the Engine Cover and Intake Duct
- Lift the plastic engine cover straight up by hand to release it from the rubber mounts.
- Use a flat-blade screwdriver to loosen the air intake duct clamp at the throttle body.
- Use a flat-blade screwdriver to loosen the clamp at the air cleaner housing.
- Use needle-nose pliers to release any small hose clamps attached to the intake duct.
- Remove the intake duct and set it aside.
Step 3: Remove Access Brackets Near the Starter
- Locate the starter low on the front side of the engine where it meets the transmission housing.
- Use a 10mm socket and trim clip removal tool to move any wire retainers or plastic clips out of the way.
- Use a 12mm socket to remove any small support bracket blocking access to the starter wiring.
- Mark bracket locations if needed so they go back in the same place.
- Take a phone photo first.
Step 4: Disconnect the Starter Wiring
- Confirm the negative battery cable is still disconnected.
- Pull back the rubber cover from the large starter power terminal by hand.
- Use a 12mm socket to remove the nut from the large starter cable terminal.
- Lift the large cable off the starter stud and move it aside.
- Press the locking tab on the small starter signal connector and unplug it by hand.
- If the connector is stubborn, use a flat-blade screwdriver gently on the release tab only.
Step 5: Remove the Starter Mounting Bolts
- Support the starter with one hand before removing the final bolt. It is heavier than it looks.
- Use a 14mm socket, 3/8-inch drive ratchet, and 3/8-inch drive 6-inch extension to loosen the starter mounting bolts.
- Use a 3/8-inch drive universal joint if the bolt angle is tight.
- Remove the upper and lower starter mounting bolts.
- Carefully pull the starter straight out from the transmission housing.
Step 6: Compare the Old and New Starter
- Place both starters side by side on a clean surface.
- Confirm the mounting ears, electrical terminals, gear position, and overall length match.
- Use a 10mm socket or 12mm socket only if you need to transfer a small heat shield or bracket from the old starter.
- Do not force the new starter into place if the shape does not match.
Step 7: Install the New Starter
- Guide the new starter into the transmission housing by hand.
- Start both mounting bolts by hand first to prevent cross-threading.
- Use a 14mm socket and 3/8-inch drive ratchet to snug the mounting bolts.
- Use a torque wrench 10-100 ft-lb range and 14mm socket to tighten the starter mounting bolts to Torque to 64 Nm (47 ft-lbs).
- Hand-start bolts every time.
Step 8: Reconnect the Starter Wiring
- Plug the small starter signal connector into the new starter until it clicks.
- Install the large starter cable onto the starter terminal stud.
- Apply a small amount of dielectric grease around the rubber boot area, not between the metal contact surfaces.
- Use a 12mm socket and torque wrench 10-100 ft-lb range to tighten the starter terminal nut to Torque to 9 Nm (80 in-lbs).
- Push the rubber protective boot fully back over the terminal.
Step 9: Reinstall Brackets and Intake Parts
- Use a 12mm socket to reinstall any support brackets removed earlier.
- Tighten small bracket bolts to Torque to 22 Nm (16 ft-lbs).
- Use a trim clip removal tool by hand to reinstall wire retainers and plastic clips.
- Reinstall the intake duct onto the throttle body and air cleaner housing.
- Use a flat-blade screwdriver to tighten the intake duct clamps until snug.
- Use needle-nose pliers to reinstall any hose clamps.
- Push the engine cover back onto its rubber mounts by hand.
Step 10: Reconnect the Battery
- Install the positive battery cable first if it was removed.
- Use a 10mm socket to tighten the positive terminal clamp snugly.
- Install the negative battery cable last.
- Use a 10mm socket to tighten the negative terminal clamp snugly.
- Apply battery terminal protector spray to the outside of the terminals after tightening.
- Do not overtighten the battery clamps. They can crack.
✅ After Repair
- Start your Odyssey. The engine should crank strongly and start normally.
- Listen for grinding, clicking, or a starter that stays engaged after the engine starts. Shut the engine off immediately if this happens.
- Check that the battery terminals are tight and the starter wiring boot is fully seated.
- If the idle feels unstable after battery disconnection, let the engine idle with all accessories off until fully warm, then drive normally for several minutes.
- Reset the clock, radio presets, and any convenience settings if they were lost.
- If the van still only clicks or does not crank, test battery voltage, battery cables, starter relay, and ground connections before replacing more parts.
💰 DIY vs Shop Cost
Shop Cost: $650-$1,000 (parts + labor)
DIY Cost: $220-$450 (parts only)
You Save: $300-$650 by doing it yourself!
Shop labor rates vary but typically run $100-$150/hour. This repair takes a shop approximately 2-3 hours.
🎯 Ready to get started?
HowToo makes it easy: same-day/2-day shipping on every part, plus all the tools and specialty tools you need! Check out the parts and tools sections below to add everything to your cart.