
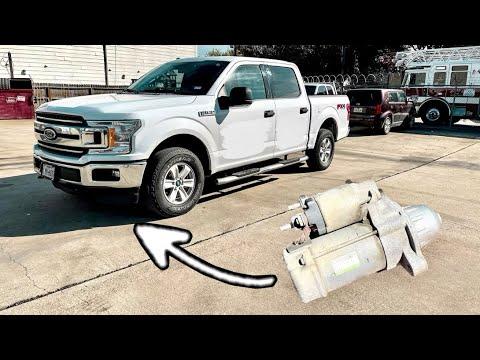




How to Replace the Starter Motor on a 2017-2020 Ford F-150 3.5L EcoBoost (Engine: V6 3.5L)
Step-by-step 4WD removal guide with required tools, torque specs, and safety tips for 2017, 2018, 2019, 2020
How to Replace the Starter Motor on a 2017-2020 Ford F-150 3.5L EcoBoost (Engine: V6 3.5L)
Step-by-step 4WD removal guide with required tools, torque specs, and safety tips for 2017, 2018, 2019, 2020


🔧 F-150 - Starter Motor Replacement
This is a tight-access repair on your F-150. The starter sits low on the passenger side of the engine, and the 4WD engine-mount bracket may leave very little room for removal.
Difficulty Level: Advanced | Estimated Time: 3-5 hours
Assumption: These instructions cover the factory 3.5L EcoBoost and original 4WD mounting arrangement.
⚠️ Safety & Precautions
- ⚠️ Disconnect the negative battery cable before touching the starter. Its large power cable is live even with the ignition off.
- ⚠️ Support the truck with properly positioned jack stands. Never work beneath a truck supported only by a hydraulic jack.
- ⚠️ Let the engine and exhaust cool completely before beginning.
- ⚠️ If engine movement is required, support it with a wide hardwood block. Never place a jack directly against an aluminum housing.
- ⚠️ Raise the engine only enough to create clearance. Excessive movement can damage hoses, wiring, exhaust parts, and mounts.
- ⚠️ Remove rings, watches, and other metal jewelry before working around the battery cable.
🔧 Required Tools
You'll need the following tools for this repair:
- 8mm socket
- 10mm socket
- 13mm socket
- 15mm socket
- 21mm deep socket
- 3/8-inch drive ratchet
- 1/2-inch drive ratchet
- 3-inch socket extension
- 6-inch socket extension
- 3/8-inch drive universal joint
- Flat-blade screwdriver
- Trim-clip removal tool
- Inch-pound torque wrench rated 50-110 lb-in
- Foot-pound torque wrench rated 30-100 lb-ft
- Floor jack rated 3-ton minimum
- Jack stands rated 3-ton minimum
- Wheel chocks
- Wide hardwood support block
- Mechanic’s gloves
- Safety glasses
- Battery-terminal cleaning brush
🔩 Required Parts
HowToo sells all the parts you need for this repair:
- Starter motor for the 3.5L EcoBoost - Qty: 1
- Starter mounting bolts or stud bolts - Qty: As needed if damaged
- Electrical terminal protectant - Qty: 1
The starter aisle is open beside this guide. Match the replacement’s nose, terminals, mounting ears, and overall length against the removed unit before installation.
📋 Before You Begin
- Park on firm, level ground. Select Park and apply the parking brake.
- Switch off the ignition, remove the key or move the key fob away from the truck, and wait several minutes for the electrical modules to shut down.
- Chock both rear wheels with wheel chocks.
- Open the hood before disconnecting the battery.
- No infotainment service mode, scan-tool command, coding, or starter registration is required.
- If the old starter only clicks, test the battery and inspect its connections first. A weak battery can imitate a failed starter.
🔨 Step-by-Step Instructions
Follow these steps in order:
Step 1: Disconnect the Battery
- Use an 8mm or 10mm socket, as fitted, to loosen the negative battery-terminal clamp.
- Lift the negative cable from the terminal and position it where it cannot spring back.
- Do not disconnect a starter cable until the battery ground cable is isolated.
Step 2: Raise and Support the Truck
- Use the 3-ton floor jack at a proper front frame lifting point.
- Position the 3-ton jack stands beneath the frame rails and slowly lower the truck onto them.
- Gently shake the truck from the side before getting underneath. It must remain completely stable.
- A rolling creeper helps, but cardboard never complains.
Step 3: Remove the Lower Shields
- Use the applicable 8mm, 10mm, or 13mm socket and trim-clip removal tool to remove the underbody shield, transmission cover, or skid plate blocking access.
- Keep M6 and M8 shield bolts separated because their torque values differ.
- During installation, tighten M6 shield fasteners to 8 Nm (71 lb-in).
- During installation, tighten M8 shield or skid-plate fasteners to 40 Nm (30 ft-lbs). f150forum.com)
Step 4: Locate and Inspect the Starter
- Locate the starter underneath the passenger side of the engine, beside the transmission bellhousing.
- Use a work light to photograph the cable routing and terminal positions before disassembly.
- Check for oil contamination, melted wiring, loose terminals, or a damaged ground connection.
Step 5: Disconnect the Starter Wiring
- Use a flat-blade screwdriver to carefully open the plastic cover over the large starter-solenoid terminal.
- Use the correctly fitting 10mm or 13mm socket to remove the large battery-cable nut. Hold the cable by its terminal, not its insulation.
- Use the correctly fitting 8mm or 10mm socket to remove the smaller control-wire nut.
- Move both wires aside without sharply bending their terminals.
- During installation, tighten the large battery-cable nut to 12 Nm (106 lb-in).
- During installation, tighten the small control-wire nut to 6 Nm (53 lb-in). f150forum.com)
Step 6: Move the Cooler-Line Bracket
- Use the correctly fitting 10mm or 13mm socket to remove the transmission cooler-line bracket nut near the starter.
- Move the bracket only far enough to provide access. Do not bend or kink the cooler lines.
- During installation, tighten the bracket nut to 12 Nm (106 lb-in). f150forum.com)
Step 7: Remove the Starter Fasteners
- Support the starter with one hand. It is heavier than it looks.
- Use a 13mm or 15mm socket, ratchet, and the shortest extension that provides access to loosen the starter mounting stud bolts.
- Remove the lower fastener first, then the remaining fasteners.
- Keep supporting the starter as the final fastener comes out.
Step 8: Work the Starter Out
- Rotate the starter and move it forward, upward, and slightly toward the passenger side while guiding the solenoid around the engine-mount bracket.
- Do not pry against the aluminum transmission bellhousing.
- If it clears, lower the starter through the opening and continue to Step 10.
- If the starter physically contacts the engine mount and cannot be rotated out, continue to Step 9. Owners commonly encounter this clearance problem on 3.5L EcoBoost 4WD trucks. f150forum.com)
Step 9: Create Engine-Mount Clearance if Required
- Use the floor jack and wide hardwood support block to gently support the engine and transmission assembly at a structurally reinforced area near the bellhousing.
- Do not place the jack beneath a thin aluminum pan or plastic component.
- Use the 21mm deep socket and 1/2-inch drive ratchet to remove the two accessible passenger-side engine-mount nuts nearest the starter.
- Raise the supported assembly only a few millimeters at a time while watching hoses, wiring, fan clearance, exhaust connections, and the opposite mount.
- Stop as soon as the starter can be rotated past the mount bracket.
- Remove the starter through the bottom, then lower the engine back onto the mount before leaving it unsupported.
- This clearance method is reported for the 3.5L EcoBoost 4WD arrangement, but the exact engine-mount nut torque is not reliably established by the available Ford procedure. Verify that specification before loosening those nuts. f150forum.com)
Step 10: Inspect the Ring Gear
- Use a work light to inspect the removed starter’s drive gear for broken, rounded, or heavily polished teeth.
- Look through the starter opening at the flexplate ring gear, which is the large toothed ring the starter engages.
- Do not install the new starter if several ring-gear teeth are missing. That requires transmission removal and is not a beginner repair.
Step 11: Compare and Position the New Starter
- Place the old and new starters side by side.
- Confirm that the mounting flange, drive gear, electrical studs, locating features, and body length match.
- Guide the new starter into position using the reverse of the removal path.
- Start every mounting fastener by hand for several turns. This prevents cross-threading the aluminum housing.
Step 12: Tighten the Starter
- Use the 13mm or 15mm socket and foot-pound torque wrench to tighten the starter stud bolts evenly.
- Torque the starter mounting stud bolts to 48 Nm (35 ft-lbs). f150forum.com)
Step 13: Reconnect the Electrical Cables
- Place each cable squarely onto its original terminal. The terminals must not be twisted or placed under tension.
- Use the inch-pound torque wrench and appropriate socket to tighten the small control-wire nut to 6 Nm (53 lb-in).
- Use the inch-pound torque wrench and appropriate socket to tighten the large battery-cable nut to 12 Nm (106 lb-in).
- Reinstall the terminal cover until it locks securely.
- Reattach the cooler-line bracket and tighten its nut to 12 Nm (106 lb-in).
Step 14: Reinstall the Shields
- Use the correct 8mm, 10mm, or 13mm socket to reinstall the transmission cover, underbody shield, and skid plate.
- Tighten M6 fasteners to 8 Nm (71 lb-in).
- Tighten M8 fasteners to 40 Nm (30 ft-lbs).
Step 15: Lower the Truck and Reconnect the Battery
- Use the 3-ton floor jack to lift the frame clear of the jack stands.
- Remove the stands and lower the truck slowly.
- Clean the battery post and clamp with the battery-terminal cleaning brush.
- Reconnect the negative battery cable using the same 8mm or 10mm socket used during removal.
- Tighten the clamp only until it cannot rotate by hand. Do not crush or distort the terminal.
✅ After Repair
- Make sure all tools are clear of the engine compartment.
- Start the engine and listen for quick, even cranking without grinding or continued starter noise.
- Switch the engine off, wait 30 seconds, and repeat the start test two more times.
- Check beneath the truck for a loose shield, cooler-line contact, or hanging wiring.
- If the starter clicks but does not crank, stop repeated attempts. Recheck the battery charge, battery terminals, ground cable, starter cable, and small control wire.
- If the starter grinds, shut the engine off immediately and verify starter seating and ring-gear condition.
- Clock and memory settings may need to be restored after battery disconnection.
💰 DIY vs Shop Cost
Shop Cost: $450-$850 (parts + labor)
DIY Cost: $115-$290 (parts only)
You Save: $160-$735 by doing it yourself!
Local labor pricing varies. Tight 4WD mount clearance can significantly increase billed time.
🎯 Ready to get started?
HowToo makes it easy: same-day/2-day shipping on every part, plus all the tools and specialty tools you need! Check out the parts and tools sections below to add everything to your cart.