

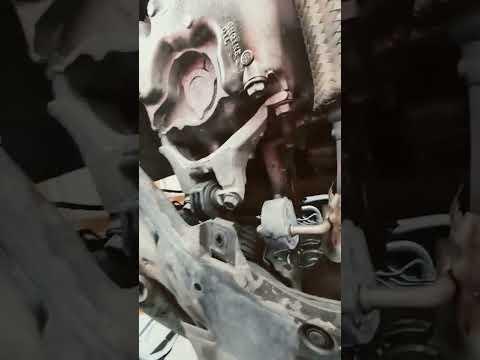




How to Replace the Starter Motor on a 2017-2019 Honda CR-V 2.4L (Trim: LX | Engine: Inline 4 2.4L)
Step-by-step DIY instructions with required tools, parts, torque specs, and safety tips for 2017, 2018, 2019
How to Replace the Starter Motor on a 2017-2019 Honda CR-V 2.4L (Trim: LX | Engine: Inline 4 2.4L)
Step-by-step DIY instructions with required tools, parts, torque specs, and safety tips for 2017, 2018, 2019


🔧 CR-V - Starter Motor Replacement
The starter motor on your CR-V is mounted beneath the intake manifold. Reaching it requires removing the air-intake assembly and intake manifold before disconnecting and unbolting the starter.
Difficulty Level: Advanced | Estimated Time: 3-5 hours
Assumption: This procedure is for the stock U.S.-market 2.4L engine.
⚠️ Safety & Precautions
- 🛑 Disconnect the negative battery cable before touching the starter’s electrical connections.
- ⚡ The starter cable remains connected directly to battery power until the battery is disconnected.
- 🔥 Allow the engine to cool completely before working around the intake manifold.
- 🧤 Wear safety glasses and mechanic’s gloves throughout the repair.
- 🚫 Keep dirt, hardware, and tools out of the exposed intake ports.
- 🔑 Keep the ignition switched off and the key away from the vehicle.
- 📻 Disconnecting the battery may reset the clock, radio settings, and engine idle memory.
🔧 Required Tools
You'll need the following tools for this repair:
- 1/4-inch-drive metric socket set (8mm-12mm)
- 3/8-inch-drive metric socket set (10mm-17mm)
- 10mm deep socket
- 12mm deep socket
- 14mm socket
- 3/8-inch-drive ratchet
- 1/4-inch-drive ratchet
- 3-inch socket extension
- 6-inch socket extension
- 3/8-inch-drive universal joint
- Metric combination wrench set (10mm-17mm)
- Inch-pound torque wrench (20-200 in-lbs)
- Foot-pound torque wrench (10-80 ft-lbs)
- Flat-blade screwdriver (6-inch)
- Phillips #2 screwdriver
- Hose-clamp pliers (specialty)
- 90-degree pick tool
- Trim-clip removal tool
- Magnetic pickup tool (18-inch)
- Plastic gasket scraper
- Masking tape (1-inch)
- Permanent marker (fine-point)
- Shop vacuum (wet/dry)
- Fender cover (protective)
- Mechanic’s gloves
- Safety glasses
🔩 Required Parts
HowToo sells all the parts you need for this repair:
- Starter motor for 2.4L engine - Qty: 1
- Intake manifold gasket set - Qty: 1
- Throttle-body gasket - Qty: 1
📋 Before You Begin
- 🅿️ Park your CR-V on level ground, select Park, and apply the parking brake.
- 🌡️ Let the engine become completely cold.
- 🪟 Lower the driver’s window so you cannot accidentally lock yourself out.
- 💾 Save any radio presets you want to restore later.
- 🔍 Compare the replacement starter with the original after removal. The mounting points, connector, and drive gear must match.
- 🧹 Clean loose dirt from around the intake manifold before opening the engine.
🔨 Step-by-Step Instructions
Follow these steps in order:
Step 1: Disconnect the Battery
- Open the hood and install the fender cover.
- Use a 10mm socket and 1/4-inch-drive ratchet to loosen the negative battery-terminal nut.
- Lift the negative terminal from the battery and position it where it cannot spring back.
- Use the same tools to disconnect the positive battery terminal if it obstructs battery removal.
- Remove the battery hold-down with the appropriate 10mm deep socket, then lift out the battery if additional working room is needed.
- Wait at least three minutes before disconnecting engine electrical connectors.
Step 2: Remove the Engine Cover and Air-Inlet Duct
- Pull the plastic engine cover straight upward by hand to release its rubber mounts.
- Use a flat-blade screwdriver or 8mm socket to loosen the air-duct clamps.
- Use hose-clamp pliers to release any breather-hose clamp attached to the duct.
- Disconnect the breather hose and remove the air-inlet duct.
- Remove the air-cleaner housing fasteners with a 10mm socket, extension, and ratchet.
- Lift the housing out without pulling sharply on attached wiring or hoses.
Step 3: Label the Intake Connections
- Use masking tape and a permanent marker to label every hose and electrical connector before removal.
- Disconnect the throttle-body electrical connector by pressing its locking tab by hand.
- Disconnect the manifold pressure-sensor, purge-control, and other visible intake-manifold connectors by hand.
- Use hose-clamp pliers to release the brake-booster, purge, and crankcase-ventilation hoses.
- Use a 90-degree pick tool only to loosen a stuck hose seal. Do not puncture the hose.
- Photograph each connection before unplugging it.
Step 4: Remove the Throttle Body
- Use a 10mm socket, extension, and ratchet to remove the throttle-body mounting bolts.
- Move the throttle body aside carefully. Avoid opening its electronic throttle plate by hand.
- If the attached coolant hoses provide enough movement, leave them connected to avoid draining coolant.
- Remove and discard the old throttle-body gasket.
- Do not spray cleaner into the throttle body or electrical actuator.
Step 5: Remove the Intake-Manifold Supports
- Use a 12mm socket, 6-inch extension, universal joint, and ratchet to remove the lower intake-manifold support-bracket bolts.
- Use a 10mm or 12mm socket, as fitted, to release wiring-harness and hose brackets from the manifold.
- Place removed hardware into labeled groups.
- Check behind and beneath the manifold for any remaining attached hose or connector.
Step 6: Remove the Intake Manifold
- Use a 12mm deep socket, extension, and ratchet to loosen the intake-manifold nuts and bolts gradually.
- Support the manifold by hand as the final fastener is removed.
- Pull the manifold straight away from the cylinder head. Do not pry against the aluminum sealing surface.
- Move the manifold out of the work area without stretching attached wiring or hoses.
- Immediately cover every intake port with clean masking tape.
- Remove the old intake-manifold gaskets by hand.
- Count all tools before covering the ports.
Step 7: Disconnect the Starter Wiring
- Locate the starter beneath the area previously occupied by the intake manifold.
- Press the locking tab and unplug the small starter-solenoid control connector by hand.
- Pull back the protective rubber cap from the large starter terminal.
- Use a 12mm deep socket and ratchet to remove the large cable-terminal nut.
- Lift the cable from the stud and move it aside without bending the terminal.
Step 8: Remove the Starter Motor
- Support the starter with one hand because it is heavier than it appears.
- Use a 14mm socket, extension, and ratchet to remove the starter mounting bolts.
- Use a magnetic pickup tool if a bolt cannot be reached safely by hand.
- Pull the starter straight out of the transmission housing.
- Compare its mounting flange, gear, terminals, and overall dimensions with the replacement starter.
Step 9: Install the Replacement Starter
- Clean the starter mounting surface with a plastic gasket scraper. Do not allow debris into the opening.
- Position the replacement starter squarely against the transmission housing.
- Start both mounting bolts by hand to prevent crossed threads.
- Use a 14mm socket and foot-pound torque wrench to tighten the starter mounting bolts to 44 Nm (33 ft-lbs).
- Install the large starter cable and terminal nut with a 12mm deep socket and inch-pound torque wrench. Tighten to 9.8 Nm (87 in-lbs).
- Reinstall the rubber terminal cap and connect the small solenoid connector until it clicks.
- Do not overtighten the electrical-terminal nut; the solenoid stud can break.
Step 10: Reinstall the Intake Manifold
- Use a shop vacuum to remove loose debris around the covered intake ports.
- Remove the masking tape one port at a time and confirm nothing entered the engine.
- Clean the gasket surfaces gently with a plastic gasket scraper.
- Install the new intake-manifold gaskets in their correct grooves.
- Position the manifold and start every nut and bolt by hand.
- Use a 12mm deep socket and foot-pound torque wrench to tighten the intake-manifold fasteners evenly from the center outward to 22 Nm (16 ft-lbs).
- Reinstall the support brackets with the original fasteners using the appropriate 10mm or 12mm socket.
- Tighten each bracket securely to its original seated position without forcing it into alignment.
Step 11: Reinstall the Throttle Body and Connections
- Install a new throttle-body gasket and position the throttle body.
- Start all throttle-body bolts by hand.
- Use a 10mm socket and inch-pound torque wrench to tighten the throttle-body bolts evenly to 12 Nm (106 in-lbs).
- Reconnect all labeled vacuum hoses, breather hoses, electrical connectors, and wiring brackets by hand.
- Use hose-clamp pliers to return each clamp to its original position.
- Confirm every electrical connector locks with an audible or felt click.
Step 12: Reinstall the Air Intake and Battery
- Reinstall the air-cleaner housing with a 10mm socket and ratchet.
- Install the air-inlet duct and tighten its clamps with a flat-blade screwdriver or 8mm socket.
- Reconnect the breather hose and secure its clamp using hose-clamp pliers.
- Press the engine cover onto its mounting points by hand.
- Reinstall the battery and hold-down using a 10mm deep socket. The battery must not move by hand.
- Connect the positive battery terminal first, followed by the negative terminal.
- Use a 10mm socket and inch-pound torque wrench to tighten each battery-terminal nut to 5.4 Nm (48 in-lbs).
✅ After Repair
- 🔍 Inspect the engine bay for leftover tools, disconnected hoses, and uncovered intake ports before starting.
- 🚗 Switch the ignition on for two seconds, switch it off, and then start the engine.
- 👂 The starter should crank evenly without grinding, clicking, or remaining engaged after the engine starts.
- ⏱️ Let the engine idle with all accessories off until fully warm. A slightly uneven idle may occur while the computer relearns.
- 💨 Listen for hissing around the intake manifold. Hissing, high idle, or a warning light may indicate an intake leak or missed hose.
- ⚠️ Switch the engine off immediately if the starter grinds or continues spinning.
- 📻 If the audio system displays a power-loss message, switch it on and hold the audio power button for approximately two seconds.
- 🛣️ Take a short test drive, then restart the engine several times to verify consistent operation.
💰 DIY vs Shop Cost
Shop Cost: ₹25,000-₹48,000 (parts + labor)
DIY Cost: ₹12,000-₹25,000 (parts only)
You Save: ₹13,000-₹23,000 by doing it yourself!
Labour rates around Sonīpat vary widely. This repair takes a shop approximately 2.5-4 hours, depending on parts availability and intake-manifold access.
🎯 Ready to get started?
HowToo makes it easy: same-day/2-day shipping on every part, plus all the tools and specialty tools you need! Check out the parts and tools sections below to add everything to your cart.