

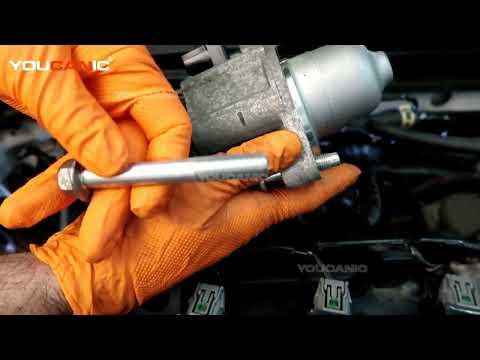




How to Replace the Starter Motor on a 2016-2021 Honda Civic 1.5L Turbo (Engine: Inline 4 1.5L)
Step-by-step removal and installation guide with tools, parts, torque specs, and safety tips for 2016, 2017, 2018, 2019, 2020, 2021
How to Replace the Starter Motor on a 2016-2021 Honda Civic 1.5L Turbo (Engine: Inline 4 1.5L)
Step-by-step removal and installation guide with tools, parts, torque specs, and safety tips for 2016, 2017, 2018, 2019, 2020, 2021


🔧 Civic - Starter Motor Replacement
This is an intermediate-to-advanced job because the starter comes out from underneath your Civic. Honda’s procedure requires removing the engine undercover, front floor brace if equipped, and front exhaust pipe before disconnecting and removing the starter. honcivic.automotive-manuals.com
Difficulty Level: Advanced | Estimated Time: 3-5 hours
Assumption: This procedure follows the factory 1.5L turbo access route; compare the replacement starter’s terminals and mounting flange before installation.
⚠️ Safety & Precautions
- ⚠️ Disconnect the battery before touching the starter. Its large cable is always connected to battery power.
- ⚠️ Support your Civic on four properly placed jack stands. Never work beneath a vehicle supported only by a jack.
- ⚠️ Let the engine, turbocharger, and exhaust cool completely before starting.
- ⚠️ Wear safety glasses. Rust, dirt, and exhaust debris will fall while you work underneath.
- ⚠️ Support the exhaust before removing its fasteners so it cannot fall or strain the remaining joints.
- ⚠️ Keep the transmission in neutral only when positioning the vehicle. Leave it in first gear with the parking brake applied before lifting.
🔧 Required Tools
You'll need the following tools for this repair:
- 10mm socket
- 12mm socket
- 14mm socket
- 17mm socket
- 3/8-inch drive ratchet
- 1/2-inch drive breaker bar
- 3-inch socket extension
- 6-inch socket extension
- 10-80 N·m torque wrench
- Flat-blade trim clip remover
- Needle-nose pliers
- Penetrating oil
- Wire terminal cleaning brush
- Floor jack rated 2-ton minimum
- Four jack stands rated 2-ton minimum
- Wheel chocks
- Exhaust support stand
- Mechanic’s gloves
- Safety glasses
🔩 Required Parts
HowToo sells all the parts you need for this repair:
- Starter motor for manual transmission - Qty: 1
- Front exhaust pipe gasket - Qty: 1
- Rear exhaust joint gasket - Qty: 1
- Exhaust self-locking nuts - Qty: As required
The starter aisle is open beside this guide. Match the replacement to the manual-transmission starter removed from your Civic. Starter catalogs love mixing automatic and manual units, which is expensive entertainment nobody needs.
📋 Before You Begin
- Park on solid, level pavement. Apply the parking brake, select first gear, and chock the rear wheels.
- Save any radio presets or personal settings you want to keep.
- Open the hood and switch the ignition completely off. Keep the key or remote away from the vehicle.
- Spray the exhaust fasteners with penetrating oil and allow it to soak while you raise the vehicle.
- No scan-tool command, starter coding, or infotainment service mode is required.
🔨 Step-by-Step Instructions
Follow these steps in order:
Step 1: Disconnect the Battery
- Use a 10mm socket to loosen the negative battery-terminal nut.
- Lift the negative terminal straight off and isolate it so it cannot spring back onto the battery post.
- Do not pull on or disconnect the battery sensor attached to the negative terminal.
- Use a 10mm socket to disconnect the positive terminal if additional isolation is needed.
Step 2: Raise and Support the Vehicle
- Use the floor jack rated 2-ton minimum at the proper center lifting point.
- Place all four jack stands rated 2-ton minimum beneath the reinforced support points.
- Lower the vehicle onto the stands, then gently push the body to verify it is stable.
- Stability first. Speed comes much later.
Step 3: Remove the Engine Undercover
- Use the flat-blade trim clip remover to release the plastic clips without twisting them sideways.
- Use a 10mm socket for the undercover bolts.
- Support the panel with one hand while removing the last fastener, then lower it out of the way.
Step 4: Remove the Front Floor Brace
- If your Civic has a brace crossing beneath the exhaust, support it and use the appropriate 14mm or 17mm socket to remove its mounting bolts.
- Mark the brace orientation before lowering it.
- Keep its fasteners separated from the exhaust hardware.
Step 5: Remove Front Exhaust Pipe A
- Position the exhaust support stand beneath the front pipe.
- Disconnect any oxygen-sensor harness clips attached to the removable pipe using needle-nose pliers. Do not pull on the wires.
- Use a 14mm socket, extensions, and the breaker bar to loosen the front flange self-locking nuts.
- Use the appropriate 14mm or 17mm socket to disconnect the rear exhaust joint and mounting bracket.
- Remove the exhaust hanger from its rubber mount, then carefully lower the front pipe.
- Discard the removed gaskets and self-locking nuts. Honda specifies new exhaust gaskets and locking nuts during reassembly. honcivic.automotive-manuals.com
Step 6: Disconnect the Starter Wiring
- Locate the starter at the engine-to-transmission joint above the space opened by removing the exhaust.
- Release the wiring-harness clamp from the starter area using needle-nose pliers.
- Pull back the rubber protective cap from the large positive starter terminal.
- Use a 12mm socket to remove the positive cable nut, then lift off the cable without twisting its terminal.
- Press the locking tab and unplug the small starter-control connector, called the S-terminal connector.
Step 7: Remove the Starter Motor
- Support the starter with one hand. It is heavier than it looks and space is tight.
- Use the appropriate 14mm or 17mm socket with the 3-inch or 6-inch extension to remove both starter mounting bolts.
- Note which hole receives each bolt because the two mounting fasteners have different specifications.
- Pull the starter straight away from the transmission bellhousing, then rotate and lower it through the available opening.
Step 8: Compare and Position the New Starter
- Compare the old and new starters on the ground. Check the mounting flange, pinion depth, electrical terminals, connector shape, and overall clocking.
- Clean the transmission mounting surface with the wire terminal cleaning brush. Do not allow debris inside the bellhousing.
- Guide the new starter into position and seat its mounting flange completely flat.
- Install both starter bolts by hand for several turns before using a ratchet.
Step 9: Tighten the Starter Mounting Bolts
- Use the 10-80 N·m torque wrench with the correct socket.
- Tighten the 10mm-diameter starter bolt to 45 N·m (33 ft-lbs).
- Tighten the 12mm-diameter starter bolt to 65 N·m (48 ft-lbs). These are the published Si L15B7 starting-system specifications. honcivic.automotive-manuals.com
- Do not identify the bolts only by socket size. The torque listing refers to the bolt’s threaded diameter.
Step 10: Reconnect the Starter Wiring
- Push the small S-terminal connector into place until its lock clicks.
- Fit the positive cable onto the stud with the crimped side of the ring terminal facing away from the starter body. honcivic.automotive-manuals.com
- Install the terminal nut and tighten it with the 10-80 N·m torque wrench to 9 N·m (80 in-lbs). honcivic.automotive-manuals.com
- Refit the rubber protective cap and secure the harness clamp.
Step 11: Reinstall the Exhaust
- Fit new exhaust gaskets and loosely install the pipe with new self-locking nuts.
- Use the exhaust support stand to align the pipe naturally before tightening anything.
- Tighten the applicable front-pipe flange hardware to 54 N·m (40 ft-lbs) and the applicable rear joint hardware to 33 N·m (24 ft-lbs), following the original positions. honcivic.automotive-manuals.com
- Reconnect all exhaust hangers and wiring clips. Ensure no sensor wire touches the exhaust.
Step 12: Reinstall the Brace and Undercover
- Raise the front floor brace into its original orientation and start every bolt by hand.
- Use the 10-80 N·m torque wrench to tighten the brace fasteners to the specification marked in the applicable factory procedure.
- Reinstall the engine undercover using the 10mm socket and flat-blade trim clip remover.
- Replace any clip that no longer grips securely.
Step 13: Lower the Vehicle and Reconnect the Battery
- Use the floor jack rated 2-ton minimum to lift the vehicle clear of the stands.
- Remove all four jack stands and lower your Civic slowly.
- Connect the positive battery terminal first if it was removed, then connect the negative terminal.
- Use the 10mm socket to tighten each terminal until secure. Do not crush or distort the clamps.
✅ After Repair
- Confirm all tools are out of the engine bay and the transmission is in neutral.
- Press the clutch fully and start the engine. The starter should engage promptly without grinding or remaining engaged.
- Switch the engine off and restart it two or three times.
- Listen underneath for an exhaust leak. A sharp ticking sound usually means a joint or gasket is not sealing.
- Check that no warning lights remain after a short drive.
- If the starter still does not operate, test the battery, battery cables, grounds, clutch interlock switch, starter-control circuit, and charging system before replacing more parts.
💰 DIY vs Shop Cost
Shop Cost: $500-$900 (parts + labor)
DIY Cost: $100-$350 (starter and exhaust hardware)
You Save: $250-$650 by doing it yourself!
Shop labor rates vary but typically run $100-$150/hour. This repair takes a shop approximately 2-3 hours.
🎯 Ready to get started?
HowToo makes it easy: same-day/2-day shipping on every part, plus all the tools and specialty tools you need! Check out the parts and tools sections below to add everything to your cart.