

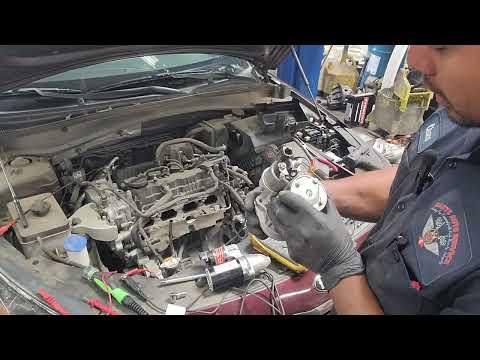





How to Replace the Starter Motor on a 2016-2020 Kia Optima 2.4L (Trim: LX | Engine: Inline 4 2.4L | Body: Sedan)
Step-by-step DIY instructions with required tools, torque specs, testing, and safety tips for 2016, 2017, 2018
How to Replace the Starter Motor on a 2016-2020 Kia Optima 2.4L (Trim: LX | Engine: Inline 4 2.4L | Body: Sedan)
Step-by-step DIY instructions with required tools, torque specs, testing, and safety tips for 2016, 2017, 2018


🔧 Optima - Starter Motor Replacement
The starter motor is mounted where the engine joins the transmission. Replacement involves disconnecting the battery, creating access around the air-cleaner assembly, disconnecting the starter wiring, and removing two mounting bolts.
Difficulty Level: Intermediate | Estimated Time: 1.5-2.5 hours
Assumption: These instructions apply to the stock U.S.-market 2.4L naturally aspirated engine.
⚠️ Safety & Precautions
- ⚠️ Disconnect the negative battery cable before touching the starter. Its large cable carries battery power at all times.
- ⚠️ Allow the engine and exhaust system to cool completely.
- ⚠️ Never work beneath your Optima while it is supported only by a floor jack.
- ⚠️ Support the vehicle at the factory side-sill jack points with jack stands.
- ⚠️ Keep metal tools away from the positive battery terminal and starter power terminal.
- ⚠️ Do not test the starter while it is loose from the transmission.
🔧 Required Tools
You'll need the following tools for this repair:
- 10mm socket
- 12mm socket
- 14mm socket
- 3/8-inch drive ratchet
- 3/8-inch drive 6-inch extension
- 3/8-inch drive universal joint
- 3/8-inch drive torque wrench rated 10-80 Nm
- Flat-tip screwdriver
- Plastic trim-clip removal tool
- Digital multimeter rated 12 volts minimum
- Floor jack rated 2-ton minimum
- Jack stands rated 2-ton minimum
- Wheel chocks
- Mechanic gloves
- Safety glasses
- Shop light rated for automotive use
🔩 Required Parts
HowToo sells all the parts you need for this repair:
- Starter motor for 2.4L engine - Qty: 1
📋 Before You Begin
- 🅿️ Park your Optima on level, solid ground. Shift into Park, engage the parking brake, and switch off the ignition.
- 🛞 Place wheel chocks securely behind both rear wheels.
- 🔑 Remove the key from the vehicle and wait at least two minutes for electrical modules to shut down.
- 🔋 Record any desired radio presets. No starter programming or battery registration is required.
- 🔎 If the starter has not been professionally diagnosed, verify that the battery is charged and the battery terminals are clean before replacing it.
🔨 Step-by-Step Instructions
Follow these steps in order:
Step 1: Disconnect the Battery
- Open the hood and locate the battery on the driver side of the engine compartment.
- Use a 10mm socket and 3/8-inch drive ratchet to loosen the negative terminal clamp.
- Lift the negative clamp from the battery post and position it where it cannot spring back into contact.
- Do not disconnect the positive terminal unless additional battery removal is needed for access.
Step 2: Remove the Air-Intake Duct
- Use a flat-tip screwdriver to loosen the clamp securing the intake duct to the air-cleaner housing.
- Use a plastic trim-clip removal tool to release any clips retaining the front intake snorkel.
- Disconnect the breather hose carefully by hand, if it crosses the air-cleaner assembly.
- Lift the intake duct out of the engine compartment.
- Photograph hose locations before disconnecting them.
Step 3: Remove the Air-Cleaner Assembly
- Release the air-cleaner cover clips by hand and move the cover and filter aside.
- Use a 10mm socket, 3/8-inch drive ratchet, and 3/8-inch drive 6-inch extension to remove the air-cleaner housing fasteners.
- Lift the lower housing from its rubber locating mounts and remove it.
- Cover the exposed intake opening with a clean, lint-free cloth so nothing can fall inside.
Step 4: Raise and Support the Front of the Vehicle
- Position a floor jack rated 2-ton minimum beneath the approved front-center lifting point.
- Raise the front of your Optima and place jack stands rated 2-ton minimum beneath both factory side-sill support points.
- Lower the vehicle gently onto the stands, then push lightly on the body to confirm it is stable.
- Use a shop light rated for automotive use to illuminate the starter area.
Step 5: Remove the Lower Engine Cover
- From beneath the front bumper, use a 10mm socket and 3/8-inch drive ratchet to remove the lower-cover bolts.
- Use a plastic trim-clip removal tool to remove the plastic retainers.
- Support the cover with one hand while removing the final fastener, then lower it from the vehicle.
Step 6: Locate and Inspect the Starter
- Locate the cylindrical starter at the transmission bellhousing, where the engine and transmission meet.
- The bellhousing is the large transmission casing surrounding the engine’s flywheel connection.
- Check that the battery remains disconnected before handling either starter wire.
- Inspect the cable routing and connector position before removal.
Step 7: Disconnect the Starter Wiring
- Press the locking tab and pull the small starter-solenoid connector straight off by hand. The solenoid is the smaller cylinder attached to the starter.
- Lift the protective rubber cap from the large power terminal.
- Use a 12mm socket, 3/8-inch drive ratchet, and 3/8-inch drive 6-inch extension to remove the power-terminal nut.
- Lift the cable eyelet from the terminal and position it away from the starter.
- Keep the nut with the cable so it cannot be lost.
Step 8: Remove the Starter Motor
- Support the starter with one hand because it will become loose when the mounting bolts are removed.
- Use a 14mm socket, 3/8-inch drive ratchet, and 3/8-inch drive 6-inch extension to loosen the two starter mounting bolts.
- Use the 3/8-inch drive universal joint if the upper bolt cannot be reached in a straight line.
- Remove the lower bolt, then remove the upper bolt while holding the starter.
- Pull the starter straight away from the transmission and guide it out through the clearest opening.
Step 9: Compare the Replacement Starter
- Place the old and replacement starters side by side.
- Confirm that the mounting flange, pinion gear, electrical terminals, locating surfaces, and connector orientation match.
- Use a clean cloth to wipe dirt from the transmission mounting surface. Do not apply grease or sealant.
Step 10: Install the Replacement Starter
- Guide the replacement starter into position and seat its mounting flange flat against the transmission.
- Start both mounting bolts by hand for several turns to prevent cross-threading.
- Use a 14mm socket and 3/8-inch drive ratchet to seat both bolts evenly.
- Use a 14mm socket and 3/8-inch drive torque wrench rated 10-80 Nm to tighten both starter mounting bolts to 49-64 Nm (36-47 ft-lbs).
Step 11: Reconnect the Starter Wiring
- Place the large power-cable eyelet squarely over the starter terminal.
- Install the terminal nut by hand, then use a 12mm socket and 3/8-inch drive torque wrench rated 10-80 Nm to tighten it to 9.8-14.7 Nm (87-130 in-lbs).
- Do not overtighten the nut because the insulated terminal can crack or rotate.
- Refit the protective rubber cap completely over the terminal.
- Push the small solenoid connector into place until its locking tab clicks.
Step 12: Reinstall the Lower Engine Cover
- Position the cover and install its plastic retainers by hand.
- Use a 10mm socket and 3/8-inch drive ratchet to reinstall the cover bolts until snug. Do not overtighten fasteners installed into plastic.
- Verify that the cover does not touch the exhaust system or hang below the bumper.
Step 13: Lower the Vehicle
- Use the floor jack rated 2-ton minimum to raise the vehicle slightly from the stands.
- Remove both jack stands rated 2-ton minimum, then lower your Optima slowly to the ground.
- Remove the floor jack and rear wheel chocks.
Step 14: Reinstall the Air-Cleaner Assembly
- Remove the cloth from the intake opening and verify that no objects remain nearby.
- Seat the air-cleaner housing into its rubber mounts.
- Use a 10mm socket and 3/8-inch drive ratchet to reinstall the housing fasteners until snug.
- Reinstall the air filter and secure the cover clips by hand.
- Fit the intake duct fully onto the housing and use a flat-tip screwdriver to tighten its clamp.
- Reconnect the breather hose and reinstall the intake-snorkel clips by hand.
Step 15: Reconnect and Test the Battery
- Place the negative battery clamp fully onto the negative post.
- Use a 10mm socket and 3/8-inch drive ratchet to tighten the clamp until it cannot rotate by hand. Do not crush or deform the battery post.
- Use a digital multimeter rated 12 volts minimum across the battery terminals. A rested battery should generally measure approximately 12.4-12.7 volts before starting.
✅ After Repair
- ✅ Confirm that the transmission is in Park and start the engine. The starter should crank smoothly without grinding, clicking, or remaining engaged.
- 🔊 Switch the engine off and restart it two or three times, waiting at least 15 seconds between attempts.
- 🔎 Look beneath your Optima and inside the engine compartment for loose tools, displaced wiring, or an incorrectly fitted lower cover.
- 🔋 With the engine running, use the digital multimeter across the battery terminals. Charging voltage will commonly be about 13.5-14.8 volts, depending on battery condition and charging strategy.
- ⚠️ Stop immediately if the starter grinds, continues spinning after the engine starts, or the power cable becomes hot.
- 🕒 Reset the clock and restore radio presets if they were erased. No coding or starter relearn is required.
💰 DIY vs Shop Cost
Shop Cost: ₹18,000-₹34,000 (parts + labor)
DIY Cost: ₹10,000-₹24,000 (parts only)
You Save: ₹8,000-₹10,000 by doing it yourself!
Labor rates around Sonīpat vary by workshop and parts availability. This repair takes a shop approximately 1-2 hours.
🎯 Ready to get started?
HowToo makes it easy: same-day/2-day shipping on every part, plus all the tools and specialty tools you need! Check out the parts and tools sections below to add everything to your cart.