

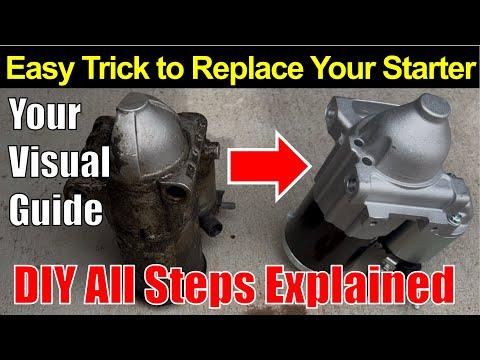




How to Replace the Starter Motor on a 2014-2021 Chevrolet Silverado 1500 6.2L (Engine: V8 5.3L)
Step-by-step 4WD replacement guide with required tools, parts, torque specs, and safety tips for 2014, 2015, 2016, 2017, 2018, 2019, 2020, 2021
How to Replace the Starter Motor on a 2014-2021 Chevrolet Silverado 1500 6.2L (Engine: V8 5.3L)
Step-by-step 4WD replacement guide with required tools, parts, torque specs, and safety tips for 2014, 2015, 2016, 2017, 2018, 2019, 2020, 2021


🔧 Silverado 1500 - Starter Motor Replacement
Replace the starter from underneath the passenger side of your Silverado 1500. Access is tight near the exhaust, but this is manageable with safe lifting, long extensions, and careful cable routing.
Difficulty Level: Intermediate | Estimated Time: 2-3 hours
Assumption: These instructions apply to the stock 6.2L 4WD configuration. Exhaust modifications may change access.
⚠️ Safety & Precautions
- ⚠️ Disconnect the negative battery cable before touching the starter. Its large terminal has constant battery power.
- 🔥 Let the engine and exhaust cool completely. Haryana heat can keep the catalytic converter hot longer than expected.
- 🛞 Support the truck with properly rated jack stands. Never work underneath a vehicle supported only by a jack.
- 🧤 Wear safety glasses and gloves. Dirt and rust commonly fall while the starter is being removed.
- 🔌 Don’t allow a wrench to bridge the starter terminal and metal engine components.
- ⚙️ Keep the starter supported while removing its final bolt. It’s heavier than it looks.
🔧 Required Tools
You'll need the following tools for this repair:
- 10mm socket
- 13mm socket
- 15mm socket
- 3/8-inch drive ratchet
- 1/2-inch drive ratchet
- 3-inch socket extension
- 6-inch socket extension
- Universal-joint socket adapter
- 10-80 Nm torque wrench
- Trim-clip removal tool
- Small flat-blade screwdriver
- Floor jack rated 3-ton minimum
- Jack stands rated 3-ton minimum
- Wheel chocks
- Mechanic gloves
- Safety glasses
🔩 Required Parts
HowToo sells all the parts you need for this repair:
- New starter motor - Qty: 1
- Starter mounting bolts - Qty: 2 only if damaged or corroded
- Electrical contact cleaner - Qty: 1
- Dielectric grease - Qty: 1 small tube
I'd put the BBB Industries New Starter Motor on the counter first at about $173.95. It’s new rather than remanufactured, includes the attached solenoid, and is listed specifically for your Silverado 1500. Buy once, crawl under the truck once.
Reuse the original starter bolts if their threads and heads are undamaged. Don’t install universal bolts or shims unless they exactly match the removed hardware and the starter manufacturer specifically requires them.
📋 Before You Begin
- Park on level, solid ground and shift the transmission into Park.
- Apply the parking brake and place wheel chocks behind both rear tires.
- Allow the exhaust to become completely cold.
- Open the hood before raising the truck.
- Save any personal radio settings if desired. No starter programming or battery registration is normally required.
- Raise the front with the floor jack and place jack stands beneath approved frame lifting points.
🔨 Step-by-Step Instructions
Follow these steps in order:
Step 1: Disconnect the Battery
- Use a 10mm socket and 3/8-inch drive ratchet to loosen the negative battery-terminal clamp.
- Lift the negative cable from the battery post and position it where it cannot spring back.
- Wait at least two minutes before working on the starter wiring.
Step 2: Raise and Secure the Truck
- Use the 3-ton floor jack to raise the front of the truck at an approved structural lifting point.
- Lower the frame securely onto both 3-ton jack stands.
- Push firmly against the truck to confirm it’s stable before going underneath.
Step 3: Remove the Lower Shield if Equipped
- Locate the starter low on the passenger side where the engine meets the transmission.
- Use the appropriate 13mm or 15mm socket to remove any lower splash shield or skid-plate fasteners blocking access.
- Use the trim-clip removal tool for any plastic retainers.
- Support a metal skid plate while removing its final fastener.
Step 4: Remove the Starter Heat Shield
- Use a 10mm socket, extension, and 3/8-inch drive ratchet to remove the starter heat-shield fastener or fasteners.
- Slide the shield away without bending it against the exhaust.
- Note its exact orientation. It must protect the replacement starter from exhaust heat.
Step 5: Label and Disconnect the Starter Wiring
- Photograph the wire routing before removing anything.
- Release any connector lock with a small flat-blade screwdriver. Don’t pull directly on the wire.
- Use a 13mm socket to remove the nut from the large battery-cable terminal.
- Use a 10mm socket to remove the small starter-control terminal nut when fitted.
- Move both wires aside without sharply bending the cable ends.
- Keep each terminal nut with its cable.
Step 6: Remove the Starter Mounting Bolts
- Support the starter with one hand before loosening its mounting bolts.
- Use a 15mm socket, long extension, and 1/2-inch drive ratchet to loosen the two starter bolts.
- Use the universal-joint adapter only if straight extension access isn’t possible.
- Remove the easier bolt first, then hold the starter firmly while removing the final bolt.
- Lower and rotate the starter carefully between the engine, transmission, and exhaust components.
- Don’t let the starter hang from its wiring.
Step 7: Compare the Replacement Starter
- Place the old and replacement starters side by side.
- Confirm the mounting flange, nose housing, pinion gear, electrical terminals, and heat-shield mounting points match.
- Turn the old starter in as a core only after the repair has been successfully tested.
Step 8: Clean the Mounting and Cable Surfaces
- Use electrical contact cleaner on dirty cable-eyelet contact surfaces.
- Inspect the large battery cable for melted insulation, green corrosion, or a loose terminal.
- Clean the starter mounting surface carefully. The starter grounds through its metal mounting contact.
- Don’t place grease between the starter and engine mounting surfaces.
Step 9: Install the Replacement Starter
- Guide the new starter into position without trapping either wire behind it.
- Install both original mounting bolts by hand for several turns. This prevents crossed threads.
- Use a 15mm socket and torque wrench to tighten the starter mounting bolts evenly.
- Torque the starter mounting bolts to 50 Nm (37 ft-lbs).
- Do not add shims unless the replacement-starter instructions specifically call for them.
Step 10: Reconnect the Starter Wiring
- Install the large battery cable on its original stud using a 13mm socket.
- Torque the battery-cable terminal nut to 13 Nm (115 in-lbs).
- Install the small control wire using a 10mm socket.
- Torque the control-terminal nut to 5 Nm (44 in-lbs).
- Hold each cable still while tightening so it doesn’t rotate into the starter housing or exhaust.
- Apply a light coating of dielectric grease around the assembled connection, not between the electrical contact surfaces.
Step 11: Reinstall the Heat Shield and Lower Shield
- Position the starter heat shield exactly as it was removed.
- Use the 10mm socket to tighten its fasteners securely without crushing the shield.
- Reinstall the splash shield or skid plate with the 13mm or 15mm socket.
- Replace any broken plastic retainers before driving.
Step 12: Lower the Truck and Reconnect the Battery
- Use the 3-ton floor jack to raise the truck slightly and remove the jack stands.
- Lower the truck completely and remove the wheel chocks after testing.
- Reconnect the negative battery cable using a 10mm socket.
- Torque the negative battery-terminal clamp to 5 Nm (44 in-lbs).
✅ After Repair
- Start the engine while listening for smooth, immediate cranking.
- Stop immediately if you hear grinding, repeated clicking, or the starter continuing to run after releasing the button.
- Start the engine two or three more times to confirm consistent operation.
- Check that no warning lights remain after the engine starts.
- Look underneath for a loose shield, hanging cable, or cable routed too close to the exhaust.
- Reset the clock and personal settings if battery disconnection cleared them.
- No starter programming or relearn procedure is normally needed.
💰 DIY vs Shop Cost
Shop Cost: $450-$750 (parts + labor)
DIY Cost: $175-$250 (parts only)
You Save: $275-$500 by doing it yourself!
Local labor pricing varies. This repair takes a shop approximately 1.5-2.5 hours.
🎯 Ready to get started?
HowToo makes it easy: same-day/2-day shipping on every part, plus all the tools and specialty tools you need! Check out the parts and tools sections below to add everything to your cart.