

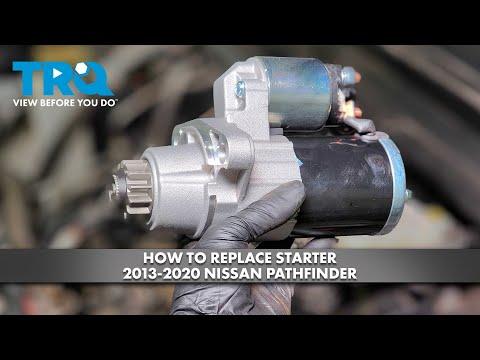



How to Replace the Starter Motor on a 2013-2018 Nissan Pathfinder 3.5L V6 (Engine: V6 3.5L)
Step-by-step DIY instructions with required tools, parts, torque specs, and safety tips for 2013, 2014, 2015, 2017, 2018
How to Replace the Starter Motor on a 2013-2018 Nissan Pathfinder 3.5L V6 (Engine: V6 3.5L)
Step-by-step DIY instructions with required tools, parts, torque specs, and safety tips for 2013, 2014, 2015, 2017, 2018


🔧 Pathfinder - Starter Motor Replacement
The starter motor is mounted to the transmission bellhousing and is reached from above after removing the battery, battery tray, and air-cleaner assembly. You will disconnect its electrical cables, remove two mounting bolts, and lift it out.
Difficulty Level: Intermediate | Estimated Time: 1.5-2.5 hours
Assumption: This procedure applies to the stock 3.5L V6 configuration; access is similar for front-wheel drive and all-wheel drive.
⚠️ Safety & Precautions
- 🧤 Disconnect the negative battery terminal before touching the starter. Its main cable remains live otherwise and can cause severe arcing or fire.
- 🔥 Let the engine and exhaust system cool completely before beginning.
- 🔑 Keep the ignition switched off and the key away from your Pathfinder.
- ⚡ Never allow a tool to bridge the positive battery terminal to metal bodywork.
- 🏋️ The battery is heavy. Lift it upright with both hands and keep acid away from your skin and eyes.
- 🚫 Do not test the starter while it is loose or connected to vehicle wiring.
🔧 Required Tools
You'll need the following tools for this repair:
- 8mm socket
- 10mm socket
- 12mm socket
- 13mm socket
- 14mm socket
- 3/8-inch-drive ratchet
- 3/8-inch-drive 6-inch extension
- 3/8-inch-drive universal joint
- 3/8-inch-drive torque wrench rated 10-80 Nm
- Flat-blade screwdriver, 6-inch
- Trim-clip removal tool
- Battery terminal puller (specialty)
- Battery lifting strap rated 50 lb minimum
- Paint marker, white
- Mechanic gloves
- Safety glasses
🔩 Required Parts
HowToo sells all the parts you need for this repair:
- Starter motor for 3.5L V6 - Qty: 1
- Starter terminal insulating cap - Qty: 1, if damaged
- Air-intake duct clamp - Qty: 1, if damaged
📋 Before You Begin
- 🅿️ Park your Pathfinder on level ground, select Park, and apply the parking brake.
- 🪟 Lower the driver’s window in case the doors lock after battery disconnection.
- 💾 Save any radio presets you want to keep. No infotainment service mode or scan-tool command is required.
- 🔌 Switch off all electrical accessories and wait at least three minutes before disconnecting the battery.
- 📷 Photograph the air ducts, electrical connectors, and cable routing before removal.
🔨 Step-by-Step Instructions
Follow these steps in order:
Step 1: Disconnect and remove the battery
- Use a 10mm socket and ratchet to loosen the negative terminal clamp. Twist it upward with a battery terminal puller if it is stuck; do not pry against the battery case.
- Move the negative cable aside so it cannot spring back onto the terminal.
- Use a 10mm socket to disconnect the positive terminal, then close or cover its protective cap.
- Use a 10mm socket to remove the battery hold-down fasteners.
- Use a battery lifting strap to lift the battery straight out. Keep it upright.
- Negative off first, positive off second.
Step 2: Remove the air-intake assembly
- Use a flat-blade screwdriver or 8mm socket to loosen the intake-hose clamp at the air-cleaner housing.
- Disconnect the mass airflow sensor connector by pressing its lock and pulling on the connector body, not the wires.
- Release the air-cleaner cover clips by hand and move the upper housing and duct aside.
- Use a 10mm socket and ratchet to remove the lower air-cleaner housing fasteners.
- Lift the lower housing upward from its rubber mounts. Cover the open intake passage with a clean cloth.
- Keep dirt out of the uncovered intake.
Step 3: Remove the battery tray
- Use a trim-clip removal tool to release any wiring retainers attached to the tray.
- Use a 10mm and 12mm socket with the 6-inch extension to remove the battery-tray fasteners.
- Mark each fastener location with a paint marker, then lift the tray from the engine compartment.
- Move nearby wiring aside gently. Do not pull or sharply bend the harness.
Step 4: Locate and inspect the starter
- Look down toward the transmission bellhousing, which is the metal housing where the engine and transmission join.
- Identify the starter by its cylindrical motor body, large battery cable, small control connector, and two mounting bolts.
- Use a paint marker to mark the original cable routing before disconnecting anything.
- Confirm again that the negative battery cable is disconnected.
Step 5: Disconnect the starter wiring
- Pull the rubber insulating cap away from the large starter terminal by hand.
- Use a 12mm or 13mm socket, as fitted, with the ratchet to remove the terminal nut. Lift off the large battery cable.
- Disconnect the small starter-control connector by depressing its locking tab and pulling it straight off.
- Position both wires where they cannot become trapped during installation.
- Do not rotate the starter’s threaded terminal while loosening its nut.
Step 6: Remove the starter motor
- Support the starter with one hand. Use a 14mm socket, 6-inch extension, universal joint, and ratchet to loosen its two mounting bolts.
- Remove the easier bolt first, then support the starter while removing the remaining bolt.
- Pull the starter straight away from the bellhousing. Rotate it carefully as needed and lift it through the battery-tray opening.
- Do not pry against the aluminum transmission housing.
Step 7: Compare and install the replacement
- Place the old and replacement starters side by side. Confirm the mounting flange, gear, connector, terminal, and overall length match.
- Position the replacement starter squarely against the bellhousing.
- Start both mounting bolts by hand for at least three full turns. This prevents cross-threading.
- Use a 14mm socket and torque wrench to tighten both starter mounting bolts evenly to 49 Nm (36 ft-lbs).
- Never draw the starter inward with its bolts.
Step 8: Reconnect the starter wiring
- Push the small control connector onto the starter until its locking tab clicks.
- Place the large battery cable squarely over the threaded terminal.
- Hold the cable still and use the correctly fitting 12mm or 13mm socket with the torque wrench to tighten the terminal nut to 12.7 Nm (112 in-lbs).
- Refit the insulating cap so the metal terminal is completely covered.
- Check that neither cable touches a sharp edge or moving component.
Step 9: Reinstall the battery tray and intake assembly
- Lower the battery tray into place and install its fasteners by hand.
- Use the 10mm and 12mm sockets with the ratchet to tighten the tray securely in its original locations. Do not overtighten thin sheet-metal fasteners.
- Use a trim-clip removal tool by hand to press the wiring retainers back into the tray.
- Seat the lower air-cleaner housing fully in its rubber mounts and reinstall its fasteners with a 10mm socket.
- Remove the cloth from the intake. Refit the upper housing, secure its clips, and reconnect the mass airflow sensor until it clicks.
- Use an 8mm socket or flat-blade screwdriver to tighten the intake-hose clamp to 5.5 Nm (49 in-lbs).
Step 10: Reinstall and connect the battery
- Use the battery lifting strap to lower the battery into the tray with the terminals in their original positions.
- Refit the hold-down and use a 10mm socket to tighten it until the battery cannot shift. Do not deform the battery case.
- Connect the positive terminal first and tighten it with a 10mm socket until secure.
- Connect the negative terminal last and tighten it with a 10mm socket until secure.
- Confirm both terminal clamps are fully seated and cannot rotate by hand.
- Positive on first, negative on last.
✅ After Repair
- 👂 Start your Pathfinder once without pressing the accelerator. The engine should crank normally without grinding, clicking, or continued starter operation.
- 🔍 Switch the engine off and inspect the battery terminals, intake duct, airflow-sensor connector, and starter wiring.
- 🔁 Restart the engine two or three times, allowing approximately 30 seconds between attempts.
- 🕒 Reset the clock and restore saved radio presets if needed.
- 🚦 Idle speed may briefly fluctuate while the engine control system relearns after battery disconnection.
- ⚠️ If the starter grinds, remains engaged, or produces smoke, switch the ignition off immediately and disconnect the negative battery terminal.
💰 DIY vs Shop Cost
Shop Cost: $550-$900 (parts + labor)
DIY Cost: $180-$420 (parts only)
You Save: $370-$480 by doing it yourself!
Shop labor rates vary but typically run $100-$150/hour. This repair takes a shop approximately 1.3-2.0 hours.
🎯 Ready to get started?
HowToo makes it easy: same-day/2-day shipping on every part, plus all the tools and specialty tools you need! Check out the parts and tools sections below to add everything to your cart.