

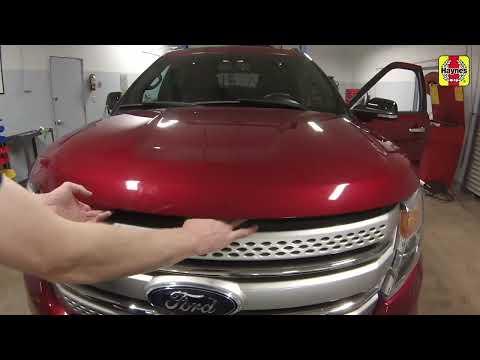







How to Replace the Starter Motor on a 2011-2019 Ford Explorer 3.5L V6 (Engine: V6 3.5L)
Step-by-step DIY instructions with tools, parts, torque specs, and safety tips for 2011, 2012, 2013, 2014, 2015, 2016, 2017, 2018, 2019
How to Replace the Starter Motor on a 2011-2019 Ford Explorer 3.5L V6 (Engine: V6 3.5L)
Step-by-step DIY instructions with tools, parts, torque specs, and safety tips for 2011, 2012, 2013, 2014, 2015, 2016, 2017, 2018, 2019


🔧 Explorer - Starter Motor Replacement
The starter motor is mounted low where the engine joins the transmission. Replacement involves disconnecting the battery, reaching the starter from underneath, removing its two electrical connections, and unbolting it from the transmission housing.
Difficulty Level: Intermediate | Estimated Time: 1.5-2.5 hours
Assumption: These instructions apply to both front-wheel-drive and all-wheel-drive versions; all-wheel-drive models have slightly tighter working space.
⚠️ Safety & Precautions
- ⚠️ Disconnect the negative battery cable before touching the starter. Its main terminal has constant battery power and can cause severe arcing.
- 🧊 Allow the engine and exhaust system to cool completely before working underneath your Explorer.
- 🚫 Never work beneath a vehicle supported only by a floor jack.
- 🅿️ Keep the transmission in Park, apply the parking brake, and chock the rear wheels.
- 🔑 Keep the ignition switched off and the key away from the vehicle.
- 🧤 Wear safety glasses and gloves because dirt may fall when the lower shield and starter are removed.
🔧 Required Tools
You'll need the following tools for this repair:
- Safety glasses
- Mechanic’s gloves
- Wheel chocks
- Floor jack rated 2-ton minimum
- Jack stands rated 2-ton minimum
- Trim-clip removal tool
- 8mm socket
- 10mm socket
- 13mm socket
- 15mm socket
- 3/8-inch-drive ratchet
- 3/8-inch-drive 6-inch extension
- 3/8-inch-drive universal joint
- 3/8-inch-drive torque wrench rated 5-80 Nm
- 10mm combination wrench
- Digital multimeter rated 12 volts DC
- Small nylon wire brush
- Work light rated for automotive use
🔩 Required Parts
HowToo sells all the parts you need for this repair:
- Starter motor assembly for 3.5L V6 - Qty: 1
- Starter terminal protective cap - Qty: 1 if damaged
- Starter mounting bolts - Qty: 2 if corroded or damaged
📋 Before You Begin
- 🅿️ Park your Explorer on firm, level ground. Select Park and apply the parking brake.
- 🔒 Chock both rear wheels before lifting the front of the vehicle.
- 💾 Disconnecting the battery may reset the clock, saved audio settings, and automatic window memory.
- 🔍 Verify the battery is charged before condemning the starter. A weak battery can produce the same clicking or slow-cranking symptoms.
- 💡 A universal joint is a hinged socket adapter that helps reach a fastener from an angle.
🔨 Step-by-Step Instructions
Follow these steps in order:
Step 1: Check Battery Voltage
- Switch off all electrical accessories and open the hood.
- Set the digital multimeter rated 12 volts DC to DC voltage.
- Touch the red lead to the positive battery terminal and the black lead to the negative terminal.
- A rested battery should read approximately 12.4-12.7 volts. Charge or test the battery first if it is below 12.2 volts.
Step 2: Disconnect the Battery
- Use a 10mm socket and 3/8-inch-drive ratchet to loosen the negative battery-terminal clamp.
- Lift the negative cable off the battery post and position it where it cannot spring back into contact.
- Wait at least one minute before touching the starter wiring.
- Cover the battery post to prevent contact.
Step 3: Raise and Support the Vehicle
- Place the wheel chocks securely against the rear tires.
- Use the floor jack rated 2-ton minimum at the front subframe’s reinforced center lifting point.
- Place the jack stands rated 2-ton minimum beneath the reinforced front subframe support points.
- Lower the vehicle onto both stands and gently push the body to verify stability.
- Keep the floor jack lightly touching the subframe as a backup without carrying the vehicle’s weight.
Step 4: Remove the Lower Engine Shield
- Put on safety glasses and mechanic’s gloves.
- Use the work light rated for automotive use to identify the lower shield fasteners.
- Remove the screws with an 8mm socket, 3/8-inch-drive extension, and 3/8-inch-drive ratchet.
- Remove any plastic retainers with the trim-clip removal tool.
- Support the shield with one hand while removing its final fastener, then lower it from the vehicle.
Step 5: Locate and Inspect the Starter
- Find the cylindrical starter at the lower engine-to-transmission joint.
- Use the work light rated for automotive use to note the routing of the large battery cable and smaller control wire.
- Inspect for oil or coolant contamination. Repair an active leak before installing the new starter.
- Confirm the battery cable is no longer connected before proceeding.
Step 6: Disconnect the Starter Wiring
- Release the starter terminal’s protective cap by hand. Do not pry against the plastic solenoid housing.
- Use a 10mm socket, 3/8-inch-drive extension, and 3/8-inch-drive ratchet to remove the small control-wire terminal nut.
- Lift the small terminal straight off its stud without pulling on the wire.
- Use a 13mm socket, 3/8-inch-drive extension, and 3/8-inch-drive ratchet to remove the large battery-cable terminal nut.
- Move both wires aside without sharply bending them.
Step 7: Remove the Starter Motor
- Support the starter with one hand because it will become loose when the mounting bolts are removed.
- Use a 13mm socket or 15mm socket, as fitted, with the 3/8-inch-drive ratchet and 3/8-inch-drive 6-inch extension to loosen the two starter mounting bolts.
- If access is angled, install the 3/8-inch-drive universal joint between the extension and socket.
- Remove the lower bolt, then remove the upper bolt while holding the starter securely.
- Pull the starter straight away from the transmission housing and lower it through the available opening.
- Do not allow the starter to hang from either wire.
Step 8: Compare and Prepare the New Starter
- Place the old and new starter motors side by side.
- Confirm the mounting ears, nose length, pinion gear, electrical terminals, and connector positions match.
- Use the small nylon wire brush to clean loose corrosion from the mounting surface and cable eyelets.
- Keep grease, oil, and thread-locking compound off the starter mounting surface and electrical contact faces.
- Transfer the protective terminal cap if the replacement starter does not include one.
Step 9: Install the New Starter
- Guide the starter into position and seat its nose squarely against the transmission housing.
- Start both mounting bolts by hand for several turns. This prevents cross-threading.
- Use the correctly fitting 13mm socket or 15mm socket, 3/8-inch-drive extension, and 3/8-inch-drive ratchet to snug both bolts evenly.
- Use the 3/8-inch-drive torque wrench rated 5-80 Nm with the correctly fitting socket to tighten both starter mounting bolts to 25 Nm (18 ft-lbs).
- Never force a bolt that will not hand-thread.
Step 10: Reconnect the Starter Wiring
- Install the large battery-cable eyelet flat against the starter terminal.
- Install its nut by hand, then use the 13mm socket and 3/8-inch-drive torque wrench rated 5-80 Nm to tighten it to 12 Nm (106 in-lbs).
- Install the small control-wire terminal and start its nut by hand.
- Use the 10mm socket and 3/8-inch-drive torque wrench rated 5-80 Nm to tighten the small terminal nut to 6 Nm (53 in-lbs).
- Hold each cable while tightening so it does not twist against the starter housing.
- Close the protective cap over the large terminal.
Step 11: Reinstall the Lower Engine Shield
- Lift the shield into place and start every fastener by hand.
- Install the plastic retainers by hand, replacing any that no longer lock securely.
- Use the 8mm socket and 3/8-inch-drive ratchet to tighten the shield screws until seated. Do not overtighten them into the plastic shield.
Step 12: Lower the Vehicle
- Use the floor jack rated 2-ton minimum to raise the front subframe slightly.
- Remove both jack stands rated 2-ton minimum.
- Lower the vehicle slowly and remove the floor jack.
- Remove the wheel chocks only after the vehicle is fully on the ground.
Step 13: Reconnect the Battery
- Fit the negative battery clamp fully onto the battery post.
- Use the 10mm socket and 3/8-inch-drive torque wrench rated 5-80 Nm to tighten the terminal clamp to 5 Nm (44 in-lbs).
- If the torque wrench cannot accurately measure 5 Nm, use the 10mm combination wrench to tighten the clamp only until it cannot rotate by hand.
✅ After Repair
- 🔑 Start the engine. The starter should engage immediately without grinding, clicking, or continuing to run after the engine starts.
- 👂 Switch the engine off and restart it two more times while listening for abnormal noise.
- 🔍 Check under your Explorer and around the starter for loose wiring or forgotten tools.
- 🪟 Restore the automatic window function if needed: close each affected window and hold its switch upward for approximately two seconds.
- 🕒 Reset the clock and saved audio settings if they were lost.
- ⚠️ Stop immediately if the starter grinds or remains engaged after releasing the key. Recheck installation and part fitment.
💰 DIY vs Shop Cost
Shop Cost: ₹22,000-₹42,000 (parts + labor)
DIY Cost: ₹12,000-₹28,000 (parts only)
You Save: ₹8,000-₹14,000 by doing it yourself!
Local labor and imported-part pricing vary. This repair takes a shop approximately 1.0-1.8 hours.
🎯 Ready to get started?
HowToo makes it easy: same-day/2-day shipping on every part, plus all the tools and specialty tools you need! Check out the parts and tools sections below to add everything to your cart.