


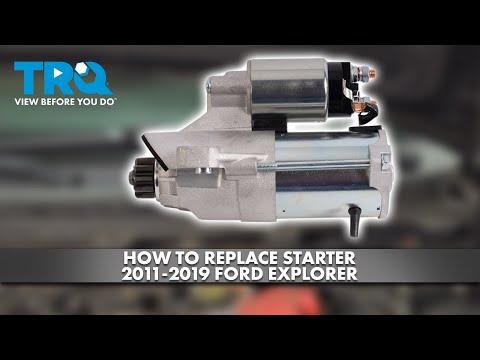






How to Replace the Starter Motor on a 2011-2019 Ford Explorer 3.5L EcoBoost (Trim: Platinum | Engine: V6 3.5L | Body: Sport Utility)
Step-by-step AWD replacement guide with required tools, parts, torque specs, and safety tips for 2011, 2012, 2013, 2014, 2015, 2016, 2017, 2018, 2019
How to Replace the Starter Motor on a 2011-2019 Ford Explorer 3.5L EcoBoost (Trim: Platinum | Engine: V6 3.5L | Body: Sport Utility)
Step-by-step AWD replacement guide with required tools, parts, torque specs, and safety tips for 2011, 2012, 2013, 2014, 2015, 2016, 2017, 2018, 2019


🔧 Explorer - Starter Motor Replacement
This is an intermediate job, but it’s completely manageable with safe lifting and patience. The starter mounts low on the transmission bellhousing, and access is mainly through the passenger-side wheel well and underneath. The starter aisle is now open with matching new and remanufactured options for your Explorer.
Difficulty Level: Intermediate | Estimated Time: 2-4 hours
Assumption: This procedure covers the factory 3.5L EcoBoost AWD configuration.
⚠️ Safety & Precautions
- ⚠️ Disconnect the negative battery cable before touching the starter.
- ⚠️ The large starter cable has direct battery power and can cause severe arcing.
- ⚠️ Keep the key fob away from the Explorer while you work.
- ⚠️ Let the engine and exhaust cool completely before starting.
- ⚠️ Support the Explorer with jack stands. Never work beneath a vehicle supported only by a floor jack.
- ⚠️ Wear safety glasses because dirt and debris will fall from the splash shields.
- ⚠️ The starter is heavy enough to injure your hand when its final bolt is removed.
🔧 Required Tools
You'll need the following tools for this repair:
- Floor jack (rated 3-ton minimum)
- Jack stands (rated 3-ton minimum, Qty: 2)
- Wheel chocks
- 1/4-inch drive ratchet
- 3/8-inch drive ratchet
- 1/2-inch drive breaker bar
- 3/8-inch drive torque wrench (5-80 ft-lbs range)
- 1/2-inch drive torque wrench (50-200 ft-lbs range)
- 8mm socket
- 10mm socket
- 13mm socket
- 15mm socket
- 19mm socket
- E8 external Torx socket
- 3-inch extension (3/8-inch drive)
- 6-inch extension (3/8-inch drive)
- Universal joint adapter (3/8-inch drive)
- Medium flat-blade screwdriver
- Trim clip removal tool
- Needle-nose pliers
- Battery terminal brush
- LED work light
- Mechanic’s gloves
- Safety glasses
A universal joint adapter lets the socket turn a fastener when the extension cannot approach it in a straight line.
🔩 Required Parts
HowToo sells all the parts you need for this repair:
- Starter motor for 3.5L EcoBoost AWD - Qty: 1
- Starter mounting bolts - Qty: 2, only if damaged or badly corroded
- Plastic splash shield clips - Qty: 4-6, as needed
- Dielectric grease - Qty: 1 small tube
- Electrical contact cleaner - Qty: 1 can
- Shop towels - Qty: 1 pack
A new starter is usually my first pick when the budget permits. Starter access is too cramped to make an early remanufactured failure entertaining.
📋 Before You Begin
- 📋 Park on firm, level ground and shift the transmission into Park.
- 📋 Apply the parking brake and place wheel chocks behind both rear wheels.
- 📋 Open the hood before disconnecting electrical power.
- 📋 Keep the key fob outside the vehicle.
- 📋 Allow the engine and exhaust to cool fully.
- 📋 Photograph the starter wiring before disconnecting anything.
- 📋 No scan-tool command, electronic parking-brake service mode, or battery registration is required for this repair.
🔨 Step-by-Step Instructions
Follow these steps in order:
Step 1: Disconnect the Battery
- Use an 8mm socket to loosen the negative battery-terminal clamp.
- Lift the negative cable from the battery and isolate it where it cannot spring back onto the terminal.
- Wait at least one minute before working on the starter wiring.
- Leave the positive battery terminal connected unless additional working room requires its removal.
Step 2: Loosen the Passenger-Side Front Wheel
- Use a 19mm socket and 1/2-inch drive breaker bar to loosen each lug nut approximately one-half turn.
- Do this while the tire remains on the ground. Do not remove the lug nuts yet.
Step 3: Raise and Support the Explorer
- Use the floor jack at the front subframe lifting area.
- Raise the front high enough to work beneath the passenger side.
- Position both jack stands beneath solid front subframe support points.
- Lower the Explorer carefully onto the stands and gently shake the body to confirm stability.
Step 4: Remove the Wheel and Splash Shields
- Use the 19mm socket to remove the passenger-side front wheel.
- Use the trim clip removal tool to release the inner-fender push clips.
- Use a 10mm socket to remove any screws securing the inner liner.
- Pull the rear section of the liner aside to create an access opening.
- Use the 10mm socket and trim clip removal tool to remove the lower engine splash shield if it blocks access.
- Keep clips grouped by panel location.
Step 5: Remove the Intake Duct
- Use an 8mm socket or medium flat-blade screwdriver to loosen the air-intake hose clamps.
- Use needle-nose pliers only if a hose retainer cannot be released by hand.
- Disconnect attached hoses or electrical retainers without pulling directly on their wires.
- Lift the intake duct out and place it somewhere clean.
Step 6: Locate and Inspect the Starter
- Use the LED work light to look toward the passenger side of the engine-to-transmission joint.
- Identify the cylindrical starter and its smaller attached solenoid.
- The solenoid carries one heavy battery cable and one small control connection.
- Compare its shape and electrical connections with the replacement starter before removing anything.
Step 7: Remove the Starter Heat Shield
- If equipped, use a 10mm socket to remove the starter heat-shield fasteners.
- Slide the shield away without bending it.
- Note its exact orientation because it must protect the new starter from exhaust heat.
Step 8: Disconnect the Starter Wiring
- Confirm again that the negative battery cable is disconnected.
- Use a 13mm socket, extension, and universal joint adapter to remove the nut from the large starter terminal.
- Lift the cable eyelet from the stud and move it away from the starter.
- Release the small control connector by hand or carefully with the medium flat-blade screwdriver.
- Pull on the connector housing, never the wire.
Step 9: Remove the Support Bracket
- If your starter has a small support bracket, use the E8 external Torx socket to remove its bolt.
- Keep the bracket with its bolt so it returns to the same position.
- Do not remove screws that join the starter motor body together.
Step 10: Remove the Starter Mounting Bolts
- Use a 15mm socket, 6-inch extension, and universal joint adapter as needed to loosen the mounting bolts.
- Remove the easier lower bolt first, then loosen the upper bolt.
- Support the starter with one hand while removing the final bolt.
- Pull the starter straight away from the transmission bellhousing.
- Rotate it carefully through the available opening without forcing wiring or hoses.
Step 11: Compare and Prepare the Replacement
- Place the old and new starters side by side.
- Confirm matching mounting ears, pinion position, electrical terminal locations, and connector style.
- Use the battery terminal brush and electrical contact cleaner to clean the cable eyelet.
- Do not place grease between the metal cable eyelet and electrical terminal.
- Apply only a light film of dielectric grease around the connector seal after the connection is assembled.
Step 12: Install the New Starter
- Guide the starter into the bellhousing opening in the same orientation as the original.
- Start both mounting bolts by hand for several turns. This prevents cross-threading.
- Use the 15mm socket and ratchet to tighten the bolts evenly.
- Use the 3/8-inch drive torque wrench to tighten the main starter bolts to 47 Nm (35 ft-lbs). howtoo.com
- If equipped, use the E8 external Torx socket and torque wrench to tighten the support-bracket bolt to 23 Nm (17 ft-lbs). howtoo.com
Step 13: Reconnect the Starter Wiring
- Push the small control connector into place until its lock clicks.
- Place the large cable eyelet squarely over the solenoid stud.
- Start the terminal nut by hand to prevent cross-threading.
- Use the 13mm socket and torque wrench to tighten the main terminal nut to 14 Nm (10 ft-lbs). howtoo.com
- Confirm the cable cannot contact the exhaust or rub against a sharp edge.
- Do not overtighten the nut because the insulated solenoid terminal can crack or rotate.
Step 14: Reinstall the Heat Shield
- Position the heat shield exactly as it was removed.
- Use the 10mm socket and torque wrench to tighten its fasteners to 8 Nm (71 in-lbs). howtoo.com
- Confirm the shield does not touch the starter terminals.
Step 15: Reinstall the Intake and Splash Shields
- Install the air-intake duct and reconnect every hose and electrical retainer.
- Use the 8mm socket to tighten the intake clamps until snug.
- Reinstall the lower splash shield with the 10mm socket and replacement clips.
- Reposition the inner-fender liner and install its screws and push clips.
- Verify the liner cannot rub against the tire.
Step 16: Reinstall the Wheel
- Install the wheel and start all lug nuts by hand.
- Use the 19mm socket to snug the nuts in a star pattern.
- Use the floor jack to lift the Explorer slightly and remove both jack stands.
- Lower the Explorer completely onto the ground.
- Use the 19mm socket and 1/2-inch drive torque wrench to tighten the lug nuts in a star pattern to 183 Nm (135 ft-lbs). howtoo.com
Step 17: Reconnect the Battery
- Confirm all tools have been removed from the engine compartment.
- Place the negative battery clamp fully onto its post.
- Use the 8mm socket to tighten the terminal to 7 Nm (62 in-lbs). howtoo.com
- Do not crush or distort the battery-terminal clamp.
✅ After Repair
- ✅ Switch the ignition on briefly, then start the engine.
- ✅ Listen for quick cranking and immediate starter disengagement after the engine starts.
- ✅ Shut the engine off and repeat the start test two or three times.
- ✅ Stop immediately if the starter grinds, remains engaged, or produces smoke.
- ✅ Check the battery and starter cable connections if cranking remains slow.
- ✅ Recheck the wheel lug torque after approximately 80-160 km of driving.
- ✅ The clock and saved convenience settings may require resetting after battery disconnection.
💰 DIY vs Shop Cost
Shop Cost: $550-$1,050 USD (parts + labor)
DIY Cost: $87-$250 USD (starter and normal consumables)
You Save: Approximately $300-$800 USD by doing it yourself!
Labor pricing around Sonīpat can differ substantially from U.S. estimates. A professional normally allows approximately 2-4 hours for this repair.
🎯 Ready to get started?
HowToo has opened the matching starter aisle for your Explorer, including new and remanufactured choices. You’ll also find the mounting hardware, clips, tools, and specialty sockets needed to finish the job safely.
