






How to Replace the Starter Motor on a 2011-2019 Ford Escape 2.5L FWD (Engine: Inline 4 2.5L)
Step-by-step DIY instructions with required tools, parts, torque specs, and safety tips for 2011, 2013, 2014, 2015, 2016, 2017, 2019
How to Replace the Starter Motor on a 2011-2019 Ford Escape 2.5L FWD (Engine: Inline 4 2.5L)
Step-by-step DIY instructions with required tools, parts, torque specs, and safety tips for 2011, 2013, 2014, 2015, 2016, 2017, 2019


This is an intermediate repair, and the big rule is simple: disconnect the battery before touching the starter. The starter aisle is open with matching replacement options for your Escape.
Assumption: This procedure uses the standard lower-access layout for the 2.5L FWD powertrain. Check fastener head sizes before forcing a socket.
🔧 Escape - Starter Motor Replacement
The starter sits low where the engine joins the automatic transmission. You’ll remove the lower splash shield, disconnect two electrical leads, and unbolt the starter from the transmission housing.
Difficulty Level: Intermediate | Estimated Time: 1.5-3 hours
⚠️ Safety & Precautions
- ⚠️ Disconnect the negative battery cable before working underneath the vehicle.
- ⚠️ The large starter cable has direct battery power and can cause severe arcing.
- ⚠️ Support your Escape with properly rated jack stands. Never work under a vehicle supported only by a jack.
- ⚠️ Let the engine and exhaust cool completely before starting.
- ⚠️ Keep the ignition off and the key away from the vehicle.
🔧 Required Tools
You'll need the following tools for this repair:
- 8mm socket
- 10mm socket
- 13mm socket
- 15mm socket
- 3/8-inch drive ratchet
- 3/8-inch drive 6-inch extension
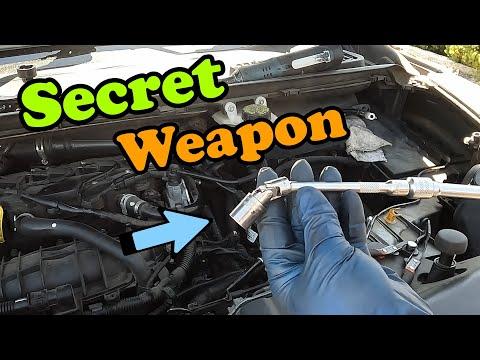
- 3/8-inch drive universal joint adapter
- 3/8-inch drive torque wrench rated 5-80 Nm
- Flat-blade screwdriver
- Plastic trim-clip removal tool
- Floor jack rated 2-ton minimum
- Jack stands rated 2-ton minimum
- Wheel chocks
- LED work light
- Mechanic gloves
- Safety glasses
A universal joint adapter lets the socket pivot slightly around an obstruction.
🔩 Required Parts
HowToo sells all the parts you need for this repair:
- Starter motor assembly - Qty: 1
- Starter terminal nut - Qty: 1 if damaged or corroded
- Starter mounting bolts - Qty: 2 if damaged or heavily corroded
- Dielectric grease - Qty: 1 small tube
Matching starter assemblies are showing in the parts sidebar. Compare the mounting ears, terminal positions, and electrical connections with the removed unit before installation. Electrical parts enjoy impersonating each other on the counter.
📋 Before You Begin
- Park on level, solid ground and shift the transmission into Park.
- Apply the parking brake and place wheel chocks behind both rear wheels.
- Open the hood and wait at least two minutes after switching off the ignition.
- Use a 10mm socket to loosen and disconnect the negative battery terminal.
- Position the disconnected cable so it cannot spring back onto the battery post.
- Raise the front using a floor jack at the approved lifting point.
- Place jack stands under the approved front support points and gently lower the vehicle onto them.
- No scan-tool programming or starter registration is normally required.
🔨 Step-by-Step Instructions
Follow these steps in order:
Step 1: Remove the lower splash shield
- Put on safety glasses before moving underneath your Escape.
- Use an 8mm socket to remove the splash-shield screws.
- Use a plastic trim-clip removal tool to release any push-pin retainers.
- Support the shield while removing its final fastener, then lower it out of the way.
- During installation, tighten threaded splash-shield fasteners to approximately 9 Nm (80 in-lbs) where applicable.
Step 2: Locate and inspect the starter
- Use an LED work light to locate the starter at the junction between the engine and transmission.
- Identify the thick battery cable and the smaller solenoid control wire.
- Check the wiring positions carefully or take a reference photo before disconnecting anything.
- A quick photo beats a long memory.
Step 3: Disconnect the starter electrical cables
- Pull the protective rubber cover away from the large starter terminal by hand.
- If necessary, use a flat-blade screwdriver to lift the cover gently without cutting it.
- Use a 13mm socket to remove the main battery-cable retaining nut.
- Lift the thick battery cable off the terminal and position it aside.
- Use the correctly fitting socket, commonly 8mm or 10mm, to remove the smaller control-wire nut.
- Move the small wire away without pulling on the wire itself.
- If a separate ground wire is attached to a starter mounting stud, remove its nut with the correctly fitting socket and position it aside.
Step 4: Remove the starter mounting bolts
- Support the starter with one hand before loosening the final mounting bolt.
- Use a 15mm socket, 3/8-inch ratchet, and 6-inch extension to loosen the mounting bolts.
- Use the universal joint adapter only if straight access is blocked.
- Remove both mounting bolts while keeping the starter supported.
- Pull the starter straight away from the transmission housing.
- Lower it carefully through the available space without snagging the wiring.
Step 5: Compare the replacement starter
- Place the old and new starters beside each other.
- Confirm that the mounting ears, nose length, drive gear, terminals, and connector arrangement match.
- Turn the drive gear only as allowed by the starter design. Do not energize the starter loose in your hands.
- Inspect the transmission mounting surface and remove loose dirt with a clean shop towel.
Step 6: Install the replacement starter
- Position the starter squarely against the transmission housing.
- Start both mounting bolts by hand for several turns to prevent cross-threading.
- Use a 15mm socket to snug the bolts evenly.
- Use the torque wrench and 15mm socket to tighten the starter mounting bolts to 35 Nm (26 ft-lbs). Ford service information uses this value for the 2.5L starter attachment. charm.li)
Step 7: Reconnect the starter wiring
- Install any removed ground wire onto its original mounting stud.
- Tighten a starter-mounted ground-wire nut to 18 Nm (159 in-lbs) if equipped in this location.
- Place the thick battery cable over the large solenoid terminal.
- Install its nut and tighten it with the 13mm socket and torque wrench to 12 Nm (106 in-lbs). charm.li
- Reconnect the small solenoid control wire.
- Tighten its retaining nut to 5 Nm (44 in-lbs). This terminal is small, so do not overtighten it. charm.li
- Apply a tiny amount of dielectric grease around the connector seal, not between the metal contact surfaces.
- Reposition the protective rubber cover over the large power terminal.
Step 8: Reinstall the lower splash shield
- Raise the shield into position by hand.
- Install all push-pin retainers with the plastic trim-clip tool.
- Start every screw by hand before tightening it with the 8mm socket.
- Tighten the threaded fasteners evenly to approximately 9 Nm (80 in-lbs) where applicable.
Step 9: Lower the vehicle and reconnect the battery
- Use the floor jack to raise your Escape slightly above the jack stands.
- Remove both jack stands and lower the vehicle slowly.
- Reconnect the negative battery terminal using the 10mm socket.
- Tighten it until the terminal cannot rotate by hand. Do not crush or distort the terminal clamp.
✅ After Repair
- Make sure all tools are clear of the engine compartment.
- Start the engine and confirm it cranks strongly without grinding or repeated clicking.
- Switch the engine off, wait 30 seconds, and restart it two more times.
- Listen for the starter remaining engaged after the engine starts. Shut the engine off immediately if that happens.
- Check that no battery or charging-system warning remains illuminated.
- Reset the clock and saved audio settings if the battery disconnect erased them.
- If the starter still only clicks, test battery voltage, battery-cable voltage drop, the starter relay, and the engine ground before condemning the replacement unit.
💰 DIY vs Shop Cost
Shop Cost: $400-$700 (parts + labor)
DIY Cost: $100-$210 (starter motor only)
You Save: $190-$600 by doing it yourself!
Local labor rates in Haryana may differ substantially. This repair normally takes a shop approximately 1.5-2.5 hours.
🎯 Ready to get started?
HowToo makes it easy: same-day/2-day shipping on every part, plus all the tools and specialty tools you need! Check out the parts and tools sections below to add everything to your cart.
