


How to Replace the Starter Motor on a 2008-2013 Subaru Forester (Engine: Flat 4 2.5L)
Step-by-step DIY guide with required tools, parts, torque specs, and safety tips for 2008, 2009, 2010, 2011, 2012, 2013
How to Replace the Starter Motor on a 2008-2013 Subaru Forester (Engine: Flat 4 2.5L)
Step-by-step DIY guide with required tools, parts, torque specs, and safety tips for 2008, 2009, 2010, 2011, 2012, 2013
🔧 Forester - Starter Motor Replacement
The starter motor turns the engine when you twist the key. On your Forester, the starter is mounted on the transmission bellhousing near the rear of the engine, and replacement is a straightforward bolt-on repair if you work safely around the battery cables.
Difficulty Level: Beginner-Intermediate | Estimated Time: 1.5-2.5 hours
⚠️ Safety & Precautions
- ⚠️ Disconnect the negative battery cable before touching the starter wiring. The starter cable is always hot when connected.
- ⚠️ Let the engine cool before working near the exhaust and transmission area.
- ⚠️ Keep metal tools away from the positive battery terminal and starter power stud.
- ⚠️ If lifting the front of the vehicle, support it with jack stands. Never rely on a floor jack alone.
- ⚠️ Manual transmission safety: shift to neutral, set the parking brake, and chock the rear wheels before starting.
🔧 Required Tools
You'll need the following tools for this repair:
- 10mm wrench
- 10mm socket
- 12mm socket
- 14mm socket
- 3/8-inch drive ratchet
- 3/8-inch drive 6-inch extension
- 3/8-inch drive torque wrench
- Flat-blade screwdriver
- Needle-nose pliers
- Battery terminal brush
- Wheel chocks
- Floor jack (rated 2-ton minimum)
- Jack stands (rated 2-ton minimum)
- Mechanic gloves
- Safety glasses
🔩 Required Parts
HowToo sells all the parts you need for this repair:
- Starter motor - Qty: 1
- Battery terminal corrosion protectant - Qty: 1
- Dielectric grease - Qty: 1
📋 Before You Begin
- Park your Forester on level ground.
- Shift the manual transmission into neutral.
- Set the parking brake firmly.
- Place wheel chocks behind the rear wheels.
- Open the hood and make sure the engine is cool.
- Disconnect the negative battery cable before removing starter wiring.
- A torque wrench tightens bolts accurately so they are not too loose or over-tightened.
- Dielectric grease is a non-conductive grease used to help protect electrical connectors from moisture.
🔨 Step-by-Step Instructions
Follow these steps in order:
Step 1: Disconnect the Battery
- Use a 10mm wrench to loosen the nut on the negative battery cable clamp.
- Lift the negative cable off the battery post and tuck it aside so it cannot spring back.
- Use a battery terminal brush to clean corrosion from the battery post and cable end if needed.
- Black cable comes off first.
Step 2: Create Access to the Starter
- The starter is on the driver-side rear area of the engine, bolted to the transmission bellhousing.
- Use a 10mm socket and 3/8-inch drive ratchet to remove any intake duct or bracket fasteners blocking your hand access from above.
- Move the duct or bracket aside gently. Do not force plastic parts.
- If top access is tight, use a floor jack to lift the front at the proper front jacking point and place the vehicle securely on jack stands.
- Take a photo before unplugging wires.
Step 3: Identify the Starter Wiring
- Put on safety glasses and mechanic gloves.
- Find the thick battery cable attached to the starter solenoid stud. The solenoid is the small cylinder attached to the starter motor.
- Find the smaller push-on control wire connector near the solenoid.
- Use a flat-blade screwdriver or needle-nose pliers carefully if the small connector is tight.
Step 4: Remove the Starter Electrical Connections
- Use a 12mm socket, 3/8-inch drive ratchet, and 3/8-inch drive 6-inch extension to remove the nut from the large starter power cable.
- Lift the large cable off the starter stud and move it aside.
- Use your fingers or needle-nose pliers to unplug the smaller starter control wire.
- Do not pull on the wire itself. Pull on the connector body.
- Torque during installation: starter power cable nut to 7 Nm (62 in-lbs)
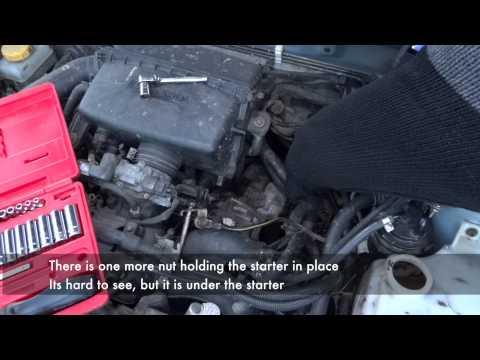
Step 5: Remove the Starter Mounting Bolts
- Support the starter with one hand so it does not drop when the bolts are removed.
- Use a 14mm socket, 3/8-inch drive ratchet, and 3/8-inch drive 6-inch extension to remove the upper starter mounting bolt.
- Use the same 14mm socket setup to remove the lower starter mounting bolt.
- Keep track of bolt positions if one bolt is longer than the other.
- Torque during installation: starter mounting bolts to 50 Nm (37 ft-lbs)
Step 6: Remove the Old Starter
- Pull the starter straight away from the transmission bellhousing.
- If it feels stuck, gently wiggle it by hand while pulling outward.
- Do not pry hard against the aluminum transmission housing.
- Compare the old starter to the new starter. The mounting ears, electrical studs, and gear nose should match.
Step 7: Install the New Starter
- Position the new starter against the transmission bellhousing by hand.
- Thread both mounting bolts in by hand first to avoid cross-threading.
- Use a 14mm socket, 3/8-inch drive ratchet, and 3/8-inch drive 6-inch extension to snug both bolts evenly.
- Use a 3/8-inch drive torque wrench with the 14mm socket to tighten the mounting bolts to 50 Nm (37 ft-lbs).
- Start bolts by hand first.
Step 8: Reconnect the Starter Wiring
- Apply a very small amount of dielectric grease to the small control wire connector seal area.
- Push the small control wire connector onto the starter terminal until fully seated.
- Place the large battery cable onto the starter power stud.
- Use a 12mm socket and 3/8-inch drive torque wrench to tighten the power cable nut to 7 Nm (62 in-lbs).
- Make sure the cable is not touching the starter body, engine, or any sharp edge.
Step 9: Reinstall Removed Intake Parts or Brackets
- Reposition any intake duct or bracket moved earlier.
- Use a 10mm socket and 3/8-inch drive ratchet to reinstall the fasteners snugly.
- Do not over-tighten plastic intake clamps or plastic bracket fasteners.
Step 10: Reconnect the Battery
- Apply battery terminal corrosion protectant to the cleaned terminal if desired.
- Place the negative battery cable back onto the negative battery post.
- Use a 10mm wrench to tighten the clamp nut until the cable does not rotate by hand.
- Do not over-tighten the battery terminal clamp.
✅ After Repair
- ✅ Make sure the transmission is in neutral and the parking brake is set.
- ✅ Turn the key to START. The engine should crank strongly and evenly.
- ✅ If you hear only one click, recheck the battery charge and both starter electrical connections.
- ✅ If the starter spins but the engine does not crank, stop testing and recheck starter fitment.
- ✅ Let the engine run for one minute, then shut it off and restart it once more.
- ✅ Confirm no warning lights stay on after the engine starts.
💰 DIY vs Shop Cost
Shop Cost: $350-$650 (parts + labor)
DIY Cost: $140-$320 (parts only)
You Save: $210-$330 by doing it yourself!
Shop labor rates vary but typically run $100-$150/hour. This repair takes a shop approximately 1.0-1.5 hours.
🎯 Ready to get started?
HowToo makes it easy: same-day/2-day shipping on every part, plus all the tools and specialty tools you need! Check out the parts and tools sections below to add everything to your cart.
