

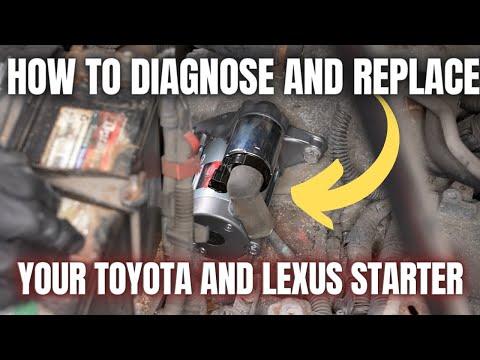




How to Replace the Starter Motor on a 2005-2018 Toyota Avalon 3.5L V6 (Engine: V6 3.5L)
Step-by-step DIY instructions with required tools, parts, torque specs, and safety tips for 2005, 2006, 2007, 2008, 2009, 2010, 2011, 2012, 2013, 2014, 2015, 2016, 2017, 2018
How to Replace the Starter Motor on a 2005-2018 Toyota Avalon 3.5L V6 (Engine: V6 3.5L)
Step-by-step DIY instructions with required tools, parts, torque specs, and safety tips for 2005, 2006, 2007, 2008, 2009, 2010, 2011, 2012, 2013, 2014, 2015, 2016, 2017, 2018


🔧 Avalon - Starter Motor Replacement
The starter motor is mounted on top of the transaxle, below the battery and air-cleaner assembly. Reaching it requires removing the intake duct, battery, battery tray, and air-cleaner housing before disconnecting and unbolting the starter.
Difficulty Level: Intermediate | Estimated Time: 2-3 hours
Assumption: These instructions apply to the stock U.S.-market 3.5L V6 configuration.
⚠️ Safety & Precautions
- ⚠️ Disconnect the negative battery terminal before touching the starter wiring. Its main cable remains electrically live whenever the battery is connected.
- 🧤 Allow the engine and exhaust components to cool completely before starting.
- 👓 Wear safety glasses and insulated work gloves.
- 🔋 Keep the battery upright. Battery electrolyte is corrosive, and the battery is heavy.
- 🚫 Do not allow a wrench to bridge the positive battery terminal and metal bodywork.
- 🔑 Keep the smart key at least 15 feet from your Avalon while working.
🔧 Required Tools
You'll need the following tools for this repair:
- 8mm socket
- 10mm socket
- 12mm socket
- 14mm socket
- 3/8-inch-drive ratchet
- 3/8-inch-drive 3-inch extension
- 3/8-inch-drive 6-inch extension
- 3/8-inch-drive torque wrench rated 10-80 Nm
- Inch-pound torque wrench rated 40-150 in-lbs
- Phillips No. 2 screwdriver
- Small flat-blade screwdriver
- Trim-clip removal tool
- Battery terminal puller (specialty)
- Digital multimeter rated CAT III 600V
- Magnetic parts tray
- Fender cover
- Insulated work gloves
- Safety glasses
🔩 Required Parts
HowToo sells all the parts you need for this repair:
- Starter motor for 3.5L V6 - Qty: 1
- Starter terminal protective cap - Qty: 1 if damaged
- Air-cleaner housing mounting grommets - Qty: As needed
- Battery terminal protectant - Qty: 1
📋 Before You Begin
- 🅿️ Park your Avalon on level ground, shift into Park, apply the parking brake, and switch the ignition completely off.
- 🪟 Lower the driver’s window so you cannot accidentally lock the smart key inside.
- 💾 Record any preferred audio settings. Disconnecting the battery may reset the clock and some learned settings.
- 🔌 Wait at least 90 seconds after switching the ignition off before disconnecting the battery.
- 📦 Use a magnetic parts tray to keep each group of fasteners separated.
🔨 Step-by-Step Instructions
Follow these steps in order:
Step 1: Verify the battery is disconnected safely
- Open the hood and place the fender cover over the painted edge.
- Use a digital multimeter to check battery voltage. A charged battery normally reads approximately 12.4-12.7 volts with the engine off.
- Use a 10mm socket and ratchet to loosen the negative terminal clamp.
- Remove the negative cable and position it where it cannot spring back onto the battery post.
- Use a 10mm socket to disconnect the positive terminal.
- Negative comes off first and goes on last.
Step 2: Remove the engine appearance cover
- Grip the cover near each mounting point and pull straight upward by hand.
- The cover uses rubber grommets rather than threaded fasteners. Do not pry against the intake manifold.
- Set the cover somewhere clean where its rubber mounts cannot be damaged.
Step 3: Remove the intake-air duct
- Use a small flat-blade screwdriver to release the electrical connector lock, then unplug the mass-airflow sensor connector from the air-cleaner lid.
- The mass-airflow sensor measures how much air enters the engine. Do not touch its sensing element.
- Release the wiring retainers with a trim-clip removal tool.
- Use a 10mm socket or Phillips No. 2 screwdriver to loosen the intake-hose clamp at the throttle body.
- Release the air-cleaner lid clips by hand.
- Disconnect the attached breather hose carefully by hand, then lift out the lid and intake hose together.
- Remove the engine air filter and keep dirt from entering the exposed ductwork.
Step 4: Remove the battery
- Use a 10mm socket and ratchet to remove the battery hold-down fasteners and upper retaining bracket.
- If a terminal is stuck, use the battery terminal puller. Do not twist aggressively or pry against the battery case.
- Lift the battery straight upward with both hands and place it upright on a stable surface.
- Bend your knees; the battery is heavy.
Step 5: Remove the battery tray
- Use a 10mm socket, 12mm socket, extensions, and ratchet to remove the battery tray and support fasteners.
- Release any harness clips from the tray with the trim-clip removal tool.
- Lift the tray and support bracket out of the engine compartment.
- Keep track of each fastener’s original position because lengths may differ.
Step 6: Remove the lower air-cleaner housing
- Use a 10mm socket, extension, and ratchet to remove the lower air-cleaner housing bolts.
- Detach the fresh-air inlet and any remaining clips by hand or with the trim-clip removal tool.
- Lift the lower housing upward from its rubber mounting grommets.
- Cover the exposed intake opening with a clean lint-free cloth. Do not allow hardware or dirt to enter it.
Step 7: Disconnect the starter wiring
- Locate the starter on top of the transaxle in the space exposed by removing the battery and air-cleaner housing.
- Press the locking tab and unplug the small starter-solenoid control connector by hand. Pull on the connector, not its wire.
- Open the rubber protective cap over the large starter terminal.
- Use a 12mm socket, extension, and ratchet to remove the terminal nut, then lift off the battery cable.
- Move the cable aside without sharply bending it.
Step 8: Remove the old starter
- Support the starter with one hand. It will become loose when the mounting bolts are removed.
- Use a 14mm socket, extension, and ratchet to remove the two starter mounting bolts.
- Pull the starter straight away from the transaxle bellhousing, then guide it upward and out.
- The bellhousing is the transmission casing surrounding the engine’s flywheel.
- Inspect the removed starter opening for oil, coolant, corrosion, or damaged flywheel teeth.
Step 9: Compare and install the replacement starter
- Place the old and new starters side by side. Confirm that the mounting flange, electrical terminals, pinion gear, and connector are identical.
- Clean the starter mounting surface with a clean lint-free cloth. Do not apply grease or sealant.
- Position the replacement starter squarely against the transaxle.
- Start both mounting bolts by hand to prevent cross-threading.
- Use a 14mm socket and torque wrench to tighten both starter mounting bolts evenly to 37 Nm (27 ft-lbs).
Step 10: Reconnect the starter wiring
- Place the large battery-cable eyelet flat against the starter terminal.
- Start the terminal nut by hand, then use a 12mm socket and inch-pound torque wrench to tighten it to 9.8 Nm (87 in-lbs).
- Close the protective rubber cap completely over the terminal.
- Push the small solenoid connector into place until its lock clicks.
- Gently tug the connector body to verify that it is latched.
Step 11: Reinstall the air-cleaner housing
- Remove the lint-free cloth from the intake opening and verify that nothing was left inside.
- Seat the lower air-cleaner housing into its rubber grommets by hand.
- Install its bolts by hand, then tighten them gently with a 10mm socket and ratchet. Do not overtighten the plastic housing.
- Reconnect the fresh-air inlet and secure all clips with the trim-clip removal tool.
Step 12: Reinstall the battery tray and battery
- Position the battery tray and support bracket, ensuring no wiring is trapped underneath.
- Start all tray fasteners by hand, then tighten them securely with the matching 10mm or 12mm socket and ratchet.
- Reattach every wiring-harness clip by hand.
- Lower the battery squarely into the tray with the terminals in their original positions.
- Install the battery hold-down and tighten its nuts evenly with a 10mm socket. The battery must not slide, but the case must not deform.
Step 13: Reinstall the intake duct
- Install the engine air filter in the lower housing with its sealing edge fully seated.
- Fit the air-cleaner lid and intake hose without folding or pinching the filter seal.
- Close the housing clips by hand.
- Seat the intake hose fully on the throttle body, then tighten its clamp with a 10mm socket or Phillips No. 2 screwdriver.
- Reconnect the breather hose and mass-airflow sensor connector by hand.
- Reinstall all wiring retainers with the trim-clip removal tool.
Step 14: Reconnect the battery
- Use a 10mm socket and inch-pound torque wrench to connect the positive terminal first, tightening the clamp to 5.4 Nm (48 in-lbs).
- Install the positive terminal cover completely.
- Use a 10mm socket and inch-pound torque wrench to connect the negative terminal last, tightening the clamp to 5.4 Nm (48 in-lbs).
- Apply a light coating of battery terminal protectant after the connections are secure.
- Align the engine cover with its grommets and press it down firmly by hand.
✅ After Repair
- 🔍 Check the engine compartment for loose tools, disconnected hoses, and unused fasteners.
- 🚗 Sit in the driver’s seat, apply the brake, and start the engine. The starter should crank smoothly without grinding or repeated clicking.
- 🛑 Switch the engine off and restart it two more times. Pause at least 15 seconds between attempts.
- ⚡ Confirm that the charging-system warning light turns off after the engine starts.
- 📊 Use the digital multimeter across the battery terminals with the engine running. Charging voltage will normally be approximately 13.5-14.8 volts.
- 💡 Reinitialize the automatic windows if needed: fully lower each affected window, then fully raise it and hold its switch for approximately one second.
- 🕒 Reset the clock and restore any preferred audio settings.
- ⚠️ If the starter grinds, runs after the engine starts, or does not crank, switch the ignition off immediately and recheck the mounting and electrical connections.
💰 DIY vs Shop Cost
Shop Cost: $550-$900 (parts + labor)
DIY Cost: $180-$420 (parts only)
You Save: $370-$480 by doing it yourself!
Shop labor rates vary but typically run $100-$150/hour. This repair takes a shop approximately 1.5-2.5 hours.
🎯 Ready to get started?
HowToo makes it easy: same-day/2-day shipping on every part, plus all the tools and specialty tools you need! Check out the parts and tools sections below to add everything to your cart.