


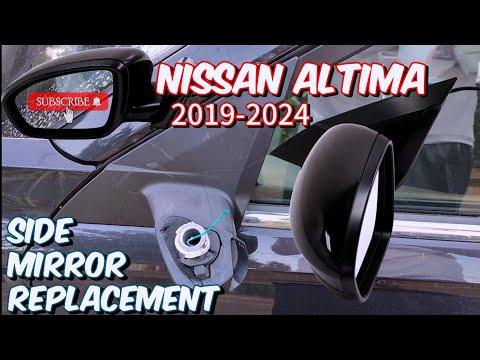







How to Replace the Side View Mirror on a 2019-2025 Nissan Altima
Step-by-step instructions with tools, parts, wiring tips, and mounting torque specs for 2019, 2020, 2021, 2022, 2023, 2024, 2025
How to Replace the Side View Mirror on a 2019-2025 Nissan Altima
Step-by-step instructions with tools, parts, wiring tips, and mounting torque specs for 2019, 2020, 2021, 2022, 2023, 2024, 2025


🔧 Altima - Side View Mirror Replacement
This is a manageable first-time repair. Expect about $81-$282 for the mirror assembly shown in the parts list. The interior door panel must come off so you can disconnect the wiring and reach the three mirror mounting nuts. howtoo.com)
Important: Match the replacement to the same side and every existing feature, including heat, turn signal, memory, blind-spot indicator, and the underside camera. A bargain mirror gets expensive quickly when half the buttons stop working.
Assumption: These instructions cover replacement of the complete mirror assembly, not only the glass.
Difficulty Level: Beginner to Intermediate | Estimated Time: 1-2 hours per side
⚠️ Safety & Precautions
- ⚠️ Wear safety glasses and gloves because broken mirror glass is extremely sharp.
- ⚠️ Lower the window before beginning so you can steady the mirror through the opening.
- ⚠️ Disconnect the negative battery terminal before unplugging door wiring.
- ⚠️ Never let the mirror hang from its wiring harness.
- ⚠️ Support the mirror while removing the final mounting nut.
- ⚠️ Do not switch the ignition on while door connectors are unplugged.
- ⚠️ Protect painted surfaces from the mirror studs and metal tools.
🔧 Required Tools
You'll need the following tools for this repair:
- 10mm socket
- 1/4-inch drive ratchet
- 3-inch socket extension
- 10mm combination wrench
- Phillips No. 2 screwdriver
- Small flat-tip screwdriver
- Plastic trim-removal tool set
- Plastic door-panel clip tool
- Needle-nose pliers
- Inch-pound torque wrench rated 20-200 in-lb
- Magnetic pickup tool
- Painter's tape
- Protective fender cover
- Mechanic's gloves
- Safety glasses
🔩 Required Parts
HowToo sells all the parts you need for this repair:
- Complete side view mirror assembly with matching factory features - Qty: 1
- Mirror mounting flange nuts - Qty: 3 if damaged or missing
- Front door trim-panel clips - Qty: 4-8 as needed
- Automotive butyl sealing tape - Qty: 1 roll if the moisture barrier loses adhesion
Check underneath the original mirror for a camera lens and inspect the glass for the blind-spot warning symbol before ordering. The replacement connector, camera, heating, signal, memory function, finish, and mounting side must match the original.
📋 Before You Begin
- 📋 Park your Altima on level ground, select Park, and apply the parking brake.
- 📋 Lower the window completely and turn the ignition off.
- 📋 Open the hood and keep the key fob away from the vehicle.
- 📋 Use the 10mm wrench to disconnect the negative battery terminal. Isolate the cable so it cannot touch the battery post.
- 📋 Wait at least three minutes before disconnecting wiring inside the door.
- 📋 Apply painter's tape around the outside mirror base and upper door edge.
- 📋 Compare both mirror connectors and mounting studs before removing protective packaging.
🔨 Step-by-Step Instructions
Follow these steps in order:
Step 1: Remove the inside handle trim
- Use a plastic trim-removal tool to lift the small cover behind or around the interior door-release handle.
- Remove the exposed fastener with the 10mm socket or Phillips No. 2 screwdriver, depending on the installed fastener.
- Place every fastener in a labeled container.
- Plastic tools prevent expensive scratches.
Step 2: Remove the armrest fastener
- Use the plastic trim-removal tool to lift the rubber mat or trim cover inside the door-pull pocket.
- Use the 10mm socket, extension, and ratchet to remove the fastener underneath.
- Do not pry against the soft door-panel covering.
Step 3: Remove the window-switch panel
- Use the plastic trim-removal tool to lift the switch panel from its rear edge.
- Raise the panel only far enough to reach its connectors.
- Use the small flat-tip screwdriver to depress stubborn connector locks, then unplug the connectors by holding their plastic bodies.
- Never pull directly on the wires.
Step 4: Release the door-panel clips
- Insert the plastic door-panel clip tool between the lower edge of the panel and the metal door.
- Move around the bottom and both sides, releasing each retaining clip individually.
- Once the clips release, lift the complete panel straight upward to unhook it from the window ledge.
- Keep one hand behind the panel because cables and connectors remain attached.
Step 5: Disconnect the door panel
- Use the needle-nose pliers only if needed to release the door-handle cable retainers.
- Rotate each cable housing from its bracket, then unhook the cable end from its lever.
- Use the small flat-tip screwdriver to release any remaining courtesy-light or control-module connectors.
- Place the panel on the protective fender cover with its finished side facing upward.
Step 6: Open the mirror-access area
- Use the plastic trim-removal tool to remove the triangular interior sail trim beside the mirror.
- A sail panel is the small triangular trim piece at the front upper corner of the door.
- If necessary, peel the moisture barrier back by hand only far enough to expose the mirror harness and nuts.
- Preserve the sticky butyl seal so the barrier can be resealed against water.
Step 7: Disconnect the mirror wiring
- Trace the mirror harness from the mounting area to its electrical connector.
- Use the small flat-tip screwdriver to depress the connector lock, then separate the connector by hand.
- Use the needle-nose pliers to release harness retainers without cutting or twisting them.
- Photograph the harness routing before removing it.
Step 8: Remove the old mirror
- Support the mirror outside the door with one hand or have a helper hold it.
- Use the 10mm socket, extension, and ratchet to loosen the three mounting nuts.
- Leave the upper nut installed by several threads while removing the lower nuts.
- Remove the upper nut last, then guide the wiring connector through the door opening.
- Pull the mirror straight away without dragging its studs across the paint.
- Use the magnetic pickup tool if a mounting nut falls inside the door.
Step 9: Inspect the mounting surface
- Use the plastic trim-removal tool to remove loose seal material without scratching the paint.
- Check that the replacement mirror's foam gasket is seated flat and undamaged.
- Compare the mounting studs, electrical connector, wiring length, camera, signal, and blind-spot components with the removed assembly.
- Transfer the painted cap only if the replacement assembly requires the original cap.
Step 10: Install the replacement mirror
- Feed the replacement harness through the door opening while holding the mirror against the outside of the door.
- Start all three mounting nuts by hand before using a tool.
- Use the 10mm socket and inch-pound torque wrench to tighten the mounting nuts evenly.
- Torque to 7.3 Nm (65 in-lb). howtoo.com
- Do not overtighten the nuts. Excess force can crack the mirror base or distort the door skin.
Step 11: Connect and test the mirror
- Route the harness exactly like the original and secure every retainer by hand or with the needle-nose pliers.
- Push the electrical connector together until its lock clicks.
- Use the 10mm wrench to temporarily reconnect the negative battery terminal.
- Switch the ignition on and test left, right, up, and down adjustment.
- Test folding, memory, heating, turn signal, blind-spot indicator, and camera functions when equipped.
- Switch the ignition off and use the 10mm wrench to disconnect the battery again before reassembly.
Step 12: Reinstall the moisture barrier
- Press the barrier firmly into its original butyl seal by hand.
- Add automotive butyl sealing tape where the original seal no longer holds.
- Keep the barrier smooth and sealed around its full perimeter.
Step 13: Reinstall the door panel
- Reconnect the handle and lock cables by hand, then lock their housings into the brackets.
- Reconnect all electrical plugs until their locks click.
- Position the top of the panel over the window ledge, then press it downward into place.
- Align every perimeter clip with its hole before pressing the panel inward by hand.
- Use the 10mm socket and ratchet to reinstall the door-pull fastener until snug.
- Use the 10mm socket or Phillips No. 2 screwdriver to reinstall the handle-area fastener until snug.
- Do not apply a guessed torque to the interior trim fasteners. Stop when the panel is seated securely.
Step 14: Finish the installation
- Reconnect the window-switch connectors and press the switch panel into place by hand.
- Press the handle cover, pocket mat, and sail panel into place by hand.
- Use the 10mm wrench to reconnect and securely tighten the negative battery terminal.
- Remove the painter's tape and protective fender cover.
✅ After Repair
- ✅ Confirm the mirror adjusts through its full range without clicking or binding.
- ✅ Verify the door locks, window switch, courtesy light, speaker, and interior handle work normally.
- ✅ Verify the turn signal and blind-spot indicator when equipped.
- ✅ Select Reverse and inspect the camera image when an underside camera is fitted.
- ✅ Check the mirror base for an even fit with no visible gap in its seal.
- ✅ Road-test at low speed and listen for wind noise or vibration.
- ✅ If the window's automatic function stops working, close it fully and hold the switch up for several seconds to reinitialize it.
- ✅ A camera image that is misaligned or a persistent driver-assistance warning may require calibration with Nissan-compatible equipment.
💰 DIY vs Shop Cost
Shop Cost: $350-$900 per side, potentially more with a camera, paint work, or calibration
DIY Cost: $81-$350 per side for the mirror and incidental supplies
You Save: Approximately $200-$550 by doing it yourself!
Shop labor rates vary but typically run $100-$150/hour. This repair takes a shop approximately 1-2 hours, excluding paint and calibration.
🎯 Ready to get started?
HowToo offers same-day or two-day shipping on matching mirror assemblies, trim clips, sealing tape, and the tools needed for the job. The mirror aisle is open beside this guide. Match every electrical feature on your original mirror before adding one to the cart.
