


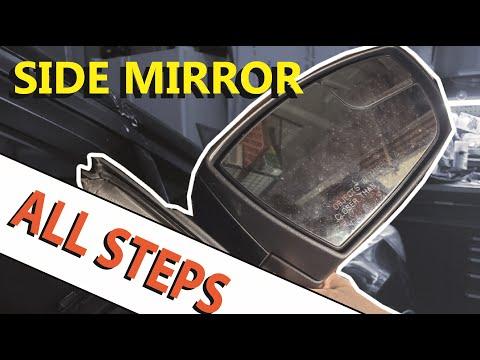







How to Replace the Side View Mirror on a 2012-2018 Ford Escape
Step-by-step power mirror replacement with tools, parts, torque specs, and safety tips for 2012, 2013, 2014, 2015, 2016, 2017, 2018
How to Replace the Side View Mirror on a 2012-2018 Ford Escape
Step-by-step power mirror replacement with tools, parts, torque specs, and safety tips for 2012, 2013, 2014, 2015, 2016, 2017, 2018


🔧 Escape - Side View Mirror Replacement
This is a solid beginner project. The interior door panel comes off so you can unplug the power-mirror connector and reach the three mounting screws. Matching mirror assemblies are now shown in the parts sidebar.
Difficulty Level: Beginner | Estimated Time: 1-1.5 hours per side
Assumption: These instructions replace the complete powered mirror assembly, not only the glass or painted cover.
⚠️ Safety & Precautions
- ⚠️ Disconnect the negative battery cable before unplugging door wiring.
- ⚠️ Wait at least 10 minutes after disconnecting the battery because the front door contains side-airbag wiring.
- ⚠️ Support the mirror while removing its final screw. Otherwise, it can drop against the paint.
- ⚠️ Keep fingers away from sharp sheet-metal edges inside the door.
- ⚠️ Do not switch on the ignition while door wiring is disconnected.
🔧 Required Tools
You'll need the following tools for this repair:
- 10mm wrench
- 1/4-inch drive ratchet
- 1/4-inch drive 3-inch extension
- 7mm socket
- Torx T30 bit socket
- Plastic trim removal tool set
- Small flat-blade screwdriver
- Plastic pick tool
- Torque wrench rated in inch-pounds
- Painter's tape
- Shop towels
- Flashlight
- Mechanic gloves
- Safety glasses
🔩 Required Parts
HowToo sells all the parts you need for this repair:
- Driver-side or passenger-side power mirror assembly matched to the original connector and features - Qty: 1
- Front door trim-panel retaining clips - Qty: 3-6
Compare the new mirror with the original before opening the door panel. The plug, number of wires, black or painted cover, heating, and any signal or puddle-light features must match. Mirror options love making a simple job unnecessarily interesting.
📋 Before You Begin
- Park your Escape on level ground, select Park, and apply the parking brake.
- Raise the affected window completely and switch the ignition off.
- Use the 10mm wrench to disconnect the negative battery cable.
- Wait at least 10 minutes before disconnecting door wiring.
- Apply painter's tape around the outside mirror base to protect the door paint.
- Place a shop towel below the mirror mounting area.
🔨 Step-by-Step Instructions
Follow these steps in order:
Step 1: Remove the inside handle trim
- Use the plastic pick tool to release the small trim cover behind the interior door-release handle.
- Remove the exposed screw with the 7mm socket, extension, and ratchet.
- Set the screw and cover together so they do not get misplaced.
Step 2: Remove the window-switch panel
- Use the plastic trim removal tool to lift the window-switch panel from its rear edge.
- Raise the panel carefully without pulling on the wires.
- Use the small flat-blade screwdriver to press the connector locking tab, then unplug the switch.
- Remove the two exposed screws with the 7mm socket and ratchet.
Step 3: Remove the remaining door-panel screw
- Use the plastic pick tool to remove the reflector or cover near the rear edge of the door panel.
- Remove the screw behind it with the 7mm socket and ratchet.
Step 4: Release the door-panel clips
- Insert the plastic trim removal tool between the lower door panel and the metal door.
- Pry beside each retaining clip until it releases.
- Continue around the lower and side edges. Pull close to each clip instead of bending the panel.
- Firm and controlled beats fast and broken.
Step 5: Lift off the door panel
- Use both hands to lift the panel straight upward and unhook it from the window ledge.
- Support the panel instead of allowing it to hang from its cables.
- Use the plastic pick tool to release the interior handle cable from its bracket.
- Unplug any remaining connectors by pressing their locking tabs with the small flat-blade screwdriver.
Step 6: Remove the triangular mirror trim
- Use the plastic trim removal tool to pull the triangular interior trim panel straight away from the door.
- Work around its edges gently so the retaining tabs remain intact.
Step 7: Disconnect the mirror wiring
- Locate the mirror connector inside the forward upper section of the door using the flashlight.
- Press its locking tab with the small flat-blade screwdriver and separate the connector.
- Release the mirror harness from any retaining clips using the plastic pick tool.
- Pull on the connector body, never on the individual wires.
Step 8: Remove the old mirror
- Hold the mirror securely from outside the door.
- Remove its three mounting screws with the Torx T30 bit socket, extension, and ratchet.
- Remove the upper screws first and the easiest-to-support screw last.
- Feed the electrical harness through the door opening and lift the mirror away.
Step 9: Install the replacement mirror
- Clean the mounting surface with a shop towel. Do not remove or damage the foam sealing gasket.
- Feed the new mirror harness through the door opening.
- Seat the mirror gasket evenly against the outside of the door.
- Start all three mounting screws by hand before tightening any of them.
- Tighten the screws evenly with the Torx T30 bit socket and ratchet.
- Final-tighten each mounting screw with the torque wrench: Torque to 8 Nm (71 in-lbs). youtube.com
Step 10: Reconnect and test the mirror
- Reconnect the mirror plug until its locking tab clicks.
- Temporarily reconnect the window-switch connector.
- Reconnect the negative battery cable with the 10mm wrench.
- Switch the ignition on and test the mirror through its full up, down, left, and right range.
- If the replacement is heated, test heating with the rear-window defroster when conditions permit.
- Switch the ignition off and disconnect the negative battery cable again before finishing assembly.
Step 11: Reinstall the door panel
- Reconnect every electrical connector and reinstall the interior handle cable.
- Position the top of the panel over the window ledge, then lower it into place.
- Align every retaining clip with its hole before pressing around the panel edges by hand.
- Replace any bent or broken clips rather than forcing the panel flat.
- Install the three door-panel screws with the 7mm socket and ratchet. Tighten them snugly without crushing the plastic.
- Reconnect and press the window-switch panel into place.
- Reinstall the handle cover, reflector, and triangular mirror trim by pressing each piece until its clips engage.
Step 12: Reconnect the battery
- Install the negative battery cable with the 10mm wrench.
- Make sure the terminal cannot rotate by hand.
- Remove the painter's tape and wipe fingerprints from the mirror and door.
✅ After Repair
- Operate the mirror in every direction and listen for smooth motor movement.
- Check the window, door lock, interior handle, speaker, and window-switch functions.
- Close the door gently and verify the mirror base remains tight against the door.
- Drive slowly and check for wind noise or mirror vibration.
- Reset the automatic window function if needed: fully lower the window, hold the switch briefly, fully raise it, and hold the switch again.
- Set the mirror only while parked. Adjust it so a small portion of your Escape remains visible at the inside edge.
💰 DIY vs Shop Cost
Shop Cost: $250-$500 USD per mirror, depending on mirror features and paint work
DIY Cost: $60-$150 USD for a typical black replacement assembly and clips
You Save: Approximately $150-$350 by doing it yourself!
Local labor in Sonīpat can vary considerably. This repair generally takes a shop approximately 0.8-1.2 hours.
🎯 Ready to get started?
HowToo makes it easy: same-day/2-day shipping on every part, plus all the tools and specialty tools you need! Check out the parts and tools sections below to add everything to your cart.
