


How to Replace the Serpentine Belt on a 2021 Nissan Rogue 2.5L
Step-by-step 2021 Rogue 2.5L serpentine belt replacement with tools, parts list, safety tips, and DIY cost savings for 2014, 2015, 2016, 2017, 2018, 2019, 2020, 2021
How to Replace the Serpentine Belt on a 2021 Nissan Rogue 2.5L
Step-by-step 2021 Rogue 2.5L serpentine belt replacement with tools, parts list, safety tips, and DIY cost savings for 2014, 2015, 2016, 2017, 2018, 2019, 2020, 2021
🔧 Rogue - Serpentine Belt Replacement
You’ll be replacing the serpentine (drive) belt that runs the alternator, A/C compressor, and other accessories on your Rogue. Over time the belt can crack, glaze, or stretch, which can cause squealing noises or charging problems.
Difficulty Level: Intermediate | Estimated Time: 1–1.5 hours
⚠️ Safety & Precautions
- ⚠️ Always work with the engine off and completely cooled down; moving pulleys can cause serious injury.
- ⚠️ Remove the key/fob from the vehicle and keep it away so the engine cannot be started while you’re working.
- ⚠️ Keep fingers, clothing, and tools clear of all pulleys and fans at all times.
- ⚠️ If you disconnect the negative battery cable, always remove the negative (-) terminal first and reconnect it last.
- ⚠️ Support any plastic engine covers carefully to avoid cracking them when removing or reinstalling.
🔧 Required Tools
You'll need the following tools for this repair:
- 🛠️ 3/8" drive ratchet
- 🛠️ 3/8" drive torque wrench (5–80 ft-lbs range)
- 🛠️ 10mm socket
- 🛠️ 12mm socket
- 🛠️ 14mm socket
- 🛠️ 3/8" drive serpentine belt tool (low-profile) (specialty)
- 🛠️ Short 14mm combination wrench
- 🛠️ Flat trim clip removal tool
- 🛠️ Flathead screwdriver (medium)
- 🛠️ Work light or headlamp
- 🛠️ Mechanic’s gloves
- 🛠️ Safety glasses
🔩 Required Parts
HowToo sells all the parts you need for this repair:
- 🔩 Serpentine (drive) belt – 2.5L engine - Qty: 1
- 🔩 Belt tensioner assembly - Qty: 1 (optional but recommended if noisy or original)
- 🔩 Idler pulley - Qty: 1 (optional, inspect for roughness)
- 🔩 Dielectric grease packet - Qty: 1 (for battery terminals if disconnected)
- 🔩 Plastic push clips for engine cover / splash shield - Qty: 4–6 (in case any break)
📋 Before You Begin
- Park the Rogue on level ground, shift to P, and set the parking brake.
- Open the hood and use the hood prop securely.
- Take a clear photo of the existing belt routing from above and, if possible, from the right side wheel well. This is your backup diagram.
- Battery disconnect is not required for just the belt, but you may disconnect the negative terminal with a 10mm socket if you want extra safety.
🔨 Step-by-Step Instructions
Follow these steps in order:
Step 1: Remove upper engine cover
- Lift off the plastic engine cover by pulling straight up at the corners; it is held by rubber grommets.
- If it feels stuck, gently pry near the grommets with a flathead screwdriver, but do not crack the cover.
- Set the cover aside in a safe place.
Step 2: Improve access from the right side
- Turn the steering wheel fully to the left to open up the right front wheel well area.
- Use the flat trim clip removal tool to pop out the plastic clips holding the small front part of the right inner fender liner and lower splash shield (just enough to fold it back).
- Use a 10mm socket to remove any small bolts at the edge of the splash shield if present.
- Fold the liner/splash shield back carefully to give you a view of the belt and pulleys from the side. This view really helps routing.
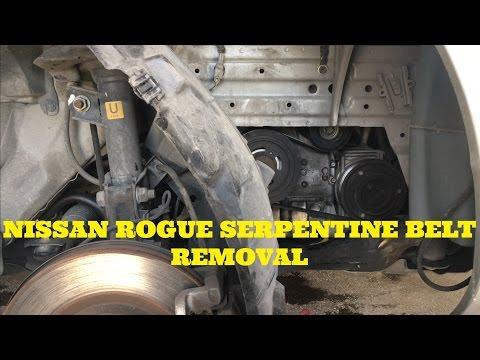
Step 3: Note belt routing
- From the top and side, look at how the belt wraps around each pulley: crankshaft (bottom), alternator, A/C compressor, and idler/tensioner pulleys.
- Compare what you see to the belt routing label under the hood (usually on the radiator support or underside of hood). If present, take another photo of the diagram.
Step 4: Locate the belt tensioner
- From the right side opening, identify the spring-loaded tensioner. It will have a small pulley and a center bolt head, usually 14mm.
- This tensioner keeps the belt tight; you’ll rotate it to release belt tension.
Step 5: Relieve tension from the belt
- Place the 14mm socket on the tensioner pulley bolt, attached to your serpentine belt tool or 3/8" ratchet. A serpentine belt tool is a very flat, long handle that fits in tight spaces.
- Rotate the tensioner in the direction that loosens the belt (usually clockwise when viewed from the passenger side). It will take firm pressure.
- While holding the tensioner rotated, slip the belt off the smoothest and easiest-to-reach pulley (often the idler) with your free hand.
- Slowly release the tensioner back to its resting position.
Step 6: Remove the old belt completely
- From above and from the side, slide the belt off each pulley and pull it out of the engine bay.
- Lay the old belt flat next to the new belt and compare length and number of ribs. They should match closely.
- If the new belt is significantly shorter or has a different rib count, do not install it.
Step 7: Inspect pulleys, tensioner, and idler
- Spin each accessible pulley by hand. It should spin smoothly and quietly, with no grinding or wobble.
- Gently move the tensioner arm by hand; it should move smoothly and spring back with firm force.
- If any pulley feels rough, noisy, or loose, replace that pulley or the tensioner now using a 12mm or 14mm socket as needed. Do it now; it’s the same labor.
Step 8: Route the new belt (initial positioning)
- Using your photos and the routing diagram, start placing the new belt around the lower crankshaft pulley first; make sure all ribs sit in the grooves.
- Then loop it around the A/C compressor and alternator pulleys, leaving the easiest upper pulley (or idler) for last.
- Double-check that each rib is seated in the grooves on every grooved pulley; a rib sitting on top of the edge will cause noise and damage.
Step 9: Apply tension and finish routing
- Again place the 14mm socket and serpentine belt tool or ratchet on the tensioner bolt.
- Rotate the tensioner to the “loose” position to create slack.
- With your other hand, slide the belt over the last pulley you left open.
- Carefully release the tensioner so it takes up the slack and tightens the belt.
Step 10: Final belt alignment check
- From above, look at every pulley and make sure the belt ribs are fully centered in the grooves and not hanging off any edge.
- From the side opening, visually confirm the same thing.
- Gently push on the belt span between two pulleys: you should see a firm deflection, not very loose and not “banjo tight.”
Step 11: Reinstall splash shield and inner fender liner
- Fold the right inner fender liner and splash shield back into place.
- Install any bolts with a 10mm socket and snug them by hand. Torque to about 5–7 Nm (4–5 ft-lbs) – just snug; do not overtighten plastic.
- Reinstall the plastic clips by pushing the bodies in first, then pushing the centers to lock.
Step 12: Reinstall engine cover
- Align the engine cover with the rubber grommets on the top of the engine.
- Press down firmly at each corner until you feel it snap into place.
Step 13: Start engine and inspect
- Make sure all tools are out of the engine bay and the wheel well area is clear.
- Start the engine and let it idle.
- Watch the belt from above; it should run smoothly with no wobble, jumping, or wandering off any pulley.
- Listen for squealing, chirping, or grinding noises. If you hear anything, shut off the engine and recheck routing and pulley condition.
✅ After Repair
- 🧪 Let the engine idle for a few minutes with the A/C on and headlights on; this loads the belt slightly so you can listen for problems.
- 🔍 After a short test drive (5–10 minutes), open the hood again and recheck belt alignment and condition.
- 🔋 If you disconnected the battery, apply a small amount of dielectric grease to the terminals and tighten the 10mm nuts snugly. The radio and window auto-up may need normal re-learning.
- 📅 Note the mileage and date of belt replacement for future maintenance records.
💰 DIY vs Shop Cost
Shop Cost: $250–$380 (parts + labor)
DIY Cost: $40–$90 (belt only) or $90–$180 (belt + tensioner/idler)
You Save: About $160–$250 by doing it yourself!
Shop labor rates vary but typically run $100–$150/hour. This repair takes a shop approximately 1.0–1.2 hours.
🎯 Ready to get started?
HowToo makes it easy: same-day/2-day shipping on every part, plus all the tools and specialty tools you need! Check out the parts and tools sections above to add everything to your cart.
