

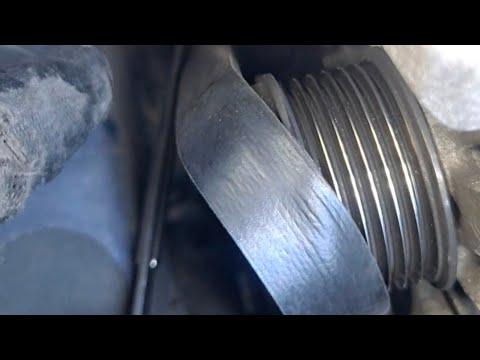





How to Replace the Serpentine Belt on a 2019-2025 Toyota RAV4 Hybrid 2.5L (Engine: Inline 4 2.5L)
Step-by-step belt routing, wheel well access, tools, parts, torque specs, and hybrid safety tips for 2019, 2020, 2021, 2022, 2023, 2024, 2025
How to Replace the Serpentine Belt on a 2019-2025 Toyota RAV4 Hybrid 2.5L (Engine: Inline 4 2.5L)
Step-by-step belt routing, wheel well access, tools, parts, torque specs, and hybrid safety tips for 2019, 2020, 2021, 2022, 2023, 2024, 2025


🔧 RAV4 - Serpentine Belt Replacement
Your RAV4 Hybrid uses a drive belt on the passenger side of the engine. Replacing it means safely accessing the belt through the right-front wheel well, releasing the automatic belt tensioner, removing the old belt, and routing the new belt correctly.
Difficulty Level: Beginner | Estimated Time: 1-2 hours
Assumption: This procedure is for the stock 2.5L hybrid engine layout.
⚠️ Safety & Precautions
- ⚠️ Your RAV4 is a hybrid. Do not touch orange high-voltage cables or high-voltage components.
- ⚠️ Make sure the vehicle is fully OFF, not in READY mode, before working near the belt.
- ⚠️ Keep the key fob at least 15 feet away so the vehicle cannot wake up unexpectedly.
- ⚠️ Disconnect the 12-volt battery negative cable before working near the belt. This prevents accidental engine movement.
- ⚠️ Support the vehicle with jack stands. Never rely on a floor jack alone.
- ⚠️ Let the engine cool before starting. The exhaust and coolant components can stay hot.
🔧 Required Tools
You'll need the following tools for this repair:
- 10mm wrench
- 10mm socket
- 14mm long box-end wrench
- 21mm socket
- 3/8-inch drive ratchet
- Torque wrench rated to 100 ft-lbs
- Flat trim clip removal tool
- Floor jack rated 3-ton minimum
- Jack stands rated 3-ton minimum
- Wheel chocks
- Flashlight
- Mechanic gloves
- Safety glasses
🔩 Required Parts
HowToo sells all the parts you need for this repair:
- Serpentine belt - Qty: 1
- Fender liner push clips - Qty: 2-4
📋 Before You Begin
- Park your RAV4 on level ground.
- Shift to Park and set the parking brake.
- Place wheel chocks behind the rear wheels.
- Open the hood and confirm the dash is completely off, with no READY light showing.
- Remove the key fob from the vehicle area.
- Open the rear cargo area and access the 12-volt battery area.
- Use a 10mm wrench to disconnect the negative 12-volt battery cable.
- Take a belt-routing photo first.
🔨 Step-by-Step Instructions
Follow these steps in order:
Step 1: Raise the Passenger Front Corner
- Use a 21mm socket and 3/8-inch drive ratchet to slightly loosen the passenger front lug nuts before lifting.
- Use a floor jack rated 3-ton minimum at the proper front jacking point to raise the passenger side.
- Place a jack stand rated 3-ton minimum under the proper support point.
- Lower the vehicle gently onto the jack stand.
- Use a 21mm socket to remove the lug nuts and remove the passenger front wheel.
Step 2: Remove the Passenger-Side Splash Shield Access Panel
- Use a flat trim clip removal tool to remove the plastic push clips from the inner fender liner.
- Use a 10mm socket and 3/8-inch drive ratchet to remove any 10mm fasteners holding the lower splash shield or access flap.
- Pull the liner or access flap back enough to see the belt and pulleys.
- A pulley is a round wheel the belt wraps around.
- Do not force old plastic clips.
Step 3: Inspect and Record the Belt Routing
- Use a flashlight to look at how the belt wraps around each pulley.
- Take a clear photo with your phone before removing the belt.
- Make sure you can identify the smooth pulleys and grooved pulleys.
- The grooved side of the belt rides on grooved pulleys. The smooth back side of the belt rides on smooth pulleys.
Step 4: Release the Belt Tensioner
- The tensioner is a spring-loaded arm that keeps the belt tight automatically.
- Place a 14mm long box-end wrench on the tensioner pulley bolt.
- Slowly rotate the tensioner to relieve belt tension.
- While holding the tensioner released, slide the belt off the easiest upper pulley or smooth idler pulley.
- Slowly let the tensioner return to its resting position.
- Move slowly; the spring is strong.
Step 5: Remove the Old Belt
- Use your hands and mechanic gloves to pull the old belt out through the wheel well opening.
- Check the old belt for cracks, missing ribs, glazing, or frayed edges.
- Spin the visible pulleys by hand. They should feel smooth and quiet.
- If a pulley feels rough, wobbly, or noisy, it should be repaired before installing the new belt.
Step 6: Install the New Belt
- Route the new serpentine belt around the lower pulleys first using your routing photo.
- Use your flashlight to confirm every rib is seated in the pulley grooves.
- Leave the easiest upper smooth pulley or idler pulley for last.
- Use the 14mm long box-end wrench to rotate the tensioner again.
- Slip the belt over the final pulley.
- Slowly release the tensioner until it tightens the belt.
- Never pry the belt on.
Step 7: Verify Belt Alignment
- Use a flashlight to inspect every pulley from above and through the wheel well.
- Make sure the belt is centered on each pulley.
- Make sure no belt ribs are hanging off the edge of any grooved pulley.
- If the belt is not seated correctly, use the 14mm long box-end wrench to release the tensioner and reposition it.
Step 8: Reinstall the Splash Shield and Wheel
- Reposition the fender liner or splash shield by hand.
- Use a flat trim clip removal tool to help guide the plastic clips back into place.
- Use a 10mm socket and 3/8-inch drive ratchet to reinstall any 10mm fasteners snugly.
- Install the passenger front wheel by hand-starting the lug nuts.
- Use a 21mm socket to snug the lug nuts in a star pattern.
- Raise the vehicle slightly with the floor jack rated 3-ton minimum, remove the jack stand rated 3-ton minimum, and lower the vehicle fully.
- Use a torque wrench rated to 100 ft-lbs and 21mm socket to tighten the lug nuts to Torque to 103 Nm (76 ft-lbs).
Step 9: Reconnect the 12-Volt Battery
- Use a 10mm wrench to reconnect the negative 12-volt battery cable.
- Tighten the terminal securely, but do not overtighten it.
- Confirm the cable cannot twist loose by hand.
✅ After Repair
- Start your RAV4 and confirm there are no warning lights related to the hybrid system.
- Let the engine run when it cycles on and listen for squealing, chirping, or slapping sounds.
- Turn the vehicle OFF and recheck belt alignment with a flashlight.
- Drive gently for 5-10 minutes, then recheck for noise.
- If the belt walks off a pulley, shut the vehicle off immediately and inspect pulley alignment.
💰 DIY vs Shop Cost
Shop Cost: $180-$320 (parts + labor)
DIY Cost: $35-$80 (parts only)
You Save: $145-$240 by doing it yourself!
Shop labor rates vary but typically run $100-$150/hour. This repair takes a shop approximately 0.8-1.3 hours.
🎯 Ready to get started?
HowToo makes it easy: same-day/2-day shipping on every part, plus all the tools and specialty tools you need! Check out the parts and tools sections below to add everything to your cart.