

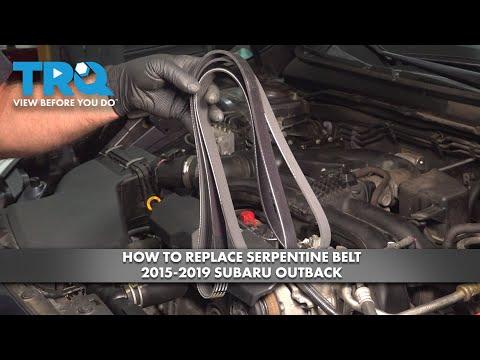





How to Replace the Serpentine Belt on a 2019-2025 Subaru Ascent (Trim: Limited | Engine: Flat 4 2.4L)
Step-by-step belt routing, tensioner release, required tools, and safety checks for 2019, 2020, 2021, 2022, 2023, 2024
How to Replace the Serpentine Belt on a 2019-2025 Subaru Ascent (Trim: Limited | Engine: Flat 4 2.4L)
Step-by-step belt routing, tensioner release, required tools, and safety checks for 2019, 2020, 2021, 2022, 2023, 2024


🔧 Ascent - Serpentine Belt Replacement
This is a manageable first belt job, and the replacement belt is already showing in the parts sidebar. You’ll remove the small belt cover, release the automatic tensioner, copy the original routing, and carefully seat the new belt in every pulley groove.
Difficulty Level: Intermediate | Estimated Time: 30-60 minutes
Assumption: This procedure covers replacing the belt only, not the tensioner assembly.
⚠️ Safety & Precautions
- ⚠️ Let the engine cool completely before reaching near the belt and pulleys.
- ⚠️ Keep the ignition off and move the key away from your Ascent.
- ⚠️ The tensioner contains a strong spring. Keep a firm grip and let it return slowly.
- ⚠️ Never place your fingers between the belt and a pulley while moving the tensioner.
- ⚠️ Do not run the engine until all tools are removed from the engine compartment.
- 🔋 Battery disconnection is not normally required for this repair.
🔧 Required Tools
You'll need the following tools for this repair:
- Slim 17mm box-end wrench
- 14mm socket
- 3/8-inch drive long-handled ratchet
- 10mm socket
- 3/8-inch drive ratchet
- Plastic trim clip remover
- Flat-blade screwdriver
- Telescoping inspection mirror
- LED work light
- Mechanic gloves
- Safety glasses
A box-end wrench is the closed-ring end of a combination wrench. Its thin shape helps it reach the tensioner in the tight space behind the belt.
🔩 Required Parts
HowToo sells all the parts you need for this repair:
- Serpentine belt - Qty: 1
- Belt-cover clips - Qty: As needed if damaged
Replace the tensioner only if its pulley is loose, rough, leaking, or the arm cannot hold steady tension.
📋 Before You Begin
- 📋 Park your Ascent on level ground, select Park, and engage the parking brake.
- 📋 Open the hood and wait until the engine and pulleys are cool.
- 📋 Photograph the existing belt routing from several angles before removing anything.
- 📋 Compare the new and old belts for the same rib count and approximately the same working length.
- 📋 No infotainment service mode or scan-tool command is required.
🔨 Step-by-Step Instructions
Follow these steps in order:
Step 1: Remove the belt cover
- Use the 10mm socket and 3/8-inch drive ratchet to remove the small fasteners securing the plastic belt cover.
- If plastic retainers are present, lift their center pins gently with the plastic trim clip remover.
- Use the flat-blade screwdriver only if a clip cannot be lifted with the trim tool.
- Remove the cover and store its fasteners together.
Step 2: Record the belt routing
- Use the LED work light and telescoping inspection mirror to inspect the complete belt path.
- Photograph how the belt passes over grooved and smooth pulleys.
- The ribbed side of the belt must contact grooved pulleys. The smooth back of the belt runs against smooth pulleys.
- A routing photo beats a good memory.
Step 3: Inspect the tensioner engagement point
- Locate the spring-loaded tensioner beside the accessory belt.
- Fit the slim 17mm box-end wrench completely over the cast tensioner hex.
- If your tensioner instead has a 14mm service hex, use the 14mm socket and long-handled 3/8-inch ratchet.
- Do not turn or loosen the pulley’s retaining bolt. You are moving the complete tensioner arm against its spring.
Step 4: Release the belt tension
- Use the fitted 17mm box-end wrench or 14mm socket and long-handled ratchet to rotate the tensioner smoothly until the belt becomes loose.
- Hold the tool firmly in that position.
- With your other hand safely away from pinch points, slip the belt off the easiest accessible smooth pulley.
- Slowly return the tensioner to its resting position. Never let it snap back.
Step 5: Remove and inspect the old belt
- Remove the belt from the remaining pulleys by hand.
- Check it for missing ribs, cracks, polished edges, oil contamination, or separated rubber.
- Turn each accessible pulley by hand while wearing mechanic gloves.
- Stop the repair if a pulley grinds, wobbles, binds, or has obvious side-to-side movement.
- Watch for engine-oil or coolant leaks. A new belt won’t survive long if it gets soaked.
Step 6: Route the new belt
- Route the new belt by hand using your photographs as the guide.
- Start around the lower and least-accessible pulleys, leaving an easy smooth pulley until last.
- Use the LED work light and telescoping inspection mirror to confirm every rib is inside its matching groove.
- Keep the belt flat. Do not twist it or force it over a pulley with a screwdriver.
Step 7: Install the belt over the final pulley
- Rotate the tensioner again with the 17mm box-end wrench or 14mm socket and long-handled ratchet.
- Slip the belt over the final smooth pulley by hand.
- Slowly release the tensioner while watching the belt settle into position.
- Remove the wrench or ratchet only after the tensioner has fully returned.
Step 8: Check every pulley
- Use the LED work light and telescoping inspection mirror to inspect the belt from above and below.
- Verify that no rib hangs over a pulley edge.
- Confirm the belt follows exactly the same path shown in your original photographs.
- If anything looks questionable, release the tensioner and reseat the belt before starting the engine.
Step 9: Reinstall the belt cover
- Position the plastic belt cover without trapping or touching the belt.
- Install its bolts by hand first, then snug them using the 10mm socket and 3/8-inch drive ratchet.
- Reinstall the plastic retainers by hand and press their center pins flush.
- Do not overtighten small plastic-cover fasteners.
✅ After Repair
- ✅ Remove every tool, loose fastener, and rag from the engine compartment.
- ✅ Start the engine and observe the belt from a safe distance for 15-30 seconds.
- ✅ The belt should remain centered without jumping, wandering, or whipping.
- ✅ Shut the engine off immediately if the belt chirps, squeals, walks sideways, or appears misaligned.
- ✅ Turn on the headlights and rear defroster, then listen for abnormal belt noise under electrical load.
- ✅ Recheck the belt alignment after a short drive and again after the engine cools.
💰 DIY vs Shop Cost
Shop Cost: Approximately ₹8,000-₹18,000, depending on local parts and labor
DIY Cost: Approximately ₹2,500-₹7,000 for the belt and any needed tools
You Save: Approximately ₹5,500-₹11,000 by doing it yourself!
Local labor rates vary. This repair typically takes a shop approximately 0.5-1.0 hour.
🎯 Ready to get started?
The correct belt aisle is open in the parts sidebar for your Ascent. HowToo makes it easy with the matched parts plus the long-reach belt tools you may need for the tight tensioner access.