


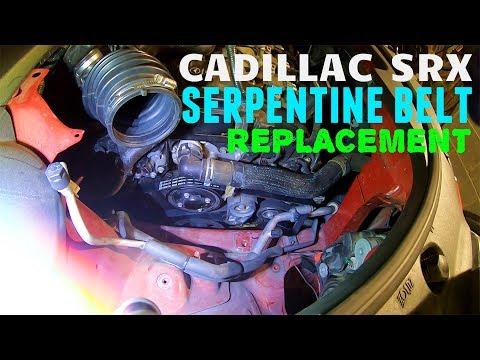







How to Replace the Serpentine Belt on a 2019-2025 Cadillac XT4
Step-by-step DIY instructions with required tools, belt routing, and safety tips for 2019, 2020, 2021, 2022, 2023, 2024, 2025
How to Replace the Serpentine Belt on a 2019-2025 Cadillac XT4
Step-by-step DIY instructions with required tools, belt routing, and safety tips for 2019, 2020, 2021, 2022, 2023, 2024, 2025


🔧 XT4 - Serpentine Belt Replacement
This is a straightforward belt-only repair if the tensioner and pulleys are still healthy. You’ll release the spring-loaded tensioner, remove the old belt, route the new belt, and slowly restore tension.
Assumption: This procedure covers the main accessory-drive belt without replacing the tensioner or pulleys.
Difficulty Level: Beginner to Intermediate | Estimated Time: 30-60 minutes
⚠️ Safety & Precautions
- 🧊 Let the engine cool completely before reaching between the engine and body.
- 🔑 Keep the key away from the XT4 so nobody can start the engine.
- 🛑 Never place your fingers between the belt and a pulley while the tensioner is loaded.
- ⚙️ Move the tensioner slowly. Its spring pressure is strong and can snap the tool backward.
- 🔋 A battery disconnect normally isn’t required because no electrical connectors are being opened.
🔧 Required Tools
You'll need the following tools for this repair:
- Long-reach serpentine belt tool with 15mm and square-drive adapters
- 3/8-inch-drive ratchet
- 3/8-inch-drive extension set
- Flat-blade trim removal tool
- Bright LED work light
- Mechanic's gloves
- Safety glasses
🔩 Required Parts
HowToo sells all the parts you need for this repair:
- 5-rib serpentine belt - Qty: 1
I’d use the vehicle-specific reinforced belt highlighted in the parts list. The long-reach belt-tool kit is also worth having because access is tight. Your knuckles will appreciate the investment.
📋 Before You Begin
- 🅿️ Park your XT4 on level ground, select Park, and apply the parking brake.
- 🌡️ Open the hood and wait until the engine and exhaust components are cool.
- 📸 Photograph the original belt routing and locate the factory routing diagram under the hood.
- 🔍 Compare the new and old belts. The new belt must have the same rib count and nearly identical length.
- 🧭 Note which pulleys are grooved and which are smooth. Belt ribs ride on grooved pulleys; the flat back rides on smooth pulleys.
🔨 Step-by-Step Instructions
Follow these steps in order:
Step 1: Open the Working Area
- Use the flat-blade trim removal tool to release any removable intake duct or upper cover fasteners blocking belt access.
- Move only the pieces necessary to see the belt, tensioner, and upper pulleys.
- Use the bright LED work light to identify the tensioner and check the factory routing diagram.
Step 2: Inspect the Existing Routing
- Follow the belt around every pulley and compare it with the underhood diagram.
- Use your phone to take clear pictures from more than one angle.
- Check whether the belt ribs sit nearest the engine or nearest the fender at each pulley.
- A routing photo beats a good memory.
Step 3: Release Belt Tension
- Fit the correct adapter from the long-reach serpentine belt tool securely onto the tensioner’s release point.
- Use the adapter that fully seats without looseness. Do not force an undersized or oversized adapter.
- Rotate the tool in the direction that moves the tensioner pulley away from the belt.
- Hold the tool securely against the spring pressure.
- Do not loosen the center bolt of the tensioner pulley. You’re rotating the complete spring-loaded arm, not removing the pulley.
Step 4: Remove the Old Belt
- While holding the long-reach serpentine belt tool, slide the belt off the easiest accessible smooth pulley.
- Slowly return the tensioner to its resting position. Never let it snap back.
- Remove the tool and work the belt out from around the remaining pulleys.
- Avoid pulling on nearby hoses, wiring, or electrical connectors.
Step 5: Inspect the Pulleys and Tensioner
- Use your gloved hand to rotate each accessible idler pulley and tensioner pulley.
- Replace any pulley that feels rough, binds, wobbles, or makes a dry grinding sound.
- Inspect the tensioner for cracking, excessive side movement, or a crooked pulley.
- Look for oil or coolant contamination. Fix the leak before installing the new belt.
Step 6: Route the New Belt
- Route the new belt according to the factory diagram and your photographs.
- Leave the easiest accessible smooth pulley until last.
- Seat every rib inside its matching pulley groove. The belt must not hang over any pulley edge.
- Use the bright LED work light to inspect the lower pulleys carefully.
Step 7: Reapply Tension
- Place the long-reach serpentine belt tool back on the tensioner.
- Rotate the tensioner far enough to slip the belt over the final smooth pulley.
- Keep your fingers away from the space between the belt and pulley.
- Slowly release the tensioner until it applies full spring pressure to the belt.
Step 8: Verify Belt Alignment
- Remove the long-reach serpentine belt tool.
- Use the bright LED work light to check every visible pulley.
- Confirm the ribs are centered in all grooved pulleys and the belt is centered on every smooth pulley.
- Reinstall any intake duct or cover using the flat-blade trim removal tool where appropriate.
- No fastener torque is required for a belt-only replacement because the tensioner and pulleys remain installed.
✅ After Repair
- 👀 Remove every tool from the engine compartment before starting the engine.
- ▶️ Start the engine and observe the belt from a safe distance for 20-30 seconds.
- 🔄 Shut the engine off immediately if the belt wanders, flaps heavily, squeals, or rides off-center.
- 🔍 Turn the engine off and perform one final alignment inspection.
- 🧰 If noise remains, inspect the tensioner, idler pulleys, and accessory pulleys instead of applying belt dressing.
💰 DIY vs Shop Cost
Shop Cost: ₹4,000-₹9,000 including parts and labor
DIY Cost: ₹600-₹3,500 for the belt, plus any needed tool
You Save: Approximately ₹2,000-₹6,000 by doing it yourself!
Local labor and imported-part pricing vary. A workshop typically allows about 0.5-1.0 labor hour.
🎯 Ready to get started?
HowToo makes it easy: same-day/2-day shipping on every part, plus all the tools and specialty tools you need! Check out the parts and tools sections below to add everything to your cart.
