


How to Replace the Serpentine Belt on a 2018-2023 Chevrolet Traverse (Engine: V6 3.6L)
Step-by-step DIY guide with belt routing tips, tools, parts, safety checks, and cost savings for 2018, 2019, 2020, 2021, 2022, 2023
How to Replace the Serpentine Belt on a 2018-2023 Chevrolet Traverse (Engine: V6 3.6L)
Step-by-step DIY guide with belt routing tips, tools, parts, safety checks, and cost savings for 2018, 2019, 2020, 2021, 2022, 2023
🔧 Traverse - Serpentine Belt Replacement
The serpentine belt drives important engine accessories like the alternator, water pump, and A/C compressor. On your Traverse, the belt is spring-tensioned, so replacement mainly involves relieving tension, removing the old belt, routing the new belt correctly, and checking pulley alignment.
Difficulty Level: Beginner | Estimated Time: 0.5-1.0 hours
⚠️ Safety & Precautions
- ⚠️ Work only with the engine completely off and cool.
- ⚠️ Keep fingers, hair, sleeves, and tools away from the belt path.
- ⚠️ Disconnect the negative battery cable before working near the belt. This helps prevent accidental engine cranking.
- ⚠️ Never pry on the belt tensioner or pulleys. The tensioner is spring-loaded and can snap back quickly.
- ⚠️ Support the hood securely before reaching into the engine bay.
🔧 Required Tools
You'll need the following tools for this repair:
- 10mm socket
- 3/8-inch drive ratchet
- 3/8-inch drive serpentine belt tool
- 15mm socket
- Flashlight
- Mechanic gloves
- Safety glasses
🔩 Required Parts
HowToo sells all the parts you need for this repair:
- Serpentine belt - Qty: 1
📋 Before You Begin
- Park your Traverse on level ground.
- Shift to Park and set the parking brake.
- Open the hood and let the engine cool fully.
- Take a clear photo of the belt routing before removal. This is your backup reference.
- Look for a belt-routing decal under the hood. If present, follow that routing exactly.
- A serpentine belt tool is a long, thin handle used to move the belt tensioner in tight engine bays.
🔨 Step-by-Step Instructions
Follow these steps in order:
Step 1: Disconnect the Battery
- Use a 10mm socket and 3/8-inch drive ratchet to loosen the negative battery cable nut.
- Remove the negative cable from the battery post and position it so it cannot spring back onto the terminal.
- Negative cable is usually black.
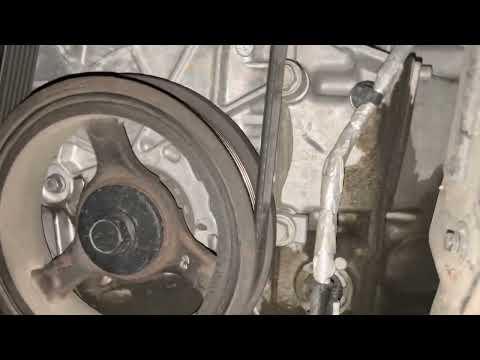
Step 2: Locate the Belt and Tensioner
- Use a flashlight to look at the passenger side of the engine compartment where the serpentine belt runs around the pulleys.
- Find the automatic belt tensioner. The tensioner is a spring-loaded arm with a pulley that keeps the belt tight.
- Identify the square drive hole or bolt head on the tensioner arm.
Step 3: Record the Belt Routing
- Use your phone or flashlight to clearly view the belt path.
- Compare the belt path to the under-hood routing decal if equipped.
- If there is no decal, make a quick drawing before removing the belt.
- One wrong pulley groove can shred the belt.
Step 4: Release Belt Tension
- Fit the 3/8-inch drive serpentine belt tool into the tensioner square drive, or use a 15mm socket on the tensioner bolt if that style is fitted.
- Slowly rotate the tensioner away from the belt to remove belt tension.
- Hold the tensioner steady. Do not let it snap back.
- Slide the belt off the easiest smooth pulley first, usually an idler pulley.
Step 5: Remove the Old Belt
- Use your hands with mechanic gloves to pull the old belt out of the pulley path.
- Work slowly around the engine accessories until the belt is fully removed.
- Do not force the belt past wiring, hoses, or plastic covers.
Step 6: Inspect the Pulleys
- Use a flashlight to check each pulley for cracks, wobble, missing grooves, or stuck rubber pieces.
- Spin the smooth idler pulleys by hand. They should spin smoothly and quietly.
- If a pulley feels rough, loose, or noisy, it should be replaced before installing the new belt.
- A bad pulley can ruin a new belt fast.
Step 7: Install the New Belt
- Route the new serpentine belt around the crankshaft pulley first. The crankshaft pulley is the large lower pulley that drives the belt.
- Follow the belt-routing decal or your photo exactly.
- Keep the ribbed side of the belt on grooved pulleys.
- Keep the smooth back side of the belt on smooth pulleys.
- Leave the easiest smooth idler pulley for last.
Step 8: Reapply Tension
- Use the 3/8-inch drive serpentine belt tool or 15mm socket to rotate the tensioner again.
- Slip the belt over the final pulley.
- Slowly release the tensioner until it presses against the belt.
- Do not release the tool suddenly.
Step 9: Verify Belt Seating
- Use a flashlight to inspect every pulley.
- Make sure the belt ribs sit fully inside the pulley grooves.
- Confirm the belt is centered on smooth pulleys.
- If the belt is off by even one groove, use the 3/8-inch drive serpentine belt tool to release tension and reposition it.
Step 10: Reconnect the Battery
- Install the negative battery cable back onto the battery post.
- Use a 10mm socket and 3/8-inch drive ratchet to tighten the cable clamp snugly.
- Do not overtighten the battery terminal.
✅ After Repair
- Start your Traverse and let it idle for 30-60 seconds.
- Watch the belt from a safe distance. It should run straight and smooth.
- Listen for squealing, chirping, slapping, or grinding noises.
- Turn the A/C on and off once to confirm the belt stays stable under load.
- Shut the engine off and recheck belt seating with a flashlight.
- If the belt walks sideways, squeals, or jumps grooves, stop driving and recheck pulley alignment and routing.
💰 DIY vs Shop Cost
Shop Cost: $160-$280 (parts + labor)
DIY Cost: $35-$75 (parts only)
You Save: $125-$205 by doing it yourself!
Shop labor rates vary but typically run $100-$150/hour. This repair takes a shop approximately 0.5-1.0 hours.
🎯 Ready to get started?
HowToo makes it easy: same-day/2-day shipping on every part, plus all the tools and specialty tools you need! Check out the parts and tools sections below to add everything to your cart.
