

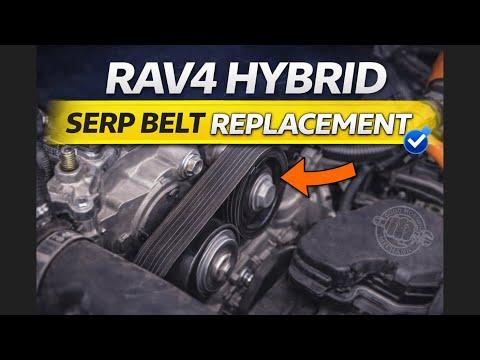





How to Replace the Serpentine Belt on a 2017 Toyota RAV4
Step-by-step instructions with tools, parts, safety tips, and final inspection guidance for 2009, 2010, 2011, 2012, 2013, 2014, 2015, 2016, 2017, 2018
How to Replace the Serpentine Belt on a 2017 Toyota RAV4
Step-by-step instructions with tools, parts, safety tips, and final inspection guidance for 2009, 2010, 2011, 2012, 2013, 2014, 2015, 2016, 2017, 2018


🔧 Serpentine Belt - Replacement
Your RAV4 Hybrid uses an accessory drive belt to spin the engine-driven accessories. Replacing it means releasing the belt tension, removing the old belt, and routing the new one exactly the same way.
Difficulty Level: Intermediate | Estimated Time: 1-2 hours
⚠️ Safety & Precautions
- Keep hands and tools clear of the belt path while releasing tension.
- Do not work near the belt with the hybrid system awake. Power the vehicle fully off and keep the key fob away.
- Let the engine and nearby components cool before starting.
- No battery disconnect is normally required for this job.
- Take a belt-routing photo first.
🔧 Required Tools
You'll need the following tools for this repair:
- Ratchet
- 14mm socket
- Breaker bar
- Serpentine belt tool (specialty)
- Flashlight
- Gloves
- Safety glasses
- Wheel chocks
🔩 Required Parts
HowToo sells all the parts you need for this repair:
- Accessory drive belt - Qty: 1
📋 Before You Begin
- Park on level ground.
- Set the parking brake.
- Let the hybrid power system shut fully down.
- Open the hood and locate the belt routing path before removing anything.
🔨 Step-by-Step Instructions
Follow these steps in order:
Step 1: Access the belt area
- Open the hood and locate the accessory drive belt on the front of the engine.
- Use a flashlight to trace the belt routing around the pulleys.
- Take a clear photo for reference.
Step 2: Release belt tension
- Use a serpentine belt tool (specialty) or breaker bar with the 14mm socket on the belt tensioner hex.
- Rotate the tensioner slowly to relieve belt tension.
- Hold the tensioner steady while slipping the belt off one smooth pulley.
Step 3: Remove the old belt
- Release the tensioner fully and remove the belt from all pulleys.
- Inspect the old belt for cracks, missing ribs, glazing, or frayed edges.
- If you find pulley damage or rough bearing noise, stop and repair that first.
Step 4: Compare and route the new belt
- Compare the new belt to the old one for length and rib count.
- Route the new belt around all pulleys except the easiest final pulley to reach.
- Make sure the ribs sit squarely in every grooved pulley.
- Keep the belt fully seated in every groove.
Step 5: Install the new belt
- Use the serpentine belt tool (specialty) or breaker bar to rotate the tensioner again.
- Slip the belt onto the last pulley while keeping tension controlled.
- Slowly release the tensioner and confirm the belt stays centered on every pulley.
- No torque spec applies to the belt itself. If you removed any tensioner or pulley bolts, torque them to factory specification.
Step 6: Final inspection
- Visually inspect the belt routing one more time.
- Check that the belt is not riding off-center on any pulley.
- Make sure no tools are left in the engine bay.
✅ After Repair
- Start the vehicle and listen for squealing or chirping.
- Watch the belt for smooth movement.
- Shut it off and recheck belt tracking after a short run.
- If the belt walks off a pulley or makes noise, recheck routing and tensioner operation.
💰 DIY vs Shop Cost
Shop Cost: $180-$350 (parts + labor)
DIY Cost: $35-$90 (parts only)
You Save: $145-$260 by doing it yourself!
Shop labor rates vary but typically run $100-$150/hour. This repair takes a shop approximately 1-2 hours.
🎯 Ready to get started?
HowToo makes it easy: same-day/2-day shipping on every part, plus all the tools and specialty tools you need! Check out the parts and tools sections below to add everything to your cart.