
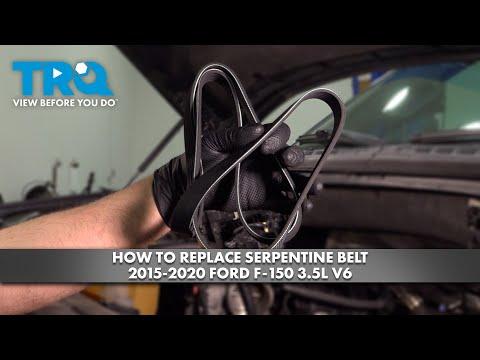





How to Replace the Serpentine Belt on a 2017-2026 Ford F-150 (Engine: V6 3.5L)
Step-by-step main drive belt routing, tools, installation, and safety tips for 2017, 2018, 2019, 2020, 2021, 2022, 2023, 2024, 2025, 2026
How to Replace the Serpentine Belt on a 2017-2026 Ford F-150 (Engine: V6 3.5L)
Step-by-step main drive belt routing, tools, installation, and safety tips for 2017, 2018, 2019, 2020, 2021, 2022, 2023, 2024, 2025, 2026


🔧 F-150 - Serpentine Belt Replacement
This is a manageable driveway repair. You’ll release the automatic tensioner, remove the main serpentine belt, route the new belt, and carefully restore tension.
Your F-150 has more than one drive belt. This procedure covers the long main serpentine belt on the inner pulley grooves. The shorter outer belt is a stretch-fit belt and stays installed unless you’re replacing it too. Ford’s routing information confirms the long and short belt arrangement. fordservicecontent.com
Difficulty Level: Intermediate | Estimated Time: 1-2 hours
⚠️ Safety & Precautions
- ⚠️ Let the engine cool completely. Your hands will be close to the fan and pulleys.
- ⚠️ Keep the ignition off and the key away from the truck.
- ⚠️ Disconnect the negative battery cable before reaching into the belt drive.
- ⚠️ Never place any part of your body under the F-150 supported only by a floor jack.
- ⚠️ Don’t rotate the tensioner farther than needed. Excess travel can damage its internal spring.
🔧 Required Tools
You'll need the following tools for this repair:
- 15mm shallow socket
- 3/8-inch drive long-handle ratchet
- 3/8-inch drive serpentine belt tool (specialty)
- 8mm socket
- 10mm socket
- Plastic trim-clip removal tool
- Flat-blade screwdriver
- Floor jack rated 3-ton minimum
- Jack stands rated 3-ton minimum
- Wheel chocks
- Work light
- Mechanic gloves
- Safety glasses
🔩 Required Parts
HowToo sells all the parts you need for this repair:
- Main serpentine belt - Qty: 1
- Lower splash-shield clips - Qty: As needed
Several belt lengths appear in the vehicle-scoped catalog because this engine uses separate drive belts. Match the replacement to the long main belt, not the shorter outer stretch-fit belt.
📋 Before You Begin
- Park on level pavement, shift into Park, engage the parking brake, and chock both rear wheels.
- Open the hood and photograph the original belt routing. Ford also provides a routing diagram in the owner’s manual. fordservicecontent.com
- Disconnect the negative battery cable using the 10mm socket. Position it where it can’t spring back onto the terminal.
- If additional access is needed, lift the front using the 3-ton floor jack and support it securely with 3-ton jack stands.
- Compare the old and new belts before installation. Rib count and effective length must match.
🔨 Step-by-Step Instructions
Follow these steps in order:
Step 1: Remove the Lower Splash Shield
- Put on safety glasses and illuminate the work area with the work light.
- Use the 8mm socket, 10mm socket, or plastic trim-clip removal tool as appropriate for the fasteners installed on your shield.
- Support the shield with one hand while removing its final fastener.
- Keep the fasteners arranged by location so they return to the same holes.
Step 2: Identify the Main Belt
- Locate the long belt running in the pulley grooves closest to the engine. The shorter outer belt isn’t removed for this job. fordservicecontent.com
- Compare the installed routing with your photograph and Ford’s under-hood or owner-manual diagram.
- Check which pulleys are ribbed and which are smooth. The belt’s ribbed side contacts ribbed pulleys, while its flat back contacts smooth pulleys.
Step 3: Release Belt Tension
- Fit the 15mm shallow socket and long-handle ratchet onto the automatic belt tensioner.
- An automatic tensioner is the spring-loaded arm that keeps the belt tight as it wears.
- Rotate the tensioner counterclockwise slowly to remove tension from the belt. The 15mm tensioner drive and counterclockwise release direction are documented for this EcoBoost belt arrangement. youtube.com
- While holding the tensioner, slide the belt off an easy-to-reach smooth pulley.
- Slowly return the tensioner to its resting position. Don’t let it snap back.
Step 4: Remove the Old Belt
- Work the belt off each remaining pulley by hand.
- Guide it around the fan and hoses without forcing or cutting it.
- Leave the short outer stretch-fit belt in place.
- Compare the old belt with the replacement. The new belt may be slightly shorter because the old one has stretched.
Step 5: Inspect the Belt Drive
- Spin each accessible idler pulley by hand. It should turn smoothly without grinding, wobbling, or excessive side play.
- Move the tensioner through part of its travel using the 15mm socket. It should move smoothly and return firmly.
- Inspect pulley grooves with the work light. Remove embedded rubber or debris with the flat-blade screwdriver without damaging the grooves.
- Repair any coolant or oil leak before installing the new belt. Fluid contamination can quickly ruin it.
Step 6: Route the New Belt
- Route the new belt around every pulley except one easy-to-reach smooth pulley.
- Keep the belt in the inner pulley grooves closest to the engine. fordservicecontent.com
- Use your photograph and Ford’s routing diagram rather than relying on memory.
- Confirm that every rib sits inside a matching groove. One rib hanging over an edge will shred a fresh belt surprisingly fast.
- Leave the easiest smooth pulley until last.
Step 7: Install the Belt Over the Final Pulley
- Place the 15mm shallow socket and long-handle ratchet back on the tensioner.
- Rotate the tensioner counterclockwise and slide the belt over the final smooth pulley.
- Keep your fingers away from the gap between the belt and pulley.
- Release the tensioner slowly until it applies full belt tension.
- No engine-component torque specification applies because the tensioner and pulleys aren’t removed during a belt-only replacement.
Step 8: Verify the Installation
- Use the work light to inspect every pulley from above and below.
- Confirm the belt is centered on every smooth pulley and fully seated in every ribbed pulley.
- Make sure the belt isn’t twisted and doesn’t share grooves with the shorter outer belt.
- If it isn’t perfectly seated, release the tensioner again and correct it before starting the engine.
Step 9: Reinstall the Splash Shield
- Raise the shield into position and start every fastener by hand.
- Install its original screws with the 8mm socket or 10mm socket, and install the clips by hand.
- Tighten the small shield fasteners only until secure. Don’t crush the plastic shield.
- Lower the truck only after removing all tools from underneath.
Step 10: Reconnect the Battery
- Reconnect the negative battery cable using the 10mm socket.
- Tighten the terminal until it can’t rotate by hand. Don’t overtighten and damage the battery post.
✅ After Repair
- Stand clear of the belt drive and start the engine.
- Watch the belt briefly from a safe distance. It should track centrally without wandering, flapping, or jumping.
- Turn the air conditioning and headlights on, then listen for chirping, squealing, rattling, or grinding.
- Shut the engine off immediately if the belt walks toward a pulley edge.
- After the engine stops completely, perform one final visual check of every pulley groove.
- A new belt doesn’t require a break-in adjustment because the automatic tensioner controls belt tension.
💰 DIY vs Shop Cost
Shop Cost: $140-$260 (parts + labor)
DIY Cost: $20-$45 (belt only)
You Save: $95-$240 by doing it yourself!
Shop labor rates vary but typically run $100-$150/hour. This repair takes a shop approximately 0.5-1.0 hour.
🎯 Ready to get started?
HowToo makes it easy: same-day/2-day shipping on every part, plus all the tools and specialty tools you need! Check out the parts and tools sections below to add everything to your cart.