

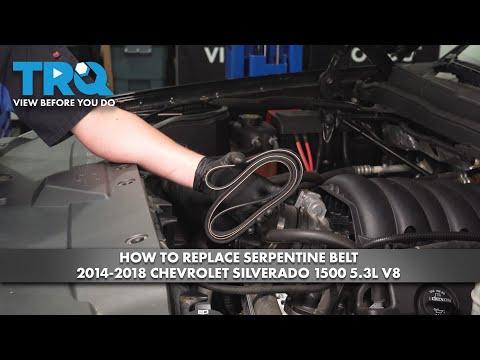







How to Replace the Serpentine Belt on a 2015-2020 Chevrolet Suburban (Engine: V8 5.3L)
Step-by-step DIY instructions with required tools, belt routing, safety tips, and torque specs for 2015, 2016, 2017, 2018, 2019, 2020
How to Replace the Serpentine Belt on a 2015-2020 Chevrolet Suburban (Engine: V8 5.3L)
Step-by-step DIY instructions with required tools, belt routing, safety tips, and torque specs for 2015, 2016, 2017, 2018, 2019, 2020


🔧 Suburban - Serpentine Belt Replacement
This procedure replaces the main accessory-drive belt that operates the alternator, water pump, and other engine accessories. Your Suburban also uses a separate stretch-fit air-conditioning belt; that smaller belt is not removed during this repair.
Difficulty Level: Beginner | Estimated Time: 0.5-1 hour
Assumption: This procedure is for the main serpentine belt, not the smaller A/C stretch belt.
⚠️ Safety & Precautions
- ⚠️ Let the engine cool completely before working near the fan, pulleys, or radiator.
- ⚠️ Keep the ignition off and the key away from the vehicle. The electric cooling fan can operate unexpectedly.
- ⚠️ Never place your fingers between the belt and a pulley.
- ⚠️ The spring-loaded tensioner can snap back forcefully. Maintain control of the breaker bar while releasing it.
- ⚠️ Do not start the engine until every tool has been removed from the engine compartment.
- 🔋 Battery disconnection is not normally required for this repair.
🔧 Required Tools
You'll need the following tools for this repair:
- 1/2-inch-drive breaker bar
- 8mm socket
- 1/4-inch-drive ratchet
- 5 Nm-capable inch-pound torque wrench
- Serpentine belt installation tool (specialty)
- Flat-blade screwdriver, 6-inch
- LED work light
- Mechanic gloves
- Safety glasses
🔩 Required Parts
HowToo sells all the parts you need for this repair:
- Main accessory-drive serpentine belt - Qty: 1
📋 Before You Begin
- 🅿️ Park your Suburban on level ground, shift into Park, apply the parking brake, and switch off the ignition.
- 🌡️ Open the hood and allow the engine to become completely cool.
- 📷 Photograph the existing belt routing. Also locate the factory routing label near the radiator support or fan shroud.
- 🔍 Compare the replacement belt with the old belt before installation. The rib count and approximate length must match.
- 🔧 A tensioner is the spring-loaded arm that keeps the belt tight automatically.
🔨 Step-by-Step Instructions
Follow these steps in order:
Step 1: Remove the Engine Cover
- Put on the mechanic gloves and safety glasses.
- Use both hands to lift the front of the plastic engine cover straight upward and release its rubber retainers.
- Lift the rear of the cover free and place it safely aside. No fasteners are used.
Step 2: Remove the Air-Intake Duct
- Use an 8mm socket and 1/4-inch-drive ratchet to loosen the clamps at the air-filter housing and throttle-body connections.
- If necessary, use a flat-blade screwdriver to release the duct carefully without puncturing it.
- Disconnect any small breather hose attached to the duct by releasing its connector by hand.
- Lift the duct out of the engine compartment. Do not allow dirt to enter the exposed throttle-body opening.
Step 3: Record the Belt Routing
- Use the LED work light to identify every pulley and compare the routing with the under-hood belt diagram.
- Confirm which pulley surfaces are grooved and which are smooth. Belt ribs run on grooved pulleys; the flat belt back runs on smooth pulleys.
- Do not use the smaller A/C stretch belt as part of the main-belt routing.
Step 4: Release Belt Tension
- Insert the 1/2-inch-drive breaker bar fully into the square opening on the main-belt tensioner.
- Rotate the breaker bar against spring pressure until the belt becomes loose.
- While holding the tensioner securely, slide the belt off an easy-to-reach smooth pulley by hand.
- Slowly return the tensioner to its resting position. Do not let it snap back.
- Keep fingers beside pulleys, never between them.
Step 5: Remove the Old Belt
- Use your hands to work the loose belt off each upper pulley.
- Use the serpentine belt installation tool to guide the belt around the fan and out of the lower pulley area without damaging the radiator fins.
- Do not remove the fan or disturb the smaller A/C belt.
Step 6: Inspect the Pulleys and Tensioner
- Use the LED work light to inspect every accessible pulley for damaged grooves, rust, oil, or coolant contamination.
- Turn each accessible idler pulley by hand. It should rotate smoothly without grinding, wobbling, or looseness.
- Move the tensioner through its travel with the 1/2-inch-drive breaker bar. Replace the tensioner if it binds, rattles, sits crooked, or cannot maintain tension.
- Repair any oil or coolant leak before installing the new belt. Fluid quickly damages belt rubber.
Step 7: Route the New Belt
- Use the serpentine belt installation tool and your belt-routing reference to feed the new belt around the fan and onto the crankshaft pulley.
- Route the belt around the remaining pulleys exactly as shown on the factory diagram.
- Leave one easy-to-reach smooth pulley for last.
- Use the LED work light to verify that every belt rib sits inside its matching pulley groove.
- One misplaced rib can destroy the belt.
Step 8: Apply Tension to the New Belt
- Insert the 1/2-inch-drive breaker bar into the tensioner and rotate it against spring pressure.
- Slide the belt over the final smooth pulley by hand.
- Slowly release the tensioner until it applies full tension to the belt.
- Use the LED work light to inspect the entire visible belt path again. The belt must be centered on every pulley.
Step 9: Reinstall the Air-Intake Duct
- Position the intake duct fully over the throttle-body and air-filter housing connections by hand.
- Reconnect the breather hose by hand until its connector locks.
- Use an 8mm socket and 5 Nm-capable inch-pound torque wrench to tighten the intake clamps to 5 Nm (44 in-lbs).
- Check that the duct is seated evenly and is not folded or pinched.
Step 10: Reinstall the Engine Cover
- Align the engine-cover sockets with their rubber retainers.
- Press downward with both hands until the cover is fully seated.
- Use the LED work light to confirm that no tools remain near the belt or fan.
✅ After Repair
- 👀 From a safe distance, start the engine and observe the belt for approximately 30 seconds.
- 👂 Switch off the engine immediately if the belt walks sideways, flaps, squeals continuously, or produces a knocking sound.
- 🔍 Turn off the engine and wait for all moving parts to stop. Recheck that the belt remains centered in every pulley groove.
- ✅ Confirm that the battery warning light remains off and that the engine temperature stays normal.
- 🛣️ After a short drive, shut the engine off and perform one final visual inspection.
💰 DIY vs Shop Cost
Shop Cost: ₹8,000-₹16,000 (parts + labor)
DIY Cost: ₹3,500-₹8,000 (parts only)
You Save: ₹4,500-₹8,000 by doing it yourself!
Local labor and imported-part pricing vary. This repair takes a shop approximately 0.5-1 hour.
🎯 Ready to get started?
HowToo makes it easy: same-day/2-day shipping on every part, plus all the tools and specialty tools you need! Check out the parts and tools sections below to add everything to your cart.