

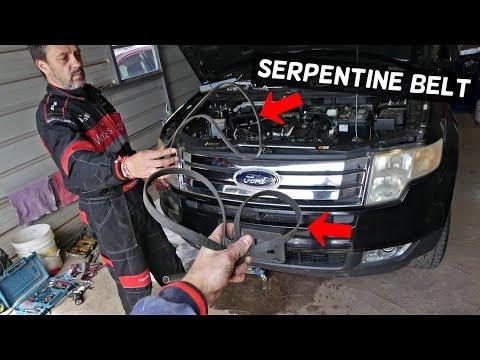







How to Replace the Serpentine Belt on a 2015-2018 Ford Edge (Engine: V6 3.5L)
Step-by-step DIY guide with belt routing tips, tools, safety checks, and cost savings for 2015, 2016, 2017, 2018
How to Replace the Serpentine Belt on a 2015-2018 Ford Edge (Engine: V6 3.5L)
Step-by-step DIY guide with belt routing tips, tools, safety checks, and cost savings for 2015, 2016, 2017, 2018


🔧 Edge - Serpentine Belt Replacement
The serpentine belt drives important accessories on your Edge, including the alternator, A/C compressor, and water pump system components. Replacing it means relieving spring tension from the belt tensioner, removing the old belt, routing the new belt correctly, and confirming it runs straight on every pulley.
Difficulty Level: Beginner | Estimated Time: 0.5-1.0 hour
⚠️ Safety & Precautions
- ⚠️ Work only with the engine completely off and cool.
- ⚠️ Keep fingers, sleeves, hair, and tools away from the belt path and pulleys.
- ⚠️ Disconnecting the battery is not normally required for this repair, but keep the key out of the vehicle so no one can start it.
- ⚠️ Support the hood securely before working near the engine bay.
- ⚠️ If the old belt is shredded or missing ribs, inspect every pulley before installing the new belt.
🔧 Required Tools
You'll need the following tools for this repair:
- 3/8-inch drive ratchet
- 3/8-inch drive serpentine belt tool (specialty)
- 15mm socket
- Flathead screwdriver
- Flashlight
- Mechanic gloves
- Safety glasses
🔩 Required Parts
HowToo sells all the parts you need for this repair:
- Serpentine belt - Qty: 1
📋 Before You Begin
- 🅿️ Park your Edge on level ground, shift to Park, and set the parking brake.
- ❄️ Let the engine cool completely before reaching near the belt area.
- 🔦 Open the hood and use a flashlight to locate the serpentine belt on the passenger side of the engine bay.
- 📝 Take a clear photo of the current belt routing before removal. This helps if the routing sticker is missing or hard to read.
- 📌 A belt tensioner is a spring-loaded arm that keeps the belt tight. You will rotate it briefly to create slack.
🔨 Step-by-Step Instructions
Follow these steps in order:
Step 1: Locate the Belt and Routing Path
- Use the flashlight to view the serpentine belt on the passenger side of the engine.
- Find the belt routing decal under the hood or on the radiator support area.
- If the decal is not visible, use your phone photo as your guide before removing the belt.
- Tip: Grooved pulleys get grooved belt side.
Step 2: Locate the Belt Tensioner
- Use the flashlight to find the belt tensioner pulley. It is the smooth pulley mounted to a spring-loaded arm.
- Look for a square 3/8-inch drive opening or a bolt head on the tensioner arm.
- If your tensioner uses a bolt head, use the 15mm socket with the 3/8-inch drive ratchet.
- If your tensioner has a square drive opening, use the 3/8-inch drive serpentine belt tool.
Step 3: Release Belt Tension
- Put on mechanic gloves and safety glasses.
- Attach the 3/8-inch drive serpentine belt tool or 3/8-inch drive ratchet with 15mm socket to the tensioner.
- Slowly rotate the tensioner away from the belt until the belt becomes loose.
- Hold the tensioner steady. Do not let it snap back.
- A serpentine belt tool is a long, thin handle that gives extra reach in tight engine spaces.
Step 4: Remove the Old Belt
- While holding the tensioner released with the 3/8-inch drive serpentine belt tool or 3/8-inch drive ratchet, slide the belt off the easiest accessible smooth pulley.
- Slowly let the tensioner return to its resting position.
- Remove the old belt from the remaining pulleys by hand.
- If the belt is stuck in a pulley groove, gently guide it loose with a flathead screwdriver.
- Tip: Never pry against plastic pulleys.
Step 5: Inspect the Pulleys
- Use the flashlight to inspect each pulley before installing the new belt.
- Spin accessible smooth pulleys by hand. They should spin quietly and smoothly.
- Check for wobble, cracks, sharp edges, or belt rubber stuck in pulley grooves.
- If a pulley is noisy, loose, or rough, replace that component before installing the new belt.
Step 6: Route the New Belt
- Route the new serpentine belt around the lower and harder-to-reach pulleys first.
- Use your routing photo or belt decal to keep the belt in the correct path.
- Make sure the ribbed side of the belt sits fully inside grooved pulleys.
- Leave one easy-to-reach smooth pulley for last.
- Tip: Save the top smooth pulley for last.
Step 7: Reapply Tension and Seat the Belt
- Use the 3/8-inch drive serpentine belt tool or 3/8-inch drive ratchet with 15mm socket to rotate the tensioner again.
- Slide the belt over the final pulley by hand.
- Slowly release the tensioner until it rests against the new belt.
- Do not use any bolts or fasteners for this step, so no torque specification applies.
Step 8: Verify Belt Alignment
- Use the flashlight to inspect every pulley from above.
- Confirm the belt ribs are centered in each grooved pulley.
- Confirm the belt is not hanging off the edge of any pulley.
- If the belt is misaligned, use the 3/8-inch drive serpentine belt tool or 3/8-inch drive ratchet with 15mm socket to release tension and reposition it.
Step 9: Start and Check Operation
- Remove all tools from the engine bay.
- Start the engine and let it idle for 30-60 seconds.
- Use the flashlight from a safe distance to confirm the belt runs smoothly and straight.
- Turn the engine off and recheck belt position.
- Do not touch the belt while the engine is running.
✅ After Repair
- ✅ Listen for squealing, chirping, or slapping noises after startup.
- ✅ Turn on the A/C and headlights, then listen again for belt noise under accessory load.
- ✅ Recheck belt alignment after the first short drive.
- ✅ If the belt walks off a pulley or squeals with a new belt, inspect the tensioner and pulleys for wear or misalignment.
💰 DIY vs Shop Cost
Shop Cost: $160-$280 (parts + labor)
DIY Cost: $25-$70 (parts only)
You Save: $90-$255 by doing it yourself!
Shop labor rates vary but typically run $100-$150/hour. This repair takes a shop approximately 0.5-1.0 hour.
🎯 Ready to get started?
HowToo makes it easy: same-day/2-day shipping on every part, plus all the tools and specialty tools you need! Check out the parts and tools sections below to add everything to your cart.