





How to Replace the Serpentine Belt on a 2014-2024 Mazda CX-5 (Engine: Inline 4 2.5L)
Step-by-step accessory belt guide with tools, routing, safety tips, and torque specs for 2014, 2015, 2016, 2017, 2018, 2019, 2020, 2021, 2022, 2023, 2024
How to Replace the Serpentine Belt on a 2014-2024 Mazda CX-5 (Engine: Inline 4 2.5L)
Step-by-step accessory belt guide with tools, routing, safety tips, and torque specs for 2014, 2015, 2016, 2017, 2018, 2019, 2020, 2021, 2022, 2023, 2024


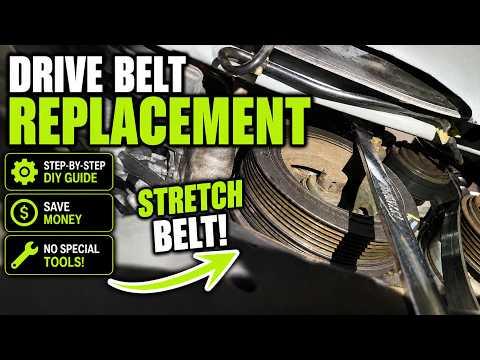
This is a manageable intermediate job, but your CX-5 uses two belts. The conventional serpentine belt drives the accessories through an automatic tensioner, while a separate stretch-fit belt drives the water pump. Don’t mistake one for the other.
🔧 CX-5 - Serpentine Belt Replacement
This procedure replaces the main six-rib accessory drive belt. Access is easiest through the front passenger-side wheel well. Mazda calls for periodic drive-belt inspection rather than a fixed replacement interval. mazdausa.com)
Difficulty Level: Intermediate | Estimated Time: 1-2 hours
Assumption: The automatic tensioner and pulleys are serviceable, and only the main serpentine belt is being replaced.
⚠️ Safety & Precautions
- ⚠️ Work only with the engine completely cool.
- ⚠️ Keep the ignition off and the key away from the vehicle.
- ⚠️ Support your CX-5 with a jack stand. Never work under a vehicle supported only by a jack.
- ⚠️ Rotate the hydraulic belt tensioner slowly. Forcing it can damage the tensioner.
- ⚠️ Never place fingers between a belt and pulley while rotating the engine.
- ⚠️ Battery disconnection is recommended because your hands will be near moving engine components.
🔧 Required Tools
You'll need the following tools for this repair:
- 10mm wrench
- 21mm socket
- 17mm six-point socket
- 8mm socket
- 10mm socket
- 3/8-inch drive ratchet
- 1/2-inch drive breaker bar
- Serpentine belt tool (specialty)
- Trim-clip removal tool
- Flat-blade screwdriver
- Torque wrench rated 30-150 ft-lbs
- Wheel chocks
- Floor jack rated 2-ton minimum
- Jack stand rated 2-ton minimum
- Mechanic gloves
- Safety glasses
- Work light
🔩 Required Parts
HowToo sells all the parts you need for this repair:
- Main six-rib serpentine belt - Qty: 1
- Passenger-side splash-shield clips - Qty: As needed
- Water-pump stretch belt - Qty: 1, only if replacing both belts
- Accessory drive belt tensioner assembly - Qty: 1, only if leaking, noisy, loose, or binding
The belt aisle is open beside this guide. Match the listing by belt position, not merely by the words “serpentine belt,” because the main belt and water-pump belt aren’t interchangeable.
📋 Before You Begin
- 📋 Park your CX-5 on level, solid ground and select Park.
- 📋 Apply the parking brake and place wheel chocks behind both rear wheels.
- 📋 Open the hood and photograph the existing belt routing from several angles.
- 📋 Confirm that the replacement belt has the same rib count and approximately the same effective length as the removed belt.
- 📋 Let the engine cool fully before reaching between the engine and body.
- 📋 No infotainment service mode or scan tool is required.
🔨 Step-by-Step Instructions
Follow these steps in order:
Step 1: Disconnect Battery Power
- Use the 10mm wrench to loosen the negative battery-terminal clamp.
- Lift the negative cable from the battery post and position it where it cannot spring back.
- This prevents an accidental engine start.
Step 2: Loosen the Passenger-Side Front Wheel
- Use the 21mm socket and 1/2-inch drive breaker bar to loosen each lug nut about one-half turn.
- Do not remove the lug nuts while the tire is supporting the vehicle.
Step 3: Raise and Support the Vehicle
- Use the floor jack rated 2-ton minimum at the approved front lifting point.
- Place the jack stand rated 2-ton minimum beneath the reinforced side support point.
- Lower the vehicle carefully onto the stand and verify that it is stable.
Step 4: Remove the Wheel and Splash Shield
- Use the 21mm socket and 3/8-inch drive ratchet to remove the lug nuts and passenger-side front wheel.
- Use the 8mm socket, 10mm socket, and trim-clip removal tool to remove the front inner splash-shield fasteners required for belt access.
- Use the flat-blade screwdriver only to lift plastic clip centers gently.
- Keep the different clips and screws arranged by position.
Step 5: Record the Belt Routing
- Use the work light to identify the crankshaft, air-conditioning compressor, alternator, idler, and tensioner pulleys.
- Compare the routing with your photographs before releasing tension.
- Notice that the smaller water-pump stretch belt is a separate belt.
- A routing photo beats an excellent memory.
Step 6: Inspect the Tensioner and Pulleys
- Use the work light to inspect the tensioner body for oily residue or hydraulic-fluid leakage.
- Check for a crooked tensioner arm, damaged pulley edges, or obvious belt misalignment.
- If the tensioner is leaking or sitting near the end of its travel, replace it before fitting the new belt.
Step 7: Release Serpentine Belt Tension
- Fit the 17mm six-point socket and serpentine belt tool securely onto the tensioner’s operating hex.
- Apply slow, steady pressure to rotate the tensioner away from the belt.
- Hold the tensioner in the released position and slide the belt from one smooth pulley.
- Slowly return the tensioner to its resting position. Do not let it snap back.
Step 8: Remove the Old Belt
- Remove the belt from the remaining pulleys by hand while wearing mechanic gloves.
- Do not remove or cut the separate water-pump stretch belt unless it is also being replaced.
- Inspect the old belt for missing ribs, glazing, oil contamination, edge wear, and cracks.
- Uneven edge wear usually points to pulley or tensioner misalignment.
Step 9: Check Every Exposed Pulley
- With the belt removed, turn each accessible idler and accessory pulley by hand using mechanic gloves.
- Each pulley should rotate smoothly without grinding, wobbling, or rough spots.
- Do not spin the pulleys aggressively. You are checking bearing feel, not setting a speed record.
Step 10: Route the New Belt
- Install the new belt around the pulleys according to your routing photograph.
- Place the grooved side of the belt against grooved pulleys.
- Place the smooth back of the belt against smooth idler and tensioner pulleys.
- Leave one easy-to-reach smooth pulley for last.
- Make certain every rib is centered in its matching pulley groove.
Step 11: Seat the Belt
- Use the 17mm six-point socket and serpentine belt tool to rotate the tensioner slowly again.
- Slip the belt over the final smooth pulley.
- Slowly release the tensioner until it loads the belt.
- Remove the tool and inspect every pulley from above and through the wheel well.
- The belt must not overhang any pulley or sit one rib out of position.
Step 12: Reinstall the Splash Shield
- Position the splash shield without trapping it against the belt or pulleys.
- Use the 8mm socket, 10mm socket, and trim-clip removal tool to reinstall the original fasteners.
- Tighten the small shield screws only until seated. They thread into light brackets and plastic retainers.
Step 13: Reinstall the Wheel
- Install the wheel and start all five lug nuts by hand.
- Use the 21mm socket and 3/8-inch drive ratchet to snug the lug nuts in a star pattern.
- Raise your CX-5 slightly with the floor jack rated 2-ton minimum, remove the stand, and lower the vehicle.
- Use the 21mm socket and torque wrench rated 30-150 ft-lbs to tighten the lug nuts in a star pattern to 108-147 Nm (80-108 ft-lbs).
Step 14: Reconnect the Battery
- Place the negative cable back onto the battery terminal.
- Use the 10mm wrench to tighten the clamp until it cannot rotate by hand.
- Do not overtighten or deform the battery terminal.
✅ After Repair
- ✅ Remove all tools from the engine compartment before starting the engine.
- ✅ Start the engine and observe the belt from a safe distance for 20-30 seconds.
- ✅ Shut the engine off immediately if the belt walks sideways, jumps, flaps heavily, or makes a slapping noise.
- ✅ Listen for chirping, squealing, grinding, or tensioner knocking.
- ✅ Switch the air conditioning on and verify that the belt remains steady as compressor load changes.
- ✅ After a short drive, shut the engine off and inspect the belt alignment again.
- ✅ Reset the clock and one-touch window function if battery disconnection cleared them.
💰 DIY vs Shop Cost
Shop Cost: $150-$300 for the main belt, parts and labor
DIY Cost: $14-$30 for the main belt, excluding tools
You Save: Approximately $120-$270 by doing it yourself!
Shop labor rates vary but typically run $100-$150/hour. This repair takes a shop approximately 0.7-1.2 hours.
🎯 Ready to get started?
HowToo makes it easy: same-day/2-day shipping on every part, plus all the tools and specialty tools you need! Check out the parts and tools sections below to add everything to your cart.