

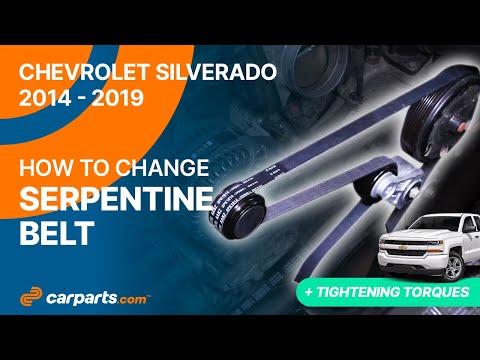







How to Replace the Serpentine Belt on a 2014-2019 Chevrolet Silverado 1500 (Trim: LT | Engine: V8 5.3L)
Step-by-step main accessory belt instructions with tools, routing, and safety tips for 2014, 2015, 2016, 2017, 2018, 2019
How to Replace the Serpentine Belt on a 2014-2019 Chevrolet Silverado 1500 (Trim: LT | Engine: V8 5.3L)
Step-by-step main accessory belt instructions with tools, routing, and safety tips for 2014, 2015, 2016, 2017, 2018, 2019


🔧 Silverado 1500 - Serpentine Belt Replacement
This is a straightforward job: release the automatic tensioner, remove the old main accessory belt, and route the new belt exactly the same way. Your Silverado also uses a separate lower stretch-fit A/C belt, so don't cut or disturb that belt during this procedure.
Assumption: These steps cover the spring-tensioned main serpentine belt, not the separate stretch-fit A/C belt.
Difficulty Level: Beginner | Estimated Time: 30-60 minutes
⚠️ Safety & Precautions
- ⚠️ Let the engine cool completely before reaching near the belt, fan, or pulleys.
- 🔑 Keep the ignition off and the key away from the truck while your hands are in the belt drive.
- 🛑 Never place fingers between the belt and a pulley while moving the tensioner.
- 🔋 Battery disconnection isn't normally required, but disconnect the negative terminal if someone else could start the truck.
- 👓 Wear safety glasses because dirt can fall when the belt is removed.
🔧 Required Tools
You'll need the following tools for this repair:
- 1/2-inch-drive serpentine belt tool
- 1/2-inch-drive breaker bar
- 10mm wrench
- LED work light
- Smartphone camera
- Mechanic's gloves
- Safety glasses
🔩 Required Parts
HowToo sells all the parts you need for this repair:
- Main serpentine belt - Qty: 1
- Accessory drive belt tensioner assembly - Qty: 1 only if noisy, loose, seized, or misaligned
Choose the listing identified as the main accessory-drive belt. A belt marked Air Conditioning or Stretch Fit is the separate lower belt and isn't a substitute.
📋 Before You Begin
- 🅿️ Park your Silverado on level ground, select Park, set the parking brake, and allow the engine to cool.
- 📷 Use the smartphone camera to photograph the complete belt route before removing anything.
- 🏷️ Check the underhood routing decal. If it's missing, draw the pulley route from your photograph.
- 🔍 Inspect the replacement belt. Its rib count and effective length must match the removed main belt.
🔨 Step-by-Step Instructions
Follow these steps in order:
Step 1: Identify the Main Belt
- Use the LED work light to locate the wide, ribbed belt running around the upper accessory pulleys.
- Identify the automatic tensioner. A tensioner is a spring-loaded arm that keeps the belt tight as it wears.
- Do not remove the smaller lower A/C stretch belt.
Step 2: Record the Belt Routing
- Use the smartphone camera to take clear photographs from more than one angle.
- Confirm which pulleys contact the belt's ribbed side and which contact its smooth backside.
- A wrong route can look surprisingly convincing.
Step 3: Release Belt Tension
- Fit the 1/2-inch-drive serpentine belt tool or 1/2-inch-drive breaker bar into the tensioner's square-drive opening.
- Slowly rotate the tensioner in the direction that makes the belt loose. Don't force it in the opposite direction.
- Hold the tensioner securely and slide the belt off one easy-to-reach smooth pulley.
- Slowly return the tensioner to its resting position. Never let it snap back.
Step 4: Remove the Old Belt
- Use your mechanic's gloves to work the loose belt around each pulley and remove it from the engine compartment.
- Compare the old belt with the new belt. Match the width, rib count, and approximate length.
- Small length differences caused by wear are normal. A major difference means you have the wrong belt.
Step 5: Inspect the Belt Drive
- Use the LED work light to inspect every exposed pulley for damaged grooves, rust buildup, or belt debris.
- Turn each accessible idler and tensioner pulley by hand while wearing mechanic's gloves.
- Replace any pulley or tensioner that grinds, binds, wobbles, or has noticeable side-to-side play.
- Check the tensioner arm for crooked alignment or oily leakage around its damping mechanism.
Step 6: Route the New Belt
- Use the routing decal and your smartphone camera photographs to position the new belt around every pulley except one accessible smooth pulley.
- Seat every rib fully inside its matching pulley groove.
- Keep the belt centered on every smooth pulley. One rib hanging over an edge will quickly destroy the belt.
Step 7: Load the Tensioner
- Use the 1/2-inch-drive serpentine belt tool or 1/2-inch-drive breaker bar to rotate the tensioner again.
- Slide the belt over the final smooth pulley without placing your fingers between the belt and pulley.
- Slowly release the tensioner until it applies full tension to the belt.
- No tension adjustment or bolt torque is required because the automatic tensioner sets belt tension.
Step 8: Verify the Installation
- Use the LED work light to inspect every pulley from above and both sides.
- Confirm all ribs are seated and the belt isn't twisted.
- Check that the separate lower A/C belt remains correctly seated and undamaged.
✅ After Repair
- 🚗 Remove all tools from the engine compartment before starting your Silverado.
- 👀 Start the engine and watch the belt from a safe distance for 20-30 seconds.
- 👂 Shut the engine off immediately if the belt walks sideways, slaps, squeals continuously, or the tensioner jumps violently.
- 🔍 Turn the engine off and perform one final seating inspection with the LED work light.
- ✅ Recheck the belt after a short drive. A correctly installed belt should remain centered and quiet.
💰 DIY vs Shop Cost
Shop Cost: ₹7,000-₹15,000, depending on belt choice and local labor
DIY Cost: ₹2,500-₹7,000 for the main belt, plus tools if needed
You Save: Approximately ₹4,000-₹8,000 by doing it yourself!
Labor prices around Sonīpat vary. This repair normally takes a shop approximately 0.5-1.0 hour.
🎯 Ready to get started?
HowToo has placed the matching belt, tensioner, and installation-tool aisles beside this guide. Confirm you're buying the main serpentine belt, not the A/C stretch belt, before adding it to your cart.