

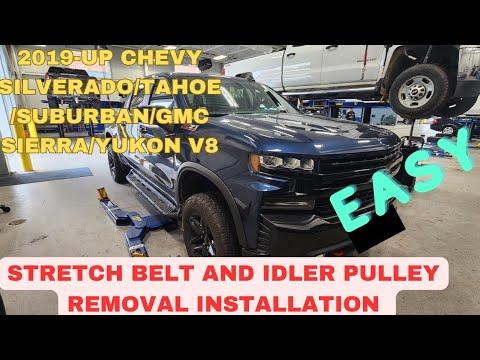







How to Replace the Serpentine Belt on a 2014-2019 Chevrolet Silverado 1500 6.2L (Engine: V8 5.3L)
Step-by-step main drive belt replacement with tools, routing, fitment, and safety tips for 2014, 2015, 2016, 2017, 2018, 2019
How to Replace the Serpentine Belt on a 2014-2019 Chevrolet Silverado 1500 6.2L (Engine: V8 5.3L)
Step-by-step main drive belt replacement with tools, routing, fitment, and safety tips for 2014, 2015, 2016, 2017, 2018, 2019


🔧 Silverado 1500 - Serpentine Belt Replacement
The main serpentine belt is replaced by rotating the automatic tensioner, slipping off the old belt, and routing the new belt exactly like the original. Your Silverado also uses a separate stretch-fit air-conditioning belt, so don’t mistake that lower belt for the main serpentine belt.
Difficulty Level: Beginner | Estimated Time: 30-60 minutes
Assumption: These steps cover the main spring-tensioned serpentine belt, not the separate air-conditioning stretch belt.
⚠️ Safety & Precautions
- ⚠️ Work only with the engine completely cool and switched off.
- ⚠️ Keep the ignition key away from the truck while your hands are near the pulleys.
- ⚠️ Never place fingers between a belt and pulley.
- ⚠️ Control the tensioner slowly. Its internal spring stores considerable force.
- ⚠️ Don’t pry the new belt onto a pulley with a screwdriver.
- ⚠️ Battery disconnection isn’t normally required because no electrical connector or starter wiring is disturbed.
🔧 Required Tools
You'll need the following tools for this repair:
- 1/2-inch-drive serpentine belt tool kit
- 1/2-inch-drive breaker bar
- Metric socket set from 10mm to 18mm
- LED work light
- Mechanic’s gloves
- Safety glasses
A serpentine belt tool is a long, slim handle that gives you leverage in the tight space around the tensioner. I’d use the Wilmar W84010 serpentine belt tool kit here. Extra reach saves scraped knuckles, which are never an official repair step.
🔩 Required Parts
HowToo sells all the parts you need for this repair:
- Main serpentine belt matched to the 6.2L accessory drive - Qty: 1
- Accessory drive belt tensioner assembly - Qty: 1 only if worn, noisy, loose, or misaligned
- Air-conditioning stretch belt - Qty: 1 only if cracked, contaminated, or being removed separately
Fitment note: Don’t substitute the air-conditioning stretch belt for the main belt. The stretch belt requires a dedicated installer and doesn’t use the spring-loaded tensioner.
📋 Before You Begin
- Park your Silverado on level ground, select Park, apply the parking brake, and let the engine cool.
- Open the hood and locate the belt-routing diagram near the radiator support or fan shroud.
- Use your phone to photograph the existing belt routing from several angles.
- If the routing label is missing, draw every pulley and mark whether the ribbed or smooth side contacts it.
- Compare the old and replacement belts before installation. Their effective length, width, and rib count must match.
🔨 Step-by-Step Instructions
Follow these steps in order:
Step 1: Identify the Main Belt and Tensioner
- Use the LED work light to locate the wide main belt and spring-loaded tensioner at the front of the engine.
- Follow the main belt around the alternator, water-pump area, crankshaft pulley, and remaining accessory pulleys.
- Identify the smaller lower air-conditioning stretch belt. Leave it installed during this procedure.
Step 2: Record the Belt Routing
- Use your phone and the LED work light to take a clear routing photograph.
- Confirm that the belt’s ribbed side rides only on grooved pulleys and its smooth side rides on smooth pulleys.
- Pay close attention to the route around the tensioner and idler pulleys.
Step 3: Release Belt Tension
- Fit the correct attachment from the 1/2-inch-drive serpentine belt tool kit onto the tensioner drive point.
- Rotate the tensioner slowly in the direction that moves it away from the belt.
- Hold the tensioner steady and slide the belt off one easy-to-reach smooth pulley.
- Slowly return the tensioner to its resting position. Don’t let it snap back.
- Use steady pressure, not a sudden pull.
Step 4: Remove the Old Belt
- Use your hands while wearing mechanic’s gloves to work the loose belt off each pulley.
- Guide the belt around the fan and nearby components without bending the fan blades.
- Compare the old belt against the new belt laid side by side. The used belt may be slightly longer from wear, but the rib count and basic length must agree.
Step 5: Inspect the Belt Drive
- Use your hands to rotate each accessible idler and tensioner pulley with the belt removed.
- Replace any pulley or tensioner that feels rough, binds, wobbles, or makes grinding noise.
- Check every pulley groove with the LED work light for stones, rubber buildup, coolant, or engine oil.
- Watch the tensioner arm for looseness or crooked alignment. A new belt won’t cure a failing tensioner.
Step 6: Route the New Belt
- Route the new belt by hand according to your photograph and the factory routing diagram.
- Leave one accessible smooth pulley until last.
- Center every rib inside its matching pulley groove. Even one rib hanging over an edge can destroy the belt.
- Confirm that the belt hasn’t crossed over or become twisted.
Step 7: Install the Belt Over the Final Pulley
- Fit the 1/2-inch-drive serpentine belt tool kit back onto the tensioner.
- Rotate the tensioner slowly until the belt can slide over the final smooth pulley.
- Use your free hand to position the belt. Keep your fingers away from pulley pinch points.
- Release the tensioner slowly until it applies full tension.
Step 8: Verify the Installation
- Use the LED work light to inspect every pulley from above and both sides where visible.
- Confirm all ribs are seated, the smooth side faces smooth pulleys, and the routing matches your photograph.
- Use the 1/2-inch-drive breaker bar only if safe access is available to rotate the crankshaft clockwise by hand through two full turns.
- Recheck belt seating after rotation.
- No fasteners are removed during normal main-belt replacement, so no installation torque is required.
✅ After Repair
- Remove every tool from the engine compartment before starting the engine.
- Start the engine and observe the belt from a safe distance for 20-30 seconds.
- Switch the air conditioning on and check for squealing, wandering, flutter, or pulley wobble.
- Shut the engine off immediately if the belt walks toward a pulley edge or makes persistent noise.
- After the engine stops, inspect the routing and rib seating one final time.
- No electronic reset, scan-tool procedure, or belt-tension adjustment is required with a healthy automatic tensioner.
💰 DIY vs Shop Cost
Shop Cost: $150-$300 USD equivalent (parts + labor)
DIY Cost: $35-$100 USD equivalent (parts only)
You Save: $100-$200 USD equivalent by doing it yourself!
Local labor rates around Sonīpat vary. This repair usually takes a shop approximately 0.5-1.0 hour.
🎯 Ready to get started?
HowToo makes it easy: same-day/2-day shipping on every part, plus all the tools and specialty tools you need! Check out the parts and tools sections below to add everything to your cart.