

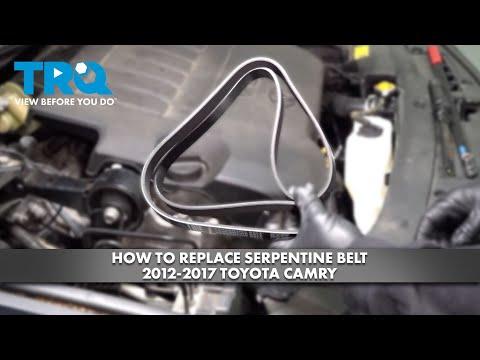






How to Replace the Serpentine Belt on a 2009-2019 Toyota Highlander 2.7L (Engine: Inline 4 2.7L)
Step-by-step DIY instructions with required tools, belt routing, safety tips, and torque specs for 2009, 2010, 2011, 2012, 2013, 2014, 2015, 2016, 2017, 2018, 2019
How to Replace the Serpentine Belt on a 2009-2019 Toyota Highlander 2.7L (Engine: Inline 4 2.7L)
Step-by-step DIY instructions with required tools, belt routing, safety tips, and torque specs for 2009, 2010, 2011, 2012, 2013, 2014, 2015, 2016, 2017, 2018, 2019


🔧 Highlander - Serpentine Belt Replacement
The serpentine belt drives the alternator, water pump, and air-conditioning compressor on your Highlander. Replacement involves opening the automatic belt tensioner, removing the old belt, and routing the new belt correctly around each pulley.
Difficulty Level: Beginner | Estimated Time: 1-1.5 hours
⚠️ Safety & Precautions
- ⚠️ Allow the engine to cool completely before working near the belt and pulleys.
- 🛑 Keep fingers away from the tensioner and pulley contact points. The tensioner is spring-loaded and can move suddenly.
- 🔑 Keep the ignition switched off and the key away from the vehicle.
- 🔋 Disconnecting the battery is not required, but never start the engine while the belt is removed.
- 🏗️ Never work beneath a vehicle supported only by a floor jack.
🔧 Required Tools
You'll need the following tools for this repair:
- 14mm six-point socket
- 10mm socket
- 21mm wheel-lug socket
- 3/8-inch-drive long-handle ratchet
- 1/2-inch-drive breaker bar
- 1/2-inch-drive torque wrench rated to at least 110 Nm
- Plastic trim-clip removal tool
- Flat-blade screwdriver, 6-inch
- Floor jack rated 2-ton minimum
- Jack stand rated 2-ton minimum
- Wheel chocks
- LED work light
- Mechanic gloves
- Safety glasses
🔩 Required Parts
HowToo sells all the parts you need for this repair:
- Serpentine drive belt for 2.7L engine - Qty: 1
- Right-front splash-shield clips - Qty: As needed
📋 Before You Begin
- 🚙 Park your Highlander on firm, level ground. Shift into Park and apply the parking brake.
- 🧱 Place wheel chocks securely behind both rear wheels.
- 🌡️ Wait until the engine and exhaust components are cool.
- 📷 Photograph the original belt routing and locate the factory routing label under the hood. If the label is missing, make a clear sketch before removing the belt.
- 🔍 Compare the new belt with the old belt before installation. Their rib count and effective length must match.
🔨 Step-by-Step Instructions
Follow these steps in order:
Step 1: Loosen the Right-Front Wheel
- Use the 21mm wheel-lug socket and 1/2-inch-drive breaker bar to loosen each right-front lug nut about one-quarter turn.
- Do not remove the lug nuts while the tire is still carrying the vehicle’s weight.
Step 2: Raise and Support the Vehicle
- Position the 2-ton floor jack beneath the specified front jacking point.
- Raise your Highlander and place the 2-ton jack stand beneath the right-front reinforced support point.
- Lower the vehicle onto the stand and gently confirm that it is stable.
- Give the vehicle a careful stability check.
Step 3: Remove the Right-Front Wheel
- Use the 21mm wheel-lug socket and 1/2-inch-drive breaker bar to remove the loosened lug nuts.
- Remove the wheel and place it flat away from the work area.
Step 4: Open the Splash Shield
- Use the plastic trim-clip removal tool to release the clips holding the front portion of the right-side engine splash shield.
- Use the 10mm socket and 3/8-inch-drive ratchet for any 10mm-head splash-shield fasteners present.
- Use the 6-inch flat-blade screwdriver only to lift the center pin of a reusable push clip. Do not force or puncture the shield.
- Move the shield aside far enough to see the crankshaft pulley and drive belt.
- A push clip is a plastic fastener with a center pin that locks its outer body in place.
Step 5: Record the Belt Routing
- Use the LED work light to inspect how the belt passes around every pulley.
- Confirm that the ribbed side of the belt contacts grooved pulleys and the smooth back of the belt contacts smooth pulleys.
- Use your photograph, sketch, or the under-hood routing label during installation.
Step 6: Release Belt Tension
- Fit the 14mm six-point socket and 3/8-inch-drive long-handle ratchet securely onto the automatic tensioner pulley bolt.
- The automatic tensioner is the spring-loaded arm that keeps the belt tight while the engine runs.
- Rotate the tensioner slowly clockwise to create slack in the belt.
- While holding the tensioner, slide the belt off an easy-to-reach smooth pulley.
- Slowly return the tensioner to its resting position. Do not let it snap back.
- Keep fingers outside the pulley pinch points.
Step 7: Remove the Old Belt
- Use your gloved hands to work the old belt off the remaining pulleys and remove it through the wheel-well opening.
- Do not use a screwdriver to pry the belt from a pulley. That can damage the pulley or belt surface.
Step 8: Inspect the Pulleys and Tensioner
- Use the LED work light to check every pulley groove for stones, rubber deposits, oil, or coolant.
- Turn each accessible idler pulley by hand. It should rotate smoothly without grinding, looseness, or wobbling.
- Check that the tensioner arm moves smoothly and does not sit crooked.
- Stop the repair if a pulley is loose, noisy, seized, contaminated, or misaligned. Installing a new belt will not correct a failed pulley or tensioner.
Step 9: Route the New Belt
- Use your gloved hands to route the new belt according to the factory routing label or the photograph taken earlier.
- Leave one easy-to-reach smooth pulley until last.
- Check each grooved pulley carefully. Every belt rib must sit inside a matching pulley groove.
- Keep the belt centered on every smooth pulley.
Step 10: Apply Tension to the New Belt
- Use the 14mm six-point socket and 3/8-inch-drive long-handle ratchet to rotate the automatic tensioner clockwise.
- Slide the belt over the final smooth pulley.
- Slowly release the tensioner until it applies full tension to the belt.
- Remove the socket and ratchet from the tensioner before continuing.
- No tensioner-bolt torque is required because its bolt was used only as a turning point and was not loosened.
Step 11: Verify Belt Alignment
- Use the LED work light to inspect every pulley from above and through the wheel well.
- Confirm that the belt follows the correct route and is fully seated in every groove.
- Look especially closely at the crankshaft pulley, where a belt can appear installed while sitting one rib off-center.
Step 12: Reinstall the Splash Shield
- Return the splash shield to its original position.
- Use the plastic trim-clip removal tool to prepare reusable clips, then press each clip into place by hand.
- Use the 10mm socket and 3/8-inch-drive ratchet to reinstall any original 10mm-head fasteners snugly. Do not overtighten fasteners in plastic.
- Replace clips that are cracked, stretched, or no longer lock securely.
Step 13: Reinstall the Right-Front Wheel
- Install the wheel and thread all lug nuts by hand to prevent cross-threading.
- Use the 21mm wheel-lug socket and 1/2-inch-drive breaker bar to seat the lug nuts lightly in a crisscross pattern.
- Use the 2-ton floor jack to raise the vehicle slightly, remove the jack stand, and lower the vehicle completely.
- Use the 21mm wheel-lug socket and 1/2-inch-drive torque wrench to tighten the lug nuts in a crisscross pattern: Torque to 103 Nm (76 ft-lbs).
✅ After Repair
- 🔍 Perform one final visual check before starting the engine. Confirm that no tools remain in the engine compartment.
- ▶️ Start the engine and observe the belt from a safe distance for 20-30 seconds. It should run centrally without fluttering, walking sideways, or squealing.
- 🛑 Switch off the engine immediately if the belt moves off-center, makes repeated noise, or the tensioner shakes heavily.
- 💡 Confirm that the charging warning light remains off and the air conditioner operates normally.
- 🔧 Recheck the wheel-lug torque to 103 Nm (76 ft-lbs) after approximately 50-100 km of driving.
💰 DIY vs Shop Cost
Shop Cost: ₹4,500-₹9,000 (parts + labor)
DIY Cost: ₹1,800-₹4,000 (parts only)
You Save: ₹2,700-₹5,000 by doing it yourself!
Labor rates around Panipat vary by workshop. This repair takes a shop approximately 0.5-1 hour.
🎯 Ready to get started?
HowToo makes it easy: same-day/2-day shipping on every part, plus all the tools and specialty tools you need! Check out the parts and tools sections below to add everything to your cart.