


How to Replace the Rear Door Lock Actuator on a 2014-2018 Toyota Highlander
Step-by-step latch actuator repair guide with tools, parts, torque specs, and safety tips for 2014, 2015, 2016, 2017, 2018
How to Replace the Rear Door Lock Actuator on a 2014-2018 Toyota Highlander
Step-by-step latch actuator repair guide with tools, parts, torque specs, and safety tips for 2014, 2015, 2016, 2017, 2018
🔧 Highlander - Rear Door Lock Actuator Replacement
This repair replaces the rear door lock actuator, which is the electric latch motor assembly that locks and unlocks the rear door when you use the key fob, switch, or smart key system. On your Highlander, the actuator is integrated with the rear door latch assembly inside the door.
Difficulty Level: Intermediate | Estimated Time: 1.5-2.5 hours
⚠️ Safety & Precautions
- ⚠️ Disconnect the 12-volt auxiliary battery before unplugging door electrical connectors to reduce the chance of short circuits.
- ⚠️ Your Highlander is a hybrid, but this repair does not require touching high-voltage orange cables or hybrid components.
- ⚠️ Keep your hands clear of the latch while testing. The latch can pinch fingers when it cycles.
- ⚠️ Work slowly around the door trim panel. Plastic clips can break if forced at the wrong angle.
- ⚠️ Do not close the door until the latch and outside handle cable are confirmed connected and working.
🔧 Required Tools
You'll need the following tools for this repair:
- 10mm socket
- Ratchet with 3/8-inch drive
- 6-inch extension with 3/8-inch drive
- Phillips #2 screwdriver
- Trim panel removal tool set
- Small flathead screwdriver
- Torx T30 socket
- Torque wrench rated 5-30 Nm
- Needle-nose pliers
- Painter's tape
- Work light
- Safety glasses
- Mechanic gloves
🔩 Required Parts
HowToo sells all the parts you need for this repair:
- Rear door lock actuator/latch assembly - Qty: 1
- Rear door trim panel clips - Qty: 4-6
- Butyl sealing tape - Qty: 1 roll
📋 Before You Begin
- Park your Highlander on level ground and turn the power switch OFF.
- Open the affected rear door fully and lower the window glass completely.
- Move the front seat forward to give yourself more room to work.
- Use painter's tape to protect painted edges around the rear door handle and latch area.
- Disconnect the negative 12-volt battery cable using a 10mm socket. The 12-volt battery is in the rear cargo area on this Highlander.
- Wait at least 90 seconds after disconnecting the battery before unplugging door connectors.
🔨 Step-by-Step Instructions
Follow these steps in order:
Step 1: Remove the Rear Door Switch Panel
- Use a trim panel removal tool to gently lift the rear power window switch panel from the armrest.
- A trim panel removal tool is a plastic pry tool that helps remove interior panels without scratching them.
- Use a small flathead screwdriver to press the connector lock tab, then unplug the window switch connector.
- Set the switch panel somewhere safe.
- Lift slowly to avoid broken clips.
Step 2: Remove Hidden Door Panel Screws
- Use a small flathead screwdriver to open the small screw cover behind the inside door handle.
- Use a Phillips #2 screwdriver to remove the screw behind the inside handle.
- Use a Phillips #2 screwdriver to remove the screw inside the armrest pocket, if equipped.
- Place the screws in a cup so they do not get lost.
Step 3: Remove the Rear Door Trim Panel
- Use a trim panel removal tool at the lower edge of the door panel to release the plastic clips.
- Work around the sides of the panel until all clips release.
- Lift the door panel straight upward to unhook it from the window ledge.
- Use a small flathead screwdriver to disconnect any remaining electrical connectors.
- Use needle-nose pliers to release the inside handle cable from the door panel if it is still attached.
- Do not yank the panel away.
Step 4: Peel Back the Water Shield
- Use your hands and a trim panel removal tool to carefully peel back the clear plastic water shield.
- The water shield is the plastic moisture barrier that keeps rainwater away from the interior trim.
- Do not tear it. You will reuse it during assembly.
- If the black butyl adhesive stretches or separates, use butyl sealing tape during reassembly.
Step 5: Disconnect the Door Lock Actuator Connector
- Use a work light to locate the latch assembly at the rear edge of the door.
- Use a small flathead screwdriver to press the electrical connector lock tab on the actuator.
- Pull the connector straight off by the plastic body, not by the wires.
Step 6: Disconnect the Lock and Handle Rods or Cables
- Use needle-nose pliers to rotate the plastic retaining clips away from the rods or cable ends.
- A retaining clip is a small plastic lock that holds a rod or cable in place.
- Lift the rods or cable ends out of the latch levers.
- Take a quick photo with your phone before removing them so you can match the routing during reassembly.
- Photos prevent cable routing mistakes.
Step 7: Remove the Rear Door Latch Screws
- Support the latch inside the door with one hand.
- Use a Torx T30 socket and ratchet to remove the three latch screws from the rear edge of the door.
- A Torx socket fits star-shaped fasteners used on many door latches.
- Pull the latch/actuator assembly out through the access opening inside the door.
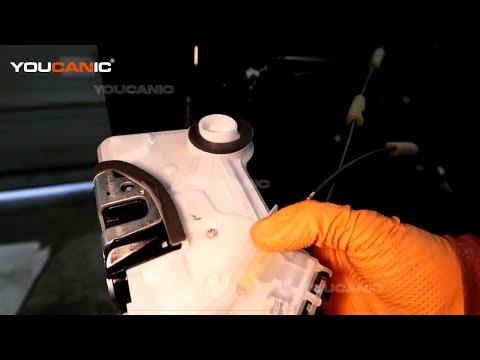
Step 8: Compare the Old and New Actuator/Latch Assembly
- Place the old and new rear door lock actuator/latch assemblies side by side.
- Confirm the connector shape, latch orientation, mounting holes, and cable/rod attachment points match.
- Transfer any reusable clips or brackets using a small flathead screwdriver and needle-nose pliers.
Step 9: Install the New Actuator/Latch Assembly
- Guide the new latch/actuator assembly into the door through the access opening.
- Align the latch with the three screw holes at the rear edge of the door.
- Use a Torx T30 socket to start all three latch screws by hand first.
- Use a torque wrench with Torx T30 socket to tighten the latch screws to Torque to 5.5 Nm (49 in-lbs).
Step 10: Reconnect Rods, Cables, and Electrical Connector
- Use needle-nose pliers to place each rod or cable end back into the correct latch lever.
- Snap each plastic retaining clip closed by hand or with needle-nose pliers.
- Push the actuator electrical connector on until it clicks.
- Gently tug the connector to make sure it is locked.
Step 11: Test Before Reinstalling the Door Panel
- Use a 10mm socket to temporarily reconnect the negative 12-volt battery cable.
- Keep the rear door open.
- Use a small flathead screwdriver to rotate the latch claw to the closed position while the door remains open.
- Use the key fob and door lock switch to lock and unlock the actuator several times.
- Pull the inside and outside handles to confirm the latch releases correctly.
- Use a 10mm socket to disconnect the negative 12-volt battery cable again before final panel installation.
- Never close the door during this test.
Step 12: Reinstall the Water Shield
- Press the water shield back into its original position by hand.
- Use butyl sealing tape where the original adhesive no longer seals.
- Make sure all openings are sealed so water does not reach the door trim panel.
Step 13: Reinstall the Rear Door Trim Panel
- Use needle-nose pliers to reconnect the inside handle cable if it was removed.
- Reconnect any electrical connectors by hand until they click.
- Hook the top of the door panel over the window ledge.
- Line up the clips with the holes in the door.
- Press around the panel edges by hand until all clips snap in.
- Replace any broken clips with new rear door trim panel clips.
Step 14: Reinstall Screws and Switch Panel
- Use a Phillips #2 screwdriver to reinstall the screw behind the inside handle.
- Use a Phillips #2 screwdriver to reinstall the armrest pocket screw, if equipped.
- Close the screw cover by hand.
- Plug in the power window switch connector by hand until it clicks.
- Press the switch panel into the armrest until fully seated.
Step 15: Reconnect the 12-Volt Battery
- Use a 10mm socket to reconnect the negative 12-volt battery cable.
- Use a torque wrench with 10mm socket to tighten the terminal nut to Torque to 5.4 Nm (48 in-lbs).
- Do not overtighten the battery terminal. It can crack or deform.
✅ After Repair
- ✅ Test the rear door lock using the key fob, inside lock switch, outside handle, and inside handle.
- ✅ Confirm the child safety lock position is correct for that rear door.
- ✅ Check that the rear window switch works. If auto-up/down operation is lost, fully lower the window, then fully raise it and hold the switch up for 2 seconds.
- ✅ Make sure the door opens and closes smoothly without binding.
- ✅ Listen for rattles while lightly closing the door. A rattle may mean a rod, cable, or clip is not seated.
💰 DIY vs Shop Cost
Shop Cost: $350-$650 (parts + labor)
DIY Cost: $90-$260 (parts only)
You Save: $260-$390 by doing it yourself!
Shop labor rates vary but typically run $100-$150/hour. This repair takes a shop approximately 1.2-2.0 hours.
🎯 Ready to get started?
HowToo makes it easy: same-day/2-day shipping on every part, plus all the tools and specialty tools you need! Check out the parts and tools sections below to add everything to your cart.
