

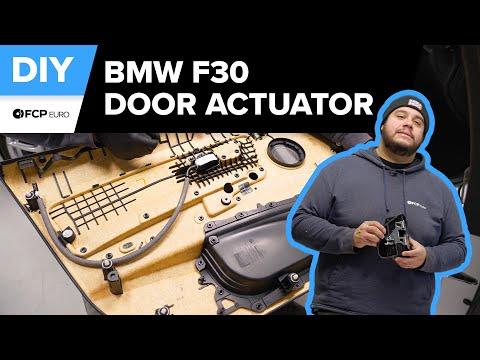







How to Replace the Rear Door Lock Actuator (Latch) on a 2016 BMW 340i
Step-by-step rear door panel removal, tools/parts list, and key torque specs for a clean install for 2016, 2017
How to Replace the Rear Door Lock Actuator (Latch) on a 2016 BMW 340i
Step-by-step rear door panel removal, tools/parts list, and key torque specs for a clean install for 2016, 2017


🔧 340i - Rear Door Lock Actuator Replacement
The rear door lock actuator (often built into the door latch assembly on your 340i) is what physically locks/unlocks the door when you use the key fob or interior switch. Replacing it involves removing the rear door panel, peeling back the moisture barrier, swapping the latch/actuator, then reassembling everything carefully so the window and door handle cables work smoothly.
Difficulty Level: Intermediate | Estimated Time: 1.5-3.0 hours
⚠️ Safety & Precautions
- ⚠️ Disconnect the battery negative terminal before working in the door (side airbag wiring is in the door).
- ⚠️ Keep the window fully UP before starting to avoid glass damage.
- ⚠️ Do not turn the ignition on with door airbag connectors unplugged (can set an SRS/airbag fault).
- ⚠️ Use trim tools, not a screwdriver, to avoid cracking panels.
- ⚠️ Support the door panel as you unplug connectors so you don’t pull wires.
🔧 Required Tools
You'll need the following tools for this repair:
- 10mm socket
- 1/4" ratchet
- 3" extension (1/4")
- Torque wrench (2-25 Nm range)
- Torx T20 bit
- Torx T25 bit
- Torx T30 bit
- Trim removal tool set
- Small pick tool
- Small flathead screwdriver
- Needle-nose pliers
- Painter’s tape
- Work light
- Nitrile gloves
- Safety glasses
🔩 Required Parts
HowToo sells all the parts you need for this repair:
- Rear door lock actuator / door latch assembly - Qty: 1
- Rear door panel clips - Qty: 6-10
- Butyl moisture barrier sealant (strip/rope type) - Qty: 1
📋 Before You Begin
- Park on level ground, shift to Park, and remove the key from the vehicle.
- Make sure the rear window is fully up.
- Open the trunk and disconnect the battery negative terminal using a 10mm socket.
- Wait at least 10 minutes before unplugging any door wiring (this allows airbag/SRS capacitors to discharge).
- Tip: Use painter’s tape to label connectors.
🔨 Step-by-Step Instructions
Follow these steps in order:
Step 1: Remove the rear door trim covers and screws
- Use a trim removal tool set to gently pry off the small trim cover behind the interior door pull handle.
- Remove the exposed Torx screw(s) using a Torx T20 bit or Torx T25 bit (BMW may use either depending on panel version).
- Check the bottom edge of the door panel for additional screws and remove them using a Torx T20 bit.
Step 2: Release the door panel clips and lift the panel off
- Start at the lower corner and work around the panel using a trim removal tool set to pop the clips free.
- Once all clips are released, lift the door panel straight upward to unhook it from the top window channel.
- Support the panel close to the door so wiring doesn’t get stretched.
Step 3: Disconnect electrical connectors and the interior handle cable
- Unplug the window switch/door module connectors using a small flathead screwdriver to release locking tabs (a locking tab is a small catch that must be lifted before the plug comes out).
- If equipped, unplug the door speaker connector using a small pick tool.
- Disconnect the interior door handle cable:
- Use a small pick tool to rotate the cable retainer out of its bracket.
- Lift the cable end (ball tip) out of the handle lever.
- Set the door panel aside on a soft surface.
Step 4: Peel back the moisture barrier (vapor barrier)
- Carefully peel the foam/plastic moisture barrier back near the rear of the door using a trim removal tool set.
- Try not to tear it; the sticky seal is butyl (a tar-like adhesive) and should be reused or replaced.
- Tip: Warm butyl slightly for easier peeling.
Step 5: Disconnect the latch/actuator electrical connector
- Locate the latch/actuator connector near the rear edge of the door (inside the door cavity).
- Release the connector lock using a small pick tool, then unplug it.
Step 6: Remove the latch/actuator from the door
- At the trailing edge of the door (where the latch grabs the body striker), remove the latch mounting screws using a Torx T30 bit.
- Torque spec (install): Torque to 8 Nm (71 in-lbs)
- Inside the door, disconnect the lock/handle linkages from the latch:
- Use a needle-nose pliers or small pick tool to flip open the plastic retaining clips.
- Lift the metal rod ends out of the latch levers.
- Work the latch/actuator assembly out through the access opening (rotate it as needed).
Step 7: Install the new latch/actuator assembly
- Place the new latch/actuator into the door in the same orientation as the old one.
- Reconnect the linkage rods and snap the plastic retaining clips closed using a needle-nose pliers.
- Reconnect the latch electrical connector (push until it clicks/locks).
- Reinstall the latch mounting screws using a Torx T30 bit and a torque wrench.
- Torque to 8 Nm (71 in-lbs)
Step 8: Reseal the moisture barrier
- Press the moisture barrier back into place firmly all the way around.
- If the seal is damaged or won’t stick, apply butyl moisture barrier sealant and press the barrier into it.
Step 9: Reinstall the door panel
- Reconnect the interior handle cable first:
- Hook the cable ball end into the handle lever.
- Snap the cable retainer back into its bracket.
- Reconnect all electrical connectors (window switch, speaker, door module), ensuring each lock tab is fully seated.
- Hang the panel on the top window channel and press it downward to seat it.
- Press around the perimeter to snap all clips back in.
- Reinstall screws using a Torx T20 bit or Torx T25 bit.
- Torque to 2 Nm (18 in-lbs) for interior trim screws.
Step 10: Reconnect the battery
- Reconnect the battery negative terminal using a 10mm socket.
- Torque to 6 Nm (53 in-lbs)
✅ After Repair
- Test the rear door: lock/unlock with key fob, interior lock button, and the exterior handle.
- Confirm the door opens from inside and outside and the child lock (if equipped) works normally.
- Check the window switch works and that the panel sits flush with no rattles.
- If an airbag/SRS light appears, it typically requires a scan tool to clear after the fault is stored.
💰 DIY vs Shop Cost
Shop Cost: ₹7,000-₹16,000 (parts + labor)
DIY Cost: ₹3,000-₹9,000 (parts only)
You Save: ₹4,000-₹7,000 by doing it yourself!
Local labor rates vary; this repair is typically 1.5-3.0 hours.
🎯 Ready to get started?
HowToo makes it easy: same-day/2-day shipping on every part, plus all the tools and specialty tools you need! Check out the parts and tools sections below to add everything to your cart.
Assumption: rear door lock actuator is integrated with the latch on your 340i.