






How to Replace the Radiator Hoses on a 2016 Ford F-150
Step-by-step DIY guide with tools, parts list, coolant drain, refill, and safety tips for upper and lower hose replacement for 2015, 2016, 2017
How to Replace the Radiator Hoses on a 2016 Ford F-150
Step-by-step DIY guide with tools, parts list, coolant drain, refill, and safety tips for upper and lower hose replacement for 2015, 2016, 2017


F-150 - Radiator Hose Replacement 🚚
Got it—you want to replace a radiator hose on your F-150. There are two main hoses: the upper radiator hose (top of radiator to engine) and the lower radiator hose (bottom of radiator to engine/thermostat housing).
Quick question before we dive in:
- 🧩 Which hose are you replacing: upper, lower, or both?
I’ll write the steps for both hoses below. You can follow only the one you need.
F-150 - Safety & Prep ⚠️
- 🧯 Never open the cooling system hot. Let the engine cool at least 1–2 hours. The coolant system is pressurized and can cause burns.
- 🧤 Wear gloves and safety glasses.
- 🧊 Coolant = the green/orange liquid that keeps the engine from overheating or freezing.
F-150 - Parts You’ll Need 📦
- 🧩 Upper radiator hose (5.0L, 4WD, Lariat specific)
- 🧩 Lower radiator hose (if doing lower)
- 🧩 New hose clamps (if your truck doesn’t use reusable spring clamps or if they’re rusty)
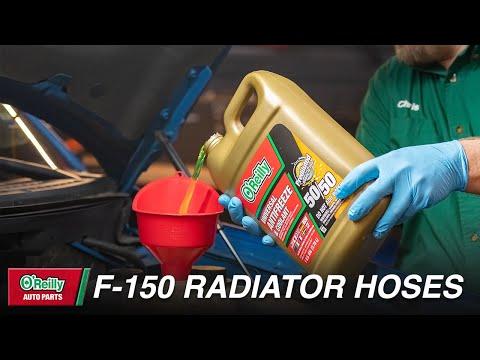
- 🧴 Motorcraft Orange coolant (Ford Specialty Orange, pre-mix 50/50 or concentrate + distilled water)
- 🧴 Distilled water (if mixing your own)
F-150 - Tools Required 🛠️
- 🔧 Socket set (metric): 8mm–10mm for shields/covers if needed
- 🔧 Ratchet and extensions
- 🔧 Pliers (regular slip-joint or channel-lock)
- For squeezing the spring clamps that hold the hose on.
- 🔧 Hose clamp pliers (optional but very helpful)
- Special pliers that lock onto spring clamps and hold them open.
- 🔧 Flat-blade screwdriver
- For gently prying a stuck hose loose (do not gouge the metal or plastic).
- 🪣 Drain pan (at least 2–3 gallons)
- To catch old coolant.
- 🧽 Rags / paper towels
- 🧴 Brake cleaner or similar (optional, to clean spilled coolant)
F-150 - Coolant Drain (Both Hoses) 💧
You don’t always have to drain the whole system, but at least drain below the hose level to avoid a big mess.
- 🧊 Step 1 – Let the engine cool
- Truck off, key out, hood open. Wait until the upper hose is cool to the touch.
- 🧊 Step 2 – Remove coolant reservoir cap
- Slowly loosen the coolant reservoir cap (plastic tank on passenger side) to release any remaining pressure.
- 🧊 Step 3 – Position drain pan
- Slide the drain pan under the bottom of the radiator, driver side.
- 🧊 Step 4 – Open radiator drain (petcock)
- On most 2016 F-150s, there is a small plastic drain valve at the bottom of the radiator (driver side).
- Turn it counterclockwise by hand or with pliers gently. Do not force it; it’s plastic.
- Let coolant drain until the level is below the hose you’re changing (usually 1–1.5 gallons).
- 🧊 Step 5 – Close the drain
- Turn the valve back clockwise until snug. Do not overtighten.
F-150 - Upper Radiator Hose Replacement 🔝
The upper hose runs from the top of the radiator (driver side) to the engine front (near thermostat housing).
- 🔩 Step 1 – Locate clamps
- Find the clamp at the radiator end and the clamp at the engine end.
- Your truck likely uses spring clamps (round clamps you squeeze to open).
- 🔩 Step 2 – Release radiator-end clamp
- Use pliers or hose clamp pliers to squeeze the clamp tabs together.
- Slide the clamp back along the hose, away from the radiator neck.
- 🔩 Step 3 – Remove hose from radiator
- Twist the hose gently to break it loose. If stuck, use a flat screwdriver to carefully lift the edge of the hose—do not stab or scratch the radiator neck.
- Pull the hose off and aim it into the drain pan if more coolant comes out.
- 🔩 Step 4 – Release engine-end clamp
- Same as before: squeeze clamp, slide it back on the hose.
- 🔩 Step 5 – Remove hose from engine
- Twist and pull the hose off the engine fitting.
- Check the fitting for any leftover rubber stuck on it and remove gently.
- 🧼 Step 6 – Clean sealing surfaces
- Wipe the radiator neck and engine fitting with a clean rag so they’re smooth and clean.
- 🧩 Step 7 – Install new upper hose
- Slide the clamps onto the new hose first.
- Push the hose fully onto the engine fitting until it bottoms out.
- Position the clamp over the raised bead or ridge on the fitting and release it.
- Repeat for the radiator side.
- Make sure the hose is not twisted and doesn’t rub on any sharp edges or moving parts.
F-150 - Lower Radiator Hose Replacement 🔻
The lower hose runs from the bottom of the radiator (passenger side) to the engine/thermostat housing. Access is mostly from underneath.
- 🛡️ Step 1 – Raise front (optional but helpful)
- If needed, use a floor jack and jack stands on the frame rails. Never rely on the jack alone.
- 🔩 Step 2 – Remove any lower splash shield (if equipped)
- Use 8–10mm sockets or trim clips to remove the plastic shield under the radiator.
- 🔩 Step 3 – Release radiator-end clamp
- Same method: squeeze clamp, slide it back, twist hose off the radiator outlet.
- 🔩 Step 4 – Release engine-end clamp
- Follow the hose to the engine/thermostat housing.
- Squeeze clamp, slide back, twist and remove hose.
- 🧼 Step 5 – Clean fittings
- Wipe both ends clean and smooth.
- 🧩 Step 6 – Install new lower hose
- Slide clamps onto the new hose.
- Install hose onto engine side first, then radiator side.
- Position clamps over the raised bead/ridge and release.
- Check routing: hose should not be kinked or touching the fan or belts.
- 🛡️ Step 7 – Reinstall splash shield
- Reinstall any plastic covers you removed.
F-150 - Refill & Bleed Coolant 🧊
- 🧴 Step 1 – Mix coolant (if needed)
- If using concentrate, mix 50% coolant / 50% distilled water in a clean container.
- 🧴 Step 2 – Fill reservoir
- Pour coolant into the coolant reservoir up to the “MAX” line.
- 🚗 Step 3 – Start engine & warm up
- Cap on loosely at first, start the engine, heater set to HOT and fan on low.
- Let the engine reach normal temperature. Watch the temperature gauge; it should stay in the normal range.
- 💨 Step 4 – Burp air from system
- As the engine warms, coolant level in the reservoir may drop.
- Add more coolant as needed to keep it near the MAX line.
- Once the upper hose is warm and firm and the heater blows hot, most air is out.
- 🧊 Step 5 – Final check after cool-down
- Shut engine off, let it cool completely.
- Recheck coolant level and top off to MAX if needed.
- Inspect all hose connections for leaks.
F-150 - Torque & Notes 🔧
- 📏 Hose clamps: spring clamps are self-tensioning; if you use screw-type clamps, snug them just enough to stop leaks—do not crush the hose.
- 📏 Radiator drain plug: hand-tight only; it’s plastic.
F-150 - Tips & Tricks 💡
- 🧠 If a hose is very stuck, twist first, then pull. Pulling straight can crack plastic fittings.
- 🧠 Keep coolant off belts and pulleys; wipe and spray with a little brake cleaner if you spill.
- 🧠 Used coolant is toxic—store it in a sealed container and dispose of it at a proper recycling center.
If you tell me whether you’re doing the upper, lower, or both, I can tailor this to just those steps and add any photos/diagrams style guidance you’d like.
HowToo makes it easy: same-day/2-day shipping on every part, plus all the tools and specialty tools you need! 🛒