







How to Replace the Radiator Hose on a 2006-2019 Toyota RAV4 Hybrid
Step-by-step cooling system repair with tools, coolant bleeding, torque specs, and safety tips for 2006, 2007, 2008, 2013, 2014, 2015, 2016, 2017, 2018, 2019
How to Replace the Radiator Hose on a 2006-2019 Toyota RAV4 Hybrid
Step-by-step cooling system repair with tools, coolant bleeding, torque specs, and safety tips for 2006, 2007, 2008, 2013, 2014, 2015, 2016, 2017, 2018, 2019


🔧 RAV4 - Radiator Hose Replacement
Replacing a radiator hose means draining some engine coolant, removing the old hose, installing the new hose, and refilling/bleeding the cooling system. On your RAV4 Hybrid, coolant service needs extra care because it has hybrid components nearby, and trapped air can cause overheating or poor heater performance.
Difficulty Level: Beginner to Intermediate | Estimated Time: 1.5-2.5 hours
⚠️ Safety & Precautions
- ⚠️ Never open the radiator cap or coolant reservoir cap when the engine is hot. Hot coolant can spray out and burn you.
- ⚠️ Your RAV4 is a hybrid. Do not touch orange high-voltage cables or high-voltage components.
- ⚠️ Make sure the vehicle is fully OFF, not in READY mode, before working under the hood.
- ⚠️ Coolant is poisonous to people and pets. Catch all drained coolant in a drain pan and dispose of it properly.
- ⚠️ Battery disconnect is not normally required for a radiator hose replacement, but keep the key fob away from the vehicle so it cannot be accidentally powered on.
- ⚠️ Work only when the engine and radiator are completely cool.
🔧 Required Tools
You'll need the following tools for this repair:
- 10mm socket
- Ratchet handle
- Long extension 6-inch
- Flat-blade screwdriver medium
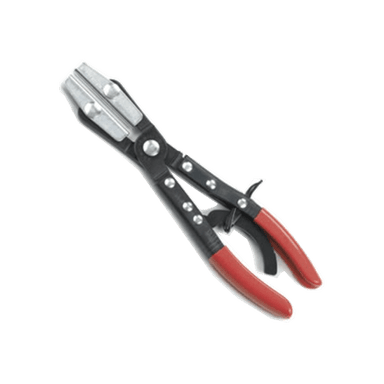
- Hose clamp pliers (specialty)
- Slip-joint pliers 10-inch
- Plastic trim clip remover
- Drain pan 2-gallon minimum
- Coolant funnel spill-free kit (specialty)
- Clean shop towels
- Safety glasses
- Nitrile gloves
- Flashlight
🔩 Required Parts
HowToo sells all the parts you need for this repair:
- Radiator hose - Qty: 1
- Radiator hose clamps - Qty: 2
- Toyota Super Long Life Coolant pink premixed 50/50 - Qty: 1-2 gallons
- Radiator drain plug gasket - Qty: 1
📋 Before You Begin
- Park your RAV4 on level ground and set the parking brake.
- Make sure the power button is OFF and the dash does not say READY.
- Let the engine cool completely, ideally for several hours.
- Move the key fob at least 15 feet away from the vehicle.
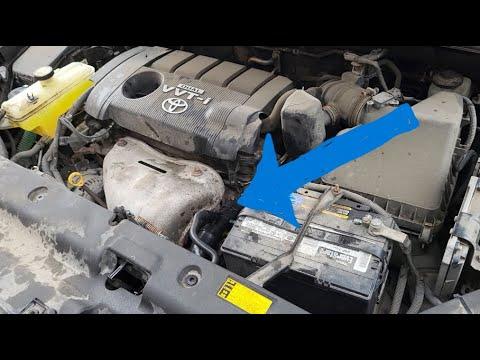
- Open the hood and locate the hose you are replacing. The upper radiator hose runs near the top of the radiator. The lower radiator hose is lower and harder to reach.
- A hose clamp is the spring or screw-style metal ring that squeezes the hose tightly onto the radiator or engine fitting.
- A spill-free funnel is a coolant funnel that locks onto the filler neck and helps remove air bubbles while refilling.
🔨 Step-by-Step Instructions
Follow these steps in order:
Step 1: Remove the under-cover access panel if needed
- Use a 10mm socket, ratchet handle, and long extension 6-inch to remove the front under-cover bolts if access to the radiator drain is blocked.
- Use a plastic trim clip remover to remove any plastic push clips without breaking them.
- Set the bolts and clips aside in order so they go back in the same places.
- Take a photo first.
Step 2: Place the drain pan
- Put a drain pan 2-gallon minimum under the radiator drain area.
- Wear safety glasses and nitrile gloves before opening the cooling system.
- Keep clean shop towels nearby for spills.
Step 3: Slowly open the coolant reservoir cap
- Make sure the engine is cold.
- Use your hand to slowly loosen the coolant reservoir cap.
- If you hear pressure escaping, stop and wait until it finishes before removing the cap fully.
Step 4: Drain enough coolant
- Use a flat-blade screwdriver medium or your fingers, depending on the drain plug style, to carefully open the radiator drain plug.
- Drain coolant until the level is below the hose you are replacing.
- Close the radiator drain plug by hand first, then snug it gently with the flat-blade screwdriver medium if needed.
- Do not overtighten the plastic drain plug.
- Torque to hand-tight only
Step 5: Release the hose clamps
- Use hose clamp pliers to squeeze the tabs on the spring clamp.
- Slide the clamp back onto the hose, away from the radiator or engine fitting.
- If your replacement area has a screw-style clamp, use a flat-blade screwdriver medium to loosen it.
- Repeat this on the other end of the hose.
- Do not pry on plastic fittings.
Step 6: Remove the old radiator hose
- Use your hand to twist the hose gently back and forth to break it loose.
- If the hose is stuck, use slip-joint pliers 10-inch only to gently rotate the hose, not crush it.
- Pull the hose straight off the radiator and engine fitting.
- Use clean shop towels to catch leftover coolant.
- Do not scrape sealing surfaces with metal tools.
Step 7: Clean and inspect the hose fittings
- Use clean shop towels to wipe the radiator and engine hose fittings.
- Use a flashlight to check for cracks, corrosion, or broken plastic necks.
- If a plastic fitting is cracked, stop and replace that part before installing the hose.
Step 8: Install the new radiator hose
- Compare the radiator hose to the old hose to make sure the shape and length match.
- Slide the radiator hose clamps onto the new hose before installing it.
- Push the hose fully onto each fitting until it seats past the raised bead on the fitting.
- The raised bead is the lip that helps keep the hose from sliding off under pressure.
- Use hose clamp pliers to position each spring clamp behind the raised bead.
- If using screw-style clamps, tighten with a flat-blade screwdriver medium until snug. Do not crush the hose.
Step 9: Refill the cooling system
- Install the coolant funnel spill-free kit onto the coolant filler point/reservoir opening.
- Pour in Toyota Super Long Life Coolant pink premixed 50/50 slowly.
- Fill to the proper level marking on the reservoir.
- Do not mix green, universal, or non-compatible coolant with Toyota pink coolant.
Step 10: Bleed air from the cooling system
- Keep the coolant funnel spill-free kit installed and partially filled.
- Start your RAV4 and put it in READY mode.
- Set the cabin heat to maximum temperature and the fan to low.
- Watch the coolant level in the funnel. Add Toyota Super Long Life Coolant pink premixed 50/50 as the level drops.
- Use a flashlight to watch for leaks at both hose ends.
- Let the engine cycle on and off until warm air comes from the vents and no large bubbles appear in the funnel.
- Turn the vehicle OFF.
Step 11: Cap the system and reinstall covers
- Remove the coolant funnel spill-free kit carefully and install the coolant cap by hand.
- Use clean shop towels to wipe spilled coolant from the engine bay.
- Use the 10mm socket, ratchet handle, and plastic trim clip remover to reinstall the under-cover and clips.
- Snug the under-cover bolts evenly.
- Torque to 5 Nm (44 in-lbs)
✅ After Repair
- ✅ With the vehicle OFF and cool, recheck the coolant level in the reservoir.
- ✅ Add Toyota Super Long Life Coolant pink premixed 50/50 if the level is below the FULL mark.
- ✅ Drive gently for 10-15 minutes while watching the temperature warning light.
- ✅ After the first drive, park and inspect both hose ends for leaks using a flashlight.
- ✅ Recheck coolant level again the next morning when fully cold.
- ✅ If the heater blows cold, the temperature warning appears, or coolant level keeps dropping, stop driving and recheck for trapped air or leaks.
💰 DIY vs Shop Cost
Shop Cost: $180-$350 USD equivalent (parts + labor)
DIY Cost: $35-$95 USD equivalent (parts only)
You Save: $145-$255 by doing it yourself!
Shop labor rates vary but typically run $100-$150/hour. This repair takes a shop approximately 1.0-1.5 hours.
🎯 Ready to get started?
HowToo makes it easy: same-day/2-day shipping on every part, plus all the tools and specialty tools you need! Check out the parts and tools sections below to add everything to your cart.