
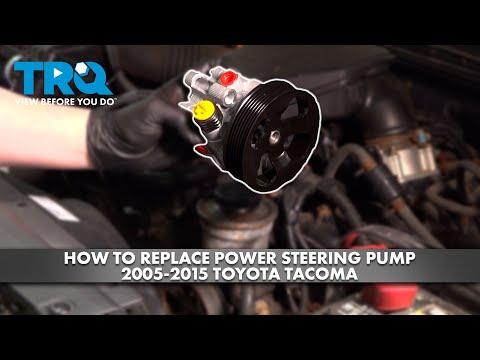





How to Replace the Power Steering Pump on a 2005-2021 Toyota Tacoma 2.7L (Engine: Inline 4 2.7L)
Step-by-step DIY guide with tools, parts, torque specs, ATF refill, and bleeding tips for 2005, 2006, 2007, 2008, 2009, 2010, 2011, 2012, 2013, 2014, 2015, 2016, 2017, 2018, 2019, 2020, 2021
How to Replace the Power Steering Pump on a 2005-2021 Toyota Tacoma 2.7L (Engine: Inline 4 2.7L)
Step-by-step DIY guide with tools, parts, torque specs, ATF refill, and bleeding tips for 2005, 2006, 2007, 2008, 2009, 2010, 2011, 2012, 2013, 2014, 2015, 2016, 2017, 2018, 2019, 2020, 2021


🔧 Power Steering Pump - Replacement
On your Tacoma, the power steering pump is belt-driven and mounted at the front of the 2.7L engine. Replacing it involves removing the drive belt, disconnecting the pressure and return hoses, swapping the pump, refilling the system, and bleeding out air so the steering is quiet and smooth.
Difficulty Level: Intermediate | Estimated Time: 2-3 hours
⚠️ Safety & Precautions
- 🧤 Wear safety glasses and gloves. Power steering fluid can irritate skin and eyes.
- 🔥 Work only on a cool engine. The pump and nearby exhaust parts can get hot.
- ⚠️ Keep hands, hair, and clothing away from the belt area.
- 🔋 Disconnect the negative battery cable before working near the belt and pulley area.
- 🚫 Do not start the engine with the power steering hoses disconnected.
- 🧴 Power steering fluid is slippery. Clean spills right away.
🔧 Required Tools
You'll need the following tools for this repair:
- 10mm socket
- 12mm socket
- 14mm socket
- 17mm wrench
- 3/8-inch ratchet
- 3/8-inch drive extension
- Torque wrench 10-80 ft-lbs
- Serpentine belt tool 14mm adapter
- Line wrench 17mm
- Hose clamp pliers
- Flathead screwdriver 1/4-inch tip
- Drain pan 2-quart minimum
- Fluid transfer syringe 8-ounce
- Shop towels
- Floor jack 3-ton minimum
- Jack stands 3-ton minimum
- Wheel chocks
- Safety glasses
- Nitrile gloves
🔩 Required Parts
HowToo sells all the parts you need for this repair:
- Power steering pump - Qty: 1
- Power steering pump pulley - Qty: 1 if not included with pump
- Power steering pressure hose sealing washers - Qty: 2
- Power steering fluid Dexron II or Dexron III ATF - Qty: 2 quarts
- Serpentine drive belt - Qty: 1 if worn, cracked, or oil-soaked
📋 Before You Begin
- 🚗 Park your Tacoma on level ground and set the parking brake.
- 🧱 Place wheel chocks behind the rear wheels.
- 🔋 Use a 10mm socket to disconnect the negative battery cable.
- 🛞 Raise the front of the truck with a 3-ton floor jack and support it securely on 3-ton jack stands. This makes bleeding the steering system easier.
- 📘 A line wrench is a wrench that grips more sides of a fluid-line fitting, helping prevent rounding it off.
- 🧴 Toyota specifies automatic transmission fluid type Dexron II or Dexron III for this hydraulic power steering system, not generic “power steering fluid.”
🔨 Step-by-Step Instructions
Follow these steps in order:
Step 1: Remove Fluid From the Reservoir
- Open the hood and locate the power steering fluid reservoir on the passenger side/front area of the engine bay.
- Use an 8-ounce fluid transfer syringe to remove as much old fluid as possible from the reservoir.
- Drain the old fluid into a 2-quart drain pan.
- Less fluid now means less mess later.
Step 2: Remove the Engine Splash Shield if Needed
- Use a 10mm socket and 3/8-inch ratchet to remove the lower splash shield fasteners if they block access to the pump area.
- Set the fasteners aside in order so they go back in the same places.
- Reinstall splash shield bolts later and tighten snugly, about Torque to 7 Nm (62 in-lbs).
Step 3: Release Belt Tension
- Find the belt tensioner near the front of the engine. The tensioner is a spring-loaded arm that keeps the belt tight.
- Use a serpentine belt tool with 14mm adapter on the tensioner bolt.
- Rotate the tensioner slowly to release tension from the serpentine belt.
- Slip the belt off the power steering pump pulley only, or remove the belt fully if replacing it.
- Take a photo of the belt routing before removal.
Step 4: Disconnect the Return Hose
- Place the 2-quart drain pan under the power steering pump.
- Use hose clamp pliers to move the clamp back from the return hose connection.
- Use a 1/4-inch flathead screwdriver gently to help break the hose loose if it is stuck.
- Pull the hose off the pump fitting and let the fluid drain into the pan.
- Do not tear the hose. If it is hard or cracked, replace it.
Step 5: Disconnect the Pressure Hose
- Use a 17mm line wrench to loosen the high-pressure hose fitting at the pump.
- A high-pressure hose carries pressurized fluid from the pump to the steering rack.
- Remove the fitting carefully and catch fluid in the drain pan.
- Remove and discard the old sealing washers if your replacement connection uses washers.
- A line wrench helps protect the fitting.
Step 6: Remove the Power Steering Pump Mounting Bolts
- Use a 12mm socket and 3/8-inch ratchet to remove the smaller bracket bolts if equipped.
- Use a 14mm socket and 3/8-inch ratchet to remove the main power steering pump mounting bolts.
- Support the pump with one hand as the final bolt comes out.
- Lift the pump out of the engine bay.
Step 7: Transfer the Pulley if Needed
- If your new power steering pump does not include a pulley, transfer the original pulley using the correct pulley puller/installer supplied with many parts stores as a loaner tool.
- Use the pulley installer to press the pulley onto the new pump shaft until the pulley aligns with the other belt pulleys.
- Do not hammer the pulley on. Hammering can damage the new pump.
- Pulley alignment prevents belt squeal.
Step 8: Install the New Pump
- Set the new power steering pump into position by hand.
- Start all mounting bolts by hand first to avoid cross-threading.
- Use a 14mm socket and torque wrench to tighten the main mounting bolts to Torque to 43 Nm (32 ft-lbs).
- Use a 12mm socket and torque wrench to tighten smaller bracket bolts, if removed, to Torque to 21 Nm (15 ft-lbs).
Step 9: Reconnect the Pressure Hose
- Install new sealing washers on the pressure hose connection if used by your replacement pump fitting.
- Thread the pressure hose fitting into the pump by hand first.
- Use a 17mm line wrench to tighten the fitting.
- Tighten the pressure hose union bolt/fitting to Torque to 44 Nm (32 ft-lbs).
- Do not overtighten. Aluminum pump housings can strip.
Step 10: Reconnect the Return Hose
- Push the return hose fully onto the pump fitting by hand.
- Use hose clamp pliers to move the clamp back into its original position.
- Make sure the hose is not twisted or rubbing the belt.
Step 11: Reinstall the Serpentine Belt
- Route the belt around the pulleys using your photo as a guide.
- Use the serpentine belt tool with 14mm adapter to rotate the tensioner.
- Slip the belt over the power steering pump pulley.
- Slowly release the tensioner.
- Check that the belt ribs sit fully in every pulley groove.
Step 12: Refill the Reservoir
- Use Dexron II or Dexron III ATF only.
- Fill the power steering reservoir to the COLD MAX mark.
- Leave the reservoir cap off for the first bleeding step.
Step 13: Bleed the System With the Engine Off
- Keep the front wheels off the ground on jack stands.
- With the engine OFF, turn the steering wheel slowly from full left to full right 10-15 times.
- Do not hold the steering wheel hard against the stops.
- Check the fluid level often and add Dexron II or Dexron III ATF as needed.
- This pushes trapped air out before the pump spins.
Step 14: Bleed the System With the Engine Running
- Reconnect the negative battery cable using a 10mm socket.
- Tighten the battery terminal to Torque to 5 Nm (44 in-lbs).
- Start the engine and let it idle.
- Turn the steering wheel slowly left and right several times.
- Watch the reservoir. If the fluid foams, shut the engine off and let the bubbles settle.
- Set the final fluid level to the HOT range after the fluid warms up.
Step 15: Reinstall Shields and Lower the Truck
- Use a 10mm socket to reinstall the splash shield if removed.
- Tighten splash shield bolts to Torque to 7 Nm (62 in-lbs).
- Use the 3-ton floor jack to lift the truck slightly off the jack stands.
- Remove the 3-ton jack stands and lower the truck slowly.
✅ After Repair
- ✅ Turn the steering wheel lock-to-lock at idle and listen for whining or groaning.
- ✅ Check for leaks at the pressure hose, return hose, and pump body.
- ✅ Road test at low speed first in an open area.
- ✅ Recheck fluid level after the test drive and top off with Dexron II or Dexron III ATF if needed.
- ✅ If the fluid looks milky or foamy, air is still trapped. Let it sit 10 minutes and repeat the bleeding steps.
- ✅ Dispose of old ATF properly at a local oil/fluid recycling center.
💰 DIY vs Shop Cost
Shop Cost: $450-$850 (parts + labor)
DIY Cost: $160-$380 (parts only)
You Save: $290-$470 by doing it yourself!
Shop labor rates vary but typically run $100-$150/hour. This repair takes a shop approximately 1.5-2.5 hours.
🎯 Ready to get started?
HowToo makes it easy: same-day/2-day shipping on every part, plus all the tools and specialty tools you need! Check out the parts and tools sections below to add everything to your cart.