

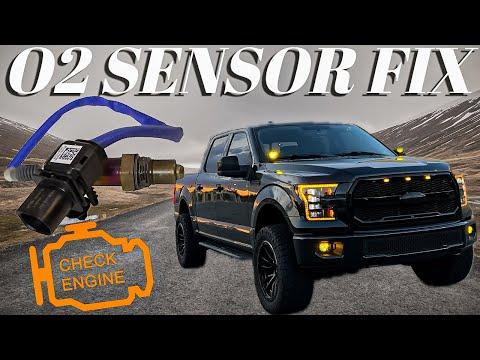






How to Replace the Oxygen Sensor on a 2015-2020 Ford F-150 (Engine: V6 2.7L)
Step-by-step DIY guide with sensor locations, tools, torque specs, and safety tips for 2015, 2016, 2017, 2018, 2019, 2020
How to Replace the Oxygen Sensor on a 2015-2020 Ford F-150 (Engine: V6 2.7L)
Step-by-step DIY guide with sensor locations, tools, torque specs, and safety tips for 2015, 2016, 2017, 2018, 2019, 2020


🔧 F-150 - Oxygen Sensor Replacement
Replacing an oxygen sensor on your F-150 means removing the failed sensor from the exhaust pipe and installing a matching new one in the same position. Your F-150 has multiple oxygen sensors, so use the check engine light code to replace the correct one.
Difficulty Level: Beginner to Intermediate | Estimated Time: 1-2 hours
Assumption: This procedure covers replacing one oxygen sensor at the location identified by a scan tool code.
⚠️ Safety & Precautions
- ⚠️ Let the exhaust cool completely before starting. Oxygen sensors screw into the exhaust and can be extremely hot.
- ⚠️ If you raise your F-150, support it with jack stands. Never work under a vehicle supported only by a jack.
- ⚠️ Disconnect the negative battery cable before unplugging the sensor connector.
- ⚠️ Do not pull on oxygen sensor wires. Pull only on the plastic connector.
- ⚠️ Keep the new sensor wire away from the exhaust, driveshaft, steering shaft, and sharp edges.
🔧 Required Tools
You'll need the following tools for this repair:
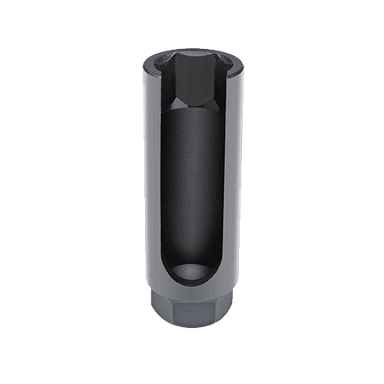
- 7/8 inch oxygen sensor socket
- 3/8 inch drive ratchet
- 3/8 inch drive 6 inch extension
- 10mm socket
- Torque wrench rated 10-80 Nm
- Flat-blade screwdriver
- Trim clip removal tool
- Floor jack rated 3-ton minimum
- Jack stands rated 3-ton minimum
- Wheel chocks
- Penetrating oil
- OBD-II scan tool
- Safety glasses
- Mechanic gloves
An oxygen sensor socket is a slotted socket that fits over the sensor while allowing the wire to pass through the side.
An OBD-II scan tool plugs into the diagnostic port and reads or clears check engine light codes.
🔩 Required Parts
HowToo sells all the parts you need for this repair:
- Oxygen sensor - Qty: 1
- Anti-seize compound - Qty: 1 small packet, if not pre-applied
Sensor location note: On your F-150, Bank 1 is the passenger side and Bank 2 is the driver side. Sensor 1 is before the catalytic converter, and Sensor 2 is after the catalytic converter.
📋 Before You Begin
- 🅿️ Park your F-150 on level ground, shift to Park, and apply the parking brake.
- 🧊 Allow the exhaust system to cool fully.
- 🛞 Place wheel chocks at the wheels that stay on the ground.
- 🔍 Use the OBD-II scan tool to identify the failed sensor location before removing anything.
- 🔋 Use a 10mm socket to disconnect the negative battery cable.
🔨 Step-by-Step Instructions
Follow these steps in order:
Step 1: Confirm the Failed Sensor
- Use the OBD-II scan tool and plug it into the diagnostic port under the driver-side dash.
- Read the engine code and write down the exact sensor location, such as Bank 1 Sensor 1 or Bank 2 Sensor 2.
- Do not replace a random sensor. Your F-150 uses more than one oxygen sensor.
Step 2: Secure the Truck
- Use wheel chocks to block the wheels.
- If you need more room, raise the truck with a floor jack rated 3-ton minimum.
- Place jack stands rated 3-ton minimum under the frame.
- Gently lower the truck onto the jack stands before getting underneath.
- Shake the truck lightly to verify stability.
Step 3: Disconnect the Battery
- Use a 10mm socket to loosen the negative battery terminal clamp.
- Move the negative cable away from the battery post so it cannot touch accidentally.
Step 4: Locate the Oxygen Sensor
- Wear safety glasses and mechanic gloves.
- Use the code location to find the correct sensor:
- Bank 1 Sensor 1: passenger side, before the catalytic converter.
- Bank 1 Sensor 2: passenger side, after the catalytic converter.
- Bank 2 Sensor 1: driver side, before the catalytic converter.
- Bank 2 Sensor 2: driver side, after the catalytic converter.
- Follow the sensor wire from the exhaust pipe to the electrical connector.
Step 5: Unplug the Sensor Connector
- Use a flat-blade screwdriver to gently lift the connector lock tab if needed.
- Use a trim clip removal tool to release any harness clips from brackets.
- Pull the connector apart by the plastic bodies, not by the wires.
- Take a photo of the wire routing first.
Step 6: Loosen the Old Sensor
- Spray penetrating oil where the sensor threads into the exhaust.
- Wait several minutes so the oil can soak into the threads.
- Place the 7/8 inch oxygen sensor socket over the sensor with the wire through the socket slot.
- Use a 3/8 inch drive ratchet and 3/8 inch drive 6 inch extension to turn the sensor counterclockwise.
- If it feels stuck, tighten it slightly, then loosen it again to work the threads free.
Step 7: Remove the Old Sensor
- Use the 7/8 inch oxygen sensor socket to unthread the sensor fully.
- Remove it by hand once it spins easily.
- Compare the old and new oxygen sensors. The connector and wire length must match.
Step 8: Prepare the New Sensor
- Look at the new sensor threads.
- If the threads already have a gray or silver coating, do not add more anti-seize.
- If the threads are bare, apply a tiny amount of anti-seize compound only to the threads.
- Keep anti-seize off the sensor tip.
Step 9: Install the New Sensor
- Thread the new oxygen sensor into the exhaust by hand first.
- Use the 7/8 inch oxygen sensor socket, 3/8 inch drive 6 inch extension, and torque wrench rated 10-80 Nm to tighten it.
- Torque to 48 Nm (35 ft-lbs).
- Hand-starting prevents damaged threads.
Step 10: Reconnect the Sensor Harness
- Route the wire the same way it was before removal.
- Use the trim clip removal tool if needed to help seat the wire clips into their brackets.
- Push the connector together until it clicks.
- Make sure the wire cannot touch the hot exhaust.
Step 11: Reconnect the Battery
- Place the negative battery cable back on the battery post.
- Use a 10mm socket to tighten the terminal clamp snugly.
- Do not overtighten the clamp.
Step 12: Lower the Truck
- If raised, use the floor jack rated 3-ton minimum to lift the truck slightly off the jack stands.
- Remove the jack stands rated 3-ton minimum.
- Lower the truck slowly with the floor jack rated 3-ton minimum.
- Remove the wheel chocks.
Step 13: Clear the Code
- Use the OBD-II scan tool to clear the check engine light code.
- Start the engine and let it idle for a few minutes.
- Check that the engine runs smoothly and the check engine light does not return immediately.
✅ After Repair
- ✅ Drive your F-150 until it reaches normal operating temperature.
- ✅ Recheck for codes with the OBD-II scan tool after the test drive.
- ✅ Inspect the new sensor wire and make sure it is clipped away from heat and moving parts.
- ✅ If the same code comes back, check for wiring damage, exhaust leaks, fuel trim issues, or catalytic converter problems.
💰 DIY vs Shop Cost
Shop Cost: $250-$550 (parts + labor)
DIY Cost: $60-$180 (parts only)
You Save: $190-$370 by doing it yourself!
Shop labor rates vary but typically run $100-$150/hour. This repair takes a shop approximately 0.8-1.5 hours.
🎯 Ready to get started?
HowToo makes it easy: same-day/2-day shipping on every part, plus all the tools and specialty tools you need! Check out the parts and tools sections below to add everything to your cart.