

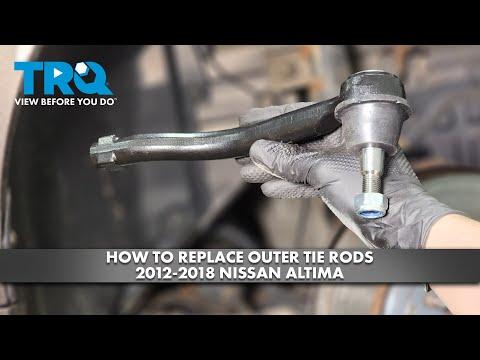







How to Replace the Outer Tie Rod End on a 2016 Nissan Altima (DIY Guide)
Step-by-step instructions with required tools/parts, torque specs, safety tips, and alignment notes for 2013, 2014, 2015, 2016, 2017, 2018
How to Replace the Outer Tie Rod End on a 2016 Nissan Altima (DIY Guide)
Step-by-step instructions with required tools/parts, torque specs, safety tips, and alignment notes for 2013, 2014, 2015, 2016, 2017, 2018


🔧 Altima - Outer Tie Rod End Replacement
The outer tie rod end connects your steering rack to the steering knuckle, and it’s a common wear item that can cause clunks, looseness, or uneven tire wear. The key to a good DIY replacement is keeping the new part installed at the same length as the old one, then getting a proper alignment afterward.
Difficulty Level: Intermediate | Estimated Time: 1.0-2.0 hours
Assumption: you’re replacing the outer tie rod end (not the inner).
⚠️ Safety & Precautions
- ⚠️ Support the car with jack stands; never rely on a jack alone.
- ⚠️ Chock the rear wheels and keep the steering wheel centered while working.
- ⚠️ If you use a “pickle fork” separator, it can damage the boot (okay if replacing the tie rod end).
- ⚠️ Alignment is required after this repair to prevent rapid tire wear.
🔧 Required Tools
You'll need the following tools for this repair:
- Floor jack (rated 2-ton minimum)
- Jack stands (rated 2-ton minimum)
- Wheel chocks
- 19mm socket
- 1/2" drive breaker bar
- 1/2" drive torque wrench (20-150 ft-lbs range)
- 17mm socket
- 17mm combination wrench
- Adjustable wrench (10 in)
- Needle-nose pliers
- Pick tool
- Tie rod end puller (specialty)
- Hammer (16 oz)
- Paint marker
- Tape measure
- Penetrating oil
- Safety glasses
- Mechanic gloves
🔩 Required Parts
HowToo sells all the parts you need for this repair:
- Outer tie rod end - Qty: 1
- Cotter pin (tie rod end) - Qty: 1
- Anti-seize compound - Qty: 1
📋 Before You Begin
- Park on level ground, point the front wheels straight, and set the parking brake.
- Place wheel chocks behind both rear tires.
- Spray penetrating oil on the tie rod end jam nut threads and the tie rod end stud nut.
- Have your new cotter pin ready (cotter pins are one-time use).
🔨 Step-by-Step Instructions
Follow these steps in order:
Step 1: Loosen lug nuts and raise the front corner
- Use a 19mm socket with a 1/2" drive breaker bar to loosen the lug nuts 1/2 turn (do not remove yet).
- Lift the front corner with a floor jack (rated 2-ton minimum) and set it securely on jack stands (rated 2-ton minimum).
- Remove the wheel using the 19mm socket.
Step 2: Mark the current tie rod end position
- Use a paint marker to mark the relationship between the tie rod end and the threaded inner tie rod (make a clear line across both).
- Use a tape measure to measure from a fixed point (like the center of the outer tie rod end stud) to the jam nut, and write it down.
- This helps keep toe close until alignment.
Step 3: Loosen the jam nut
- Hold the tie rod end with a 17mm combination wrench (or a adjustable wrench (10 in) if needed).
- Turn the jam nut counterclockwise using the adjustable wrench (10 in) to “break it loose.”
- Do not move the tie rod end position yet—just loosen the jam nut.
Step 4: Remove the cotter pin and loosen the stud nut
- Straighten and remove the cotter pin using needle-nose pliers and a pick tool.
- Remove the tie rod end stud nut using a 17mm socket.
- If the nut is a “castle nut,” you will install a new cotter pin during reassembly.
Step 5: Separate the tie rod end from the steering knuckle
- Install a tie rod end puller (specialty) and tighten it until the stud pops free. (A puller is a tool that presses the tapered stud out without hammering on threads.)
- If needed, use a hammer (16 oz) to tap the side of the knuckle near the stud while the puller is under tension (do not hit the stud threads).
Step 6: Remove the old tie rod end (count turns)
- Spin the tie rod end off the inner tie rod by hand.
- Count the exact number of turns it takes to remove it (example: 17 turns) and write it down.
Step 7: Install the new tie rod end to the same length
- Apply a thin coat of anti-seize compound to the threads (avoid getting it on the stud taper).
- Thread the new tie rod end on the inner tie rod using the exact same number of turns you counted.
- Line up your paint marker marks and your tape measure measurement as closely as possible.
Step 8: Attach the stud to the knuckle and torque fasteners
- Insert the tie rod end stud into the knuckle.
- Install the stud nut by hand, then tighten using a 17mm socket.
- Torque to 49 Nm (36 ft-lbs), then tighten further only as needed to align the cotter pin hole.
- Install a new cotter pin using needle-nose pliers, then bend the ends over securely.
- Tighten the jam nut using a adjustable wrench (10 in) while holding the tie rod end with a 17mm combination wrench.
- Torque to 55 Nm (41 ft-lbs).
Step 9: Reinstall the wheel and lower the car
- Reinstall the wheel and hand-tighten lug nuts using a 19mm socket.
- Lower the car off the jack stands (rated 2-ton minimum) using the floor jack (rated 2-ton minimum).
- Torque lug nuts in a star pattern using a 1/2" drive torque wrench (20-150 ft-lbs range): Torque to 113 Nm (83 ft-lbs).
✅ After Repair
- Start the car and turn the steering wheel lock-to-lock slowly to confirm smooth movement and no binding.
- Road test at low speed first. Listen for clunks and confirm the steering wheel is close to centered.
- Get a professional alignment as soon as possible (same day is best).
- Recheck the cotter pin and jam nut after a short drive.
💰 DIY vs Shop Cost
Shop Cost: $220-$450 (parts + labor + alignment)
DIY Cost: $35-$120 (parts only)
You Save: $185-$330 by doing it yourself!
Shop labor rates vary but typically run $100-$150/hour. This repair takes a shop approximately 1.0-1.5 hours.
🎯 Ready to get started?
HowToo makes it easy: same-day/2-day shipping on every part, plus all the tools and specialty tools you need! Check out the parts and tools sections below to add everything to your cart.