







How to Replace the Outer Tie Rod End on a 2015-2022 GMC Canyon
Step-by-step steering repair guide with tools, parts, torque specs, and alignment tips for 2015, 2016, 2017, 2018, 2019, 2020, 2021, 2022
How to Replace the Outer Tie Rod End on a 2015-2022 GMC Canyon
Step-by-step steering repair guide with tools, parts, torque specs, and alignment tips for 2015, 2016, 2017, 2018, 2019, 2020, 2021, 2022


🔧 Canyon - Outer Tie Rod End Replacement
This repair replaces a worn outer tie rod end, which connects the steering rack to the steering knuckle and helps aim the front wheels. A bad tie rod end can cause loose steering, clunking, uneven tire wear, or poor alignment.
Difficulty Level: Beginner-Intermediate | Estimated Time: 1-2 hours per side
Assumption: This procedure is for the front outer tie rod end on your Canyon.
⚠️ Safety & Precautions
- ⚠️ Work on a flat, solid surface and never rely on a jack alone.
- ⚠️ Use jack stands. Jack stands are metal supports that safely hold the vehicle after lifting.
- ⚠️ Do not hammer directly on the steering knuckle threads or stud threads.
- ⚠️ A wheel alignment is required after replacing a tie rod end.
- ⚠️ Keep your hands clear when separating the tie rod end because it may pop loose suddenly.
- ⚠️ Battery disconnect is not required for this repair.
🔧 Required Tools
You'll need the following tools for this repair:
- Floor jack (rated 2-ton minimum)
- Jack stands (rated 2-ton minimum)
- Wheel chocks
- Safety glasses
- Mechanic gloves
- 19mm lug nut socket
- Breaker bar 1/2-inch drive
- Torque wrench 1/2-inch drive
- Adjustable wrench 10-inch
- Open-end wrench set 18mm-24mm
- Socket set 18mm-24mm
- Ratchet 1/2-inch drive
- Tie rod end puller (specialty)
- Needle-nose pliers
- Paint marker
- Tape measure
- Wire brush
- Penetrating oil spray
🔩 Required Parts
HowToo sells all the parts you need for this repair:
- Front outer tie rod end - Qty: 1 per side
- New cotter pin - Qty: 1 per side
- New castle nut - Qty: 1 per side
- Chassis grease - Qty: 1 tube if tie rod end is greaseable
📋 Before You Begin
- Park your Canyon on level ground.
- Set the parking brake firmly.
- Place wheel chocks behind the rear wheels.
- Straighten the steering wheel before lifting the front end.
- Spray penetrating oil on the tie rod jam nut and outer tie rod stud nut.
- The jam nut is the lock nut on the inner tie rod that holds the outer tie rod in position.
- Take a clear photo of the old tie rod end before removing it.
🔨 Step-by-Step Instructions
Follow these steps in order:
Step 1: Loosen the Front Wheel Lug Nuts
- Use the 19mm lug nut socket and breaker bar 1/2-inch drive to loosen the front wheel lug nuts about 1/2 turn.
- Do not remove the lug nuts yet.
- Tip: Loosen while tire touches ground.
Step 2: Lift and Support the Front of the Truck
- Use the floor jack (rated 2-ton minimum) at the front frame lifting point.
- Raise your Canyon high enough for the front tire to clear the ground.
- Place jack stands (rated 2-ton minimum) under the frame.
- Lower the truck gently onto the jack stands.
- Lightly shake the vehicle by hand to confirm it is stable.
Step 3: Remove the Front Wheel
- Use the 19mm lug nut socket and ratchet 1/2-inch drive to remove the loosened lug nuts.
- Remove the wheel and place it flat under the frame as an extra safety backup.
Step 4: Mark the Tie Rod Position
- Use the paint marker to mark where the outer tie rod end meets the inner tie rod threads.
- Use the tape measure to measure from the center of the tie rod stud to a fixed point on the inner tie rod.
- Write the measurement down before removal.
- This helps keep the alignment close enough to drive to an alignment shop.
Step 5: Loosen the Jam Nut
- Use the correct-size open-end wrench set 18mm-24mm on the jam nut.
- Use the adjustable wrench 10-inch to hold the inner tie rod steady if it wants to turn.
- Turn the jam nut loose about 1/4 turn.
- Do not move the jam nut far from its original position.
- Tip: Count turns later for accuracy.
Step 6: Remove the Cotter Pin and Castle Nut
- Use needle-nose pliers to straighten and pull out the cotter pin from the tie rod stud.
- The cotter pin is the small bent safety pin through the nut and stud.
- Use the correct-size socket set 18mm-24mm and ratchet 1/2-inch drive to remove the castle nut.
- The castle nut is the slotted nut on the tie rod stud.
Step 7: Separate the Tie Rod End from the Steering Knuckle
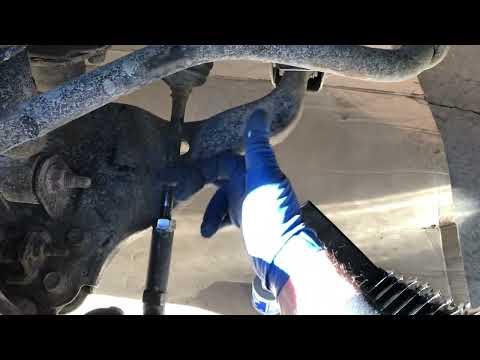
- Install the tie rod end puller (specialty) over the tie rod end stud and steering knuckle.
- A tie rod end puller is a small press tool that separates the tapered stud without damaging the steering part.
- Use the correct-size socket set 18mm-24mm and ratchet 1/2-inch drive to tighten the puller until the stud pops free.
- Remove the tie rod end from the steering knuckle.
Step 8: Count Turns and Remove the Old Tie Rod End
- Use your hand to spin the outer tie rod end off the inner tie rod.
- Count every full turn as you remove it.
- Write down the number of turns.
- Use the wire brush to clean the exposed inner tie rod threads.
Step 9: Install the New Outer Tie Rod End
- Thread the new outer tie rod end onto the inner tie rod by hand.
- Use the same number of turns you counted during removal.
- Line it up close to your paint mark and measurement.
- Do not tighten the jam nut yet.
Step 10: Attach the Tie Rod End to the Steering Knuckle
- Insert the new tie rod stud into the steering knuckle by hand.
- Install the new castle nut by hand first to avoid cross-threading.
- Use the correct-size socket set 18mm-24mm and torque wrench 1/2-inch drive to tighten the nut.
- Torque to 50 Nm (37 ft-lbs), then tighten further only as needed to align the cotter pin hole.
- Never loosen the castle nut to line up the cotter pin hole.
Step 11: Install the New Cotter Pin
- Slide the new cotter pin through the castle nut and tie rod stud hole.
- Use needle-nose pliers to bend the cotter pin ends around the nut.
- Make sure the cotter pin is fully seated and cannot fall out.
Step 12: Tighten the Jam Nut
- Use the adjustable wrench 10-inch to hold the inner tie rod steady.
- Use the correct-size open-end wrench set 18mm-24mm to tighten the jam nut against the new outer tie rod end.
- Torque to 75 Nm (55 ft-lbs).
Step 13: Grease the Tie Rod End if Needed
- If the new tie rod end has a grease fitting, use the grease fitting supplied with the part.
- Use chassis grease from the chassis grease tube with a compatible grease gun if your kit requires it.
- Stop when the rubber boot just begins to firm up.
- Do not overfill the boot.
Step 14: Reinstall the Wheel
- Place the wheel back onto the hub by hand.
- Install all lug nuts finger-tight.
- Use the 19mm lug nut socket and ratchet 1/2-inch drive to snug the lug nuts in a star pattern.
Step 15: Lower the Truck and Torque the Lug Nuts
- Use the floor jack (rated 2-ton minimum) to lift your Canyon slightly off the jack stands.
- Remove the jack stands (rated 2-ton minimum).
- Lower the truck until the tire touches the ground.
- Use the 19mm lug nut socket and torque wrench 1/2-inch drive to tighten lug nuts in a star pattern.
- Torque to 190 Nm (140 ft-lbs).
✅ After Repair
- ✅ Turn the steering wheel left and right while parked and listen for binding or clunks.
- ✅ Test drive slowly first. Keep speed low until alignment is checked.
- ✅ Schedule a front wheel alignment immediately after the repair.
- ✅ Recheck the tie rod jam nut and cotter pin after the first short drive.
- ✅ Recheck lug nut torque after 25-50 miles.
- ✅ If the steering wheel is far off-center, do not keep driving except directly to alignment service.
💰 DIY vs Shop Cost
Shop Cost: $220-$450 per side including parts, labor, and alignment-related labor
DIY Cost: $35-$120 per side for parts only, plus alignment afterward
You Save: $150-$300 by doing it yourself!
Shop labor rates vary but typically run $100-$150/hour. This repair takes a shop approximately 0.8-1.5 hours plus alignment time.
🎯 Ready to get started?
HowToo makes it easy: same-day/2-day shipping on every part, plus all the tools and specialty tools you need! Check out the parts and tools sections below to add everything to your cart.