


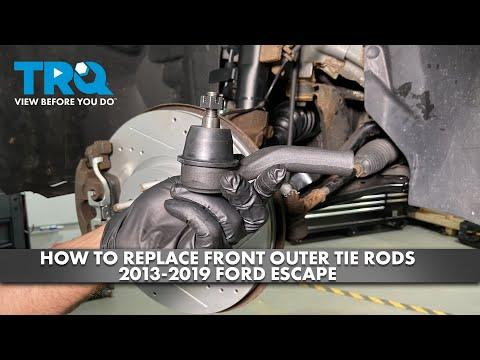







How to Replace the Outer Tie Rod End on a 2013-2019 Ford Escape
Step-by-step instructions with required tools, torque specs, safety tips, and alignment guidance for 2013, 2015, 2016, 2017, 2018, 2019
How to Replace the Outer Tie Rod End on a 2013-2019 Ford Escape
Step-by-step instructions with required tools, torque specs, safety tips, and alignment guidance for 2013, 2015, 2016, 2017, 2018, 2019


🔧 Escape - Outer Tie Rod End Replacement
This is a manageable intermediate repair, but the wheel alignment afterward isn’t optional. The outer tie rod end connects the steering rack to the steering knuckle. This procedure assumes you’re replacing an outer tie rod end, not the inner joint hidden beneath the rubber steering-rack boot.
Difficulty Level: Intermediate | Estimated Time: 1-2 hours per side
Parts note: The catalog search didn’t return a tie rod aisle, so carefully match the replacement to the left or right side before installation.
⚠️ Safety & Precautions
- ⚠️ Support your Escape with jack stands. Never work beneath a vehicle held only by a jack.
- ⚠️ A loose or incorrectly installed tie rod can cause loss of steering control.
- ⚠️ Keep the ignition off and don’t let anyone turn the steering wheel while the joint is disconnected.
- ⚠️ Don’t strike the steering knuckle or threaded stud with a hammer. Use a tie rod end separator.
- ⚠️ Replace the tie rod stud nut if the new part supplies one. Ford specifies discarding the removed nut.
- ⚠️ Battery disconnection isn’t required for an outer tie rod end replacement.
🔧 Required Tools
You'll need the following tools for this repair:
- 19mm impact-rated lug nut socket
- 18mm socket
- 21mm open-end wrench
- 3/8-inch drive ratchet
- 1/2-inch drive breaker bar
- 1/2-inch drive torque wrench rated to 150 ft-lbs
- Tie rod end separator (specialty)
- Floor jack rated 2-ton minimum
- Jack stands rated 2-ton minimum
- Wheel chocks
- Wire brush
- Paint marker
- Penetrating oil
- Mechanic gloves
- Safety glasses
🔩 Required Parts
HowToo sells all the parts you need for this repair:
- Front outer tie rod end for the correct side - Qty: 1
- New tie rod end locking nut - Qty: 1
If both outer joints have measurable looseness or damaged boots, replace both. Otherwise, they don’t have to be replaced as a pair.
📋 Before You Begin
- 📋 Park on level, solid ground with the transmission in Park and the parking brake engaged.
- 📋 Chock both rear wheels before raising the front of your Escape.
- 📋 Keep the steering wheel centered and note which side you’re repairing.
- 📋 Schedule a four-wheel alignment immediately after the repair.
- 📋 Confirm that the new tie rod matches the old part’s side, bend, stud taper, and thread direction.
🔨 Step-by-Step Instructions
Follow these steps in order:
Step 1: Loosen the wheel nuts
- Use the 19mm lug nut socket and 1/2-inch breaker bar to loosen each front wheel nut about one-quarter turn.
- Don’t remove the nuts while the tire is still carrying the vehicle’s weight.
Step 2: Raise and support the vehicle
- Use the floor jack at the approved front lifting point.
- Place a jack stand beneath the reinforced side support point, then lower the vehicle securely onto it.
- Give the body a gentle push before working. It should remain completely stable.
Step 3: Remove the front wheel
- Use the 19mm lug nut socket and ratchet to remove the loosened wheel nuts.
- Remove the wheel and place it flat beneath the rocker area as secondary protection.
Step 4: Mark the original adjustment
- Use the wire brush to clean the exposed tie rod threads and jam nut.
- Apply a small amount of penetrating oil where the jam nut meets the outer tie rod.
- Use the paint marker to mark the jam nut position and a straight reference line across the threads.
- Measure or photograph the exposed thread length for another reference.
Step 5: Loosen the jam nut
- The jam nut locks the outer tie rod end onto the threaded inner tie rod.
- Use the 21mm open-end wrench to break the jam nut loose.
- Loosen it only about one-quarter turn. Don’t move it farther down the threads.
- If necessary, hold the outer tie rod end with the correctly sized wrench flats while loosening the nut.
Step 6: Remove the tie rod stud nut
- Use the 18mm socket and ratchet to remove the nut securing the tie rod stud to the steering knuckle.
- If the stud rotates, press the tie rod downward into the knuckle while loosening the nut. Use the stud’s hex-holding feature if the replacement design provides one.
- Discard the removed locking nut.
Step 7: Separate the tie rod from the knuckle
- Install the tie rod end separator around the joint and tighten it until the tapered stud releases from the steering knuckle.
- Keep your fingers clear because the taper can release suddenly.
- Don’t hammer the aluminum steering knuckle. That shortcut can turn a simple repair into an expensive one.
Step 8: Remove the old tie rod end
- Unscrew the tie rod end by hand while counting every complete turn.
- Record the count, including any partial turn.
- Leave the jam nut close to its marked position.
- Count carefully. Toe changes faster than you’d expect.
Step 9: Compare the replacement part
- Place the old and new tie rod ends beside each other.
- Confirm the thread, overall length, stud taper, bend, and mounting direction match.
- Don’t install the new part if the dimensions or side orientation differ.
Step 10: Install the new tie rod end
- Thread the new tie rod end onto the inner tie rod using exactly the same number of turns recorded during removal.
- Stop when it reaches the jam nut or original paint mark.
- Position the stud through the steering knuckle without twisting the rubber dust boot.
Step 11: Tighten the stud nut
- Install the new locking nut supplied with the tie rod end.
- Use the 18mm socket and torque wrench to tighten the outer tie rod stud nut to 48 Nm (35 ft-lbs). Ford service information for this Escape generation lists the removed nut as single-use. scribd.com)
- Use the stud’s holding feature if it begins to rotate while tightening.
Step 12: Tighten the jam nut
- Hold the outer tie rod stationary so it doesn’t rotate away from the marked position.
- Use the 21mm open-end wrench and an appropriate torque-wrench adapter to tighten the jam nut to 90 Nm (66 ft-lbs). scribd.com)
- Verify the rubber boot isn’t pinched, cut, or twisted.
Step 13: Reinstall the wheel
- Install the wheel and start every wheel nut by hand.
- Use the 19mm lug nut socket and ratchet to snug the nuts in a crisscross pattern.
- Raise the vehicle slightly with the floor jack, remove the jack stand, and lower the tire to the ground.
- Use the 19mm lug nut socket and torque wrench to tighten the wheel nuts in a crisscross pattern to 135 Nm (100 ft-lbs). go-parts.com
✅ After Repair
- ✅ Start the engine and slowly turn the steering wheel left and right while listening for binding or unusual noises.
- ✅ Confirm the steering wheel returns smoothly and the tire doesn’t contact nearby components.
- ✅ Drive slowly around the parking area before entering normal traffic.
- ✅ Stop immediately if the steering wheel is badly off-center, the vehicle darts, or the repaired joint makes noise.
- ✅ Have a professional alignment performed immediately. Counting turns only keeps the setting close enough to reach the alignment rack safely.
- ✅ Recheck the wheel nut torque after approximately 50 miles.
💰 DIY vs Shop Cost
Shop Cost: $220-$450 (part, labor, and alignment)
DIY Cost: $90-$220 (part and alignment)
You Save: $100-$230 by doing it yourself!
Shop labor rates vary but typically run $100-$150/hour. This repair takes a shop approximately 0.5-1.0 hour per side, plus alignment time.
🎯 Ready to get started?
HowToo makes it easy: same-day/2-day shipping on every part, plus all the tools and specialty tools you need! Check out the parts and tools sections below to add everything to your cart.
