


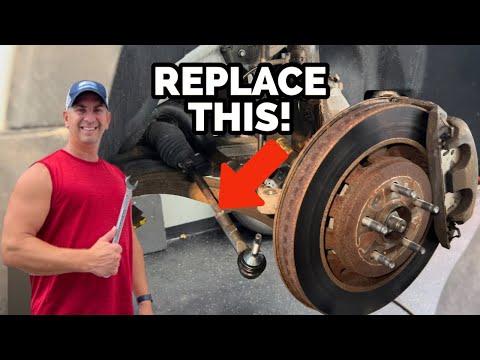







How to Replace the Outer Tie Rod End on a 2011-2019 Ford Explorer
Step-by-step instructions with required tools, torque specs, safety tips, and alignment guidance for 2011, 2012, 2013, 2014, 2015, 2016, 2017, 2018, 2019
How to Replace the Outer Tie Rod End on a 2011-2019 Ford Explorer
Step-by-step instructions with required tools, torque specs, safety tips, and alignment guidance for 2011, 2012, 2013, 2014, 2015, 2016, 2017, 2018, 2019


🔧 Explorer - Outer Tie Rod End Replacement
This is a manageable first suspension repair, but the alignment afterward isn’t optional. You’ll separate the outer tie rod end from the steering knuckle, count its removal turns, and install the new end at approximately the same position. This procedure assumes you’re replacing an outer tie rod end, not the inner tie rod hidden beneath the steering-rack boot.
Difficulty Level: Intermediate | Estimated Time: 1-2 hours per side
⚠️ Safety & Precautions
- ⚠️ Support your Explorer with jack stands. Never work beneath a vehicle supported only by a jack.
- ⚠️ Wear safety glasses when using penetrating oil or separating the tapered joint.
- ⚠️ Do not strike the threaded stud or aluminum steering knuckle with a heavy hammer.
- ⚠️ Do not drive at highway speed if the steering wheel is crooked or the vehicle pulls afterward.
- ⚠️ Have a four-wheel alignment performed immediately after replacement.
- ⚠️ Battery disconnection is not required.
🔧 Required Tools
You'll need the following tools for this repair:
- Hydraulic floor jack rated 3-ton minimum
- Jack stands rated 3-ton minimum
- Wheel chocks
- 1/2-inch drive breaker bar
- 19mm or 21mm lug-nut socket
- Metric socket set, 10-24mm
- Metric combination wrench set, 17-24mm
- 1/2-inch drive torque wrench, 20-150 ft-lbs
- Tie rod end puller (specialty)
- 10-inch adjustable wrench
- Needle-nose pliers
- Wire brush
- Tape measure
- Paint marker
- Small torque-angle-compatible crowfoot wrench set
- Mechanic gloves
- Safety glasses
🔩 Required Parts
HowToo sells all the parts you need for this repair:
- Outer steering tie rod end - Qty: 1 per affected side
- New tie rod end retaining nut - Qty: 1
- New cotter pin, if supplied or required - Qty: 1
- Penetrating oil - Qty: 1
- Paint marker - Qty: 1
I’d use a premium or OE-grade outer end rather than the cheapest option. Steering parts are a lousy place to save the price of lunch.
📋 Before You Begin
- Park on level, solid ground with the transmission in Park and the parking brake applied.
- Point the front wheels straight ahead and chock both rear wheels.
- Confirm the loose component is the outer tie rod end. Movement inside the accordion-shaped steering-rack boot indicates an inner tie rod problem.
- Arrange a four-wheel alignment before starting so the vehicle isn’t driven unnecessarily afterward.
- No infotainment service mode, scan tool, or steering calibration command is required for the mechanical replacement.
🔨 Step-by-Step Instructions
Follow these steps in order:
Step 1: Loosen the wheel nuts
- Use the 19mm or 21mm lug-nut socket and 1/2-inch breaker bar to loosen each wheel nut approximately half a turn.
- Do not remove the nuts while the tire is supporting the vehicle.
Step 2: Raise and support the front corner
- Use the 3-ton floor jack at the approved front lifting point.
- Place a 3-ton jack stand beneath the approved support point, then lower the vehicle securely onto it.
- Remove the wheel nuts and wheel using the lug-nut socket.
- Slide the removed wheel beneath the rocker area as a secondary precaution.
Step 3: Record the original tie rod position
- Use the wire brush to clean the exposed threads and jam nut. The jam nut is the large locknut directly behind the outer tie rod end.
- Apply penetrating oil to the jam nut and tapered stud.
- Use the paint marker to mark the jam nut and threaded rod.
- Use the tape measure to record the distance between two fixed points on the old assembly.
- Photograph the position and exposed thread count before moving anything.
- Measurements get you close, not aligned.
Step 4: Loosen the jam nut
- Hold the inner tie rod steady with the 10-inch adjustable wrench.
- Use the correctly fitting wrench from the 17-24mm combination wrench set to loosen the jam nut approximately one-quarter turn.
- Do not move the jam nut farther than necessary. Its position provides a useful starting point for installation.
Step 5: Remove the stud retaining nut
- If present, use the needle-nose pliers to straighten and remove the cotter pin. Never reuse it.
- Use the correctly fitting socket from the 10-24mm metric socket set to remove and discard the tie rod end retaining nut.
- Thread the old nut back onto the stud by two or three turns while separating the joint. This helps contain the release.
Step 6: Separate the tie rod end
- Fit the tie rod end puller squarely around the steering-knuckle boss and stud.
- Tighten the puller slowly until the tapered stud releases from the knuckle.
- Remove the old nut and lift the stud out of the knuckle.
- Do not hammer directly on the stud or steering knuckle. Ford’s service procedure specifies using a tie rod end remover. lemon-manuals.org.ua
Step 7: Remove the old tie rod end
- Turn the old outer tie rod end counterclockwise by hand.
- Count and write down every complete and partial turn required to remove it.
- Leave the jam nut at the marked position.
- Compare the new and old parts. The stud taper, thread diameter, overall length, and jam-nut seating surface must match.
Step 8: Install the new tie rod end
- Thread the new outer tie rod end onto the inner rod using exactly the same number of turns recorded during removal.
- Stop when it reaches the marked jam-nut position and approximately matches your measurement.
- Insert the new stud fully into the steering knuckle.
- Install the new retaining nut supplied with the replacement part.
Step 9: Torque the retaining nut
- Use the correct socket from the 10-24mm metric socket set and the 1/2-inch torque wrench.
- For the factory-style 2011-2019 Explorer joint, torque the outer tie rod end retaining nut to 150 Nm (111 ft-lbs). The service information also calls for discarding the removed nut. lemon-manuals.org.ua
- If the replacement part includes a different nut design and printed torque instructions, follow the part manufacturer’s instructions.
- If a castle nut and cotter pin are used, tighten slightly farther only as needed to align the next slot. Never loosen the nut to align it.
- Install a new cotter pin with the needle-nose pliers when applicable.
Step 10: Tighten the jam nut
- Hold the inner tie rod with the 10-inch adjustable wrench so it cannot twist.
- Use the correctly sized crowfoot wrench and torque wrench to tighten the jam nut.
- Torque the tie rod end jam nut to 63 Nm (46 ft-lbs). lemon-manuals.org.ua
- Make sure the tie rod end remains correctly oriented and its rubber boot is not twisted.
Step 11: Reinstall the wheel
- Clean dirt and loose corrosion from the wheel and hub mating surfaces with the wire brush.
- Install the wheel and start every wheel nut by hand.
- Snug the nuts in a crisscross pattern using the lug-nut socket.
- Raise the vehicle with the floor jack, remove the jack stand, and lower the tire to the ground.
- Use the 1/2-inch torque wrench and lug-nut socket to tighten the wheel nuts in a star pattern.
- Torque the wheel nuts to 149 Nm (110 ft-lbs). Ford specifies clean, dry wheel fastener threads. fordservicecontent.com
✅ After Repair
- Start the engine and turn the steering wheel slowly from side to side. Check for binding, rubbing, or unusual noise.
- Verify that the tie rod boot is intact and the stud and jam nut are fully seated.
- Drive only a short distance at low speed to the alignment shop.
- Have a four-wheel alignment performed immediately. Counting turns only creates a temporary starting position.
- Stop driving if the steering wheel is badly off-center, the vehicle pulls sharply, or the steering feels loose.
- Retorque the wheel nuts after 160 km. Ford calls for a recheck after wheel removal. fordservicecontent.com
💰 DIY vs Shop Cost
Shop Cost: Approximately ₹15,000-₹30,000 including one outer tie rod end, labor, and alignment
DIY Cost: Approximately ₹6,000-₹15,000 including the part and alignment
You Save: Approximately ₹9,000-₹15,000 by doing it yourself!
Local labor and alignment rates vary. Rust, seized threads, and tool purchases can increase the total.
🎯 Ready to get started?
HowToo has opened the matching tie rod ends and steering tools for your Explorer. Same-day and 2-day shipping availability varies by destination, but the parts list now shows the current choices and specialty pullers needed for the job.
