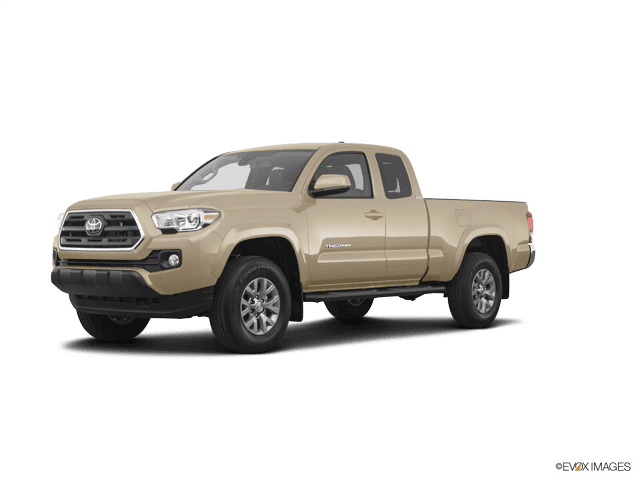








How to Replace the Outer Tie Rod End on a 2005-2022 Toyota Tacoma (Trim: SR5)
Step-by-step DIY guide with tools, parts, torque specs, safety tips, and alignment advice for 2005, 2006, 2007, 2008, 2009, 2010, 2011, 2012, 2013, 2014, 2015
How to Replace the Outer Tie Rod End on a 2005-2022 Toyota Tacoma (Trim: SR5)
Step-by-step DIY guide with tools, parts, torque specs, safety tips, and alignment advice for 2005, 2006, 2007, 2008, 2009, 2010, 2011, 2012, 2013, 2014, 2015


🔧 Tacoma - Outer Tie Rod End Replacement
This repair replaces a worn outer tie rod end, which connects the steering rack to the front wheel knuckle and helps control toe alignment. A bad tie rod end can cause loose steering, uneven tire wear, clunking, or wandering while driving.
Difficulty Level: Beginner to Intermediate | Estimated Time: 1-2 hours per side
⚠️ Safety & Precautions
- ⚠️ Work on a flat, solid surface only. Never rely on a jack by itself.
- ⚠️ Always support your Tacoma with jack stands before working near or under the front suspension.
- ⚠️ The steering alignment will be disturbed. A professional alignment is required after replacement.
- ⚠️ Do not hammer directly on the steering knuckle threads or tie rod threads.
- ⚠️ Replace the cotter pin with a new one. A cotter pin is a small bent safety pin that keeps the castle nut from backing off.
- ⚠️ Battery disconnect is not required for this repair.
🔧 Required Tools
You'll need the following tools for this repair:
- Floor jack (rated 3-ton minimum)
- Jack stands (rated 3-ton minimum)
- Wheel chocks
- 21mm socket
- 19mm wrench
- 22mm wrench
- Torque wrench (10-150 ft-lbs)
- Breaker bar 1/2-inch drive
- Ratchet 1/2-inch drive
- Needle-nose pliers
- Tie rod end puller (specialty)
- Paint marker
- Tape measure
- Hammer 16 oz
- Penetrating oil spray
- Wire brush
- Safety glasses
- Mechanic gloves
🔩 Required Parts
HowToo sells all the parts you need for this repair:
- Outer tie rod end - Qty: 1 per side
- New cotter pin - Qty: 1 per side
- New castle nut - Qty: 1 per side if not included
- Chassis grease - Qty: 1 tube if tie rod end has grease fitting
📋 Before You Begin
- 📋 Park your Tacoma on level ground with the transmission in Park.
- 📋 Set the parking brake and place wheel chocks behind the rear wheels.
- 📋 Slightly loosen the front wheel lug nuts before lifting the truck.
- 📋 Spray penetrating oil on the tie rod jam nut and outer tie rod stud nut. Let it soak for 5-10 minutes.
- 📋 A jam nut is the locking nut on the threaded inner tie rod that holds the outer tie rod in place.
- 📋 Count turns when removing the old tie rod end. This helps keep the alignment close enough to drive to an alignment shop.
🔨 Step-by-Step Instructions
Follow these steps in order:
Step 1: Loosen the Front Wheel
- Use a 21mm socket and breaker bar 1/2-inch drive to loosen the front lug nuts about half a turn.
- Do not fully remove the lug nuts yet.
- Loosen wheels before lifting.
Step 2: Lift and Support the Front
- Use a floor jack (rated 3-ton minimum) to lift the front of your Tacoma at the front crossmember.
- Place jack stands (rated 3-ton minimum) under the frame on both sides.
- Lower the truck gently onto the jack stands.
- Use wheel chocks behind the rear wheels if not already installed.
- Shake the truck lightly to confirm it is stable before working.
Step 3: Remove the Front Wheel
- Use a 21mm socket and ratchet 1/2-inch drive to remove the lug nuts.
- Remove the wheel and set it flat under the frame as an extra safety backup.
Step 4: Mark and Measure the Old Tie Rod Position
- Use a wire brush to clean the threads near the outer tie rod end.
- Use a paint marker to mark where the outer tie rod meets the jam nut.
- Use a tape measure to measure from the jam nut face to the center of the tie rod stud.
- Write the measurement down before removing anything.
- This helps preserve toe alignment.
Step 5: Loosen the Jam Nut
- Use a 22mm wrench on the jam nut.
- Use a 19mm wrench on the flats of the outer tie rod end if needed to hold it steady.
- Turn the jam nut loose about 1/4 turn only. Do not spin it far down the threads.
- If it is rusty, apply penetrating oil spray and wait a few minutes.
Step 6: Remove the Cotter Pin
- Use needle-nose pliers to straighten and pull out the cotter pin from the tie rod stud.
- If it breaks, use the needle-nose pliers to remove all remaining pieces.
- Discard the old cotter pin. Do not reuse it.
Step 7: Remove the Castle Nut
- Use a 19mm socket or 19mm wrench to loosen and remove the castle nut from the tie rod stud.
- A castle nut has slots on top so the cotter pin can pass through it.
- If the stud spins, press down on the tie rod end while loosening with the 19mm wrench.
Step 8: Separate the Tie Rod End from the Steering Knuckle
- Install the tie rod end puller (specialty) over the steering knuckle and tie rod stud.
- Tighten the puller with the correct drive from your puller kit until the stud pops free.
- If needed, tap the side of the steering knuckle lightly with a hammer 16 oz while the puller is under tension.
- Do not strike the threaded stud directly.
Step 9: Unscrew the Old Outer Tie Rod End
- Use a paint marker to make a final reference mark across the tie rod and threads.
- Turn the old outer tie rod end counterclockwise by hand.
- Count the exact number of turns until it comes off.
- Write down the turn count.
- Turn count matters for alignment.
Step 10: Install the New Outer Tie Rod End
- Thread the new outer tie rod end onto the inner tie rod by hand.
- Use the same number of turns counted during removal.
- Line it up with your paint mark and measurement from earlier.
- Do not tighten the jam nut fully yet.
Step 11: Attach the Tie Rod End to the Steering Knuckle
- Insert the new tie rod stud into the steering knuckle by hand.
- Install the new castle nut by hand first to avoid cross-threading.
- Use a 19mm socket and torque wrench (10-150 ft-lbs) to tighten the nut.
- Torque to 67 Nm (49 ft-lbs)
- If the cotter pin hole does not line up, tighten the castle nut slightly more until it lines up. Do not loosen it to align the hole.
Step 12: Install the New Cotter Pin
- Slide the new cotter pin through the tie rod stud hole.
- Use needle-nose pliers to bend the ends around the castle nut.
- Make sure the cotter pin is secure and cannot fall out.
Step 13: Tighten the Jam Nut
- Hold the outer tie rod end steady with a 19mm wrench.
- Use a 22mm wrench to tighten the jam nut against the outer tie rod end.
- Torque to 74 Nm (55 ft-lbs)
- If your torque wrench cannot be used with an open-end wrench, tighten it firmly and have the alignment shop verify final torque.
Step 14: Grease the Tie Rod End if Equipped
- If the new tie rod end has a grease fitting, use the grease gun supplied with chassis grease.
- Add grease until the rubber boot just begins to swell slightly.
- Do not overfill the boot because it can split.
Step 15: Reinstall the Wheel
- Place the wheel back onto the hub by hand.
- Install the lug nuts by hand first.
- Use a 21mm socket and ratchet 1/2-inch drive to snug the lug nuts in a star pattern.
Step 16: Lower the Truck and Torque the Lug Nuts
- Use the floor jack (rated 3-ton minimum) to lift the truck slightly off the jack stands.
- Remove the jack stands (rated 3-ton minimum).
- Lower your Tacoma until the tire touches the ground.
- Use a 21mm socket and torque wrench (10-150 ft-lbs) to tighten lug nuts in a star pattern.
- Torque to 113 Nm (83 ft-lbs)
✅ After Repair
- ✅ Turn the steering wheel fully left and right while parked. Listen for binding or popping.
- ✅ Check that the cotter pin is installed and the rubber boot is not twisted or torn.
- ✅ Drive slowly around the block. The steering wheel may be off-center until alignment is done.
- ✅ Schedule a professional front-end alignment immediately. Tie rod replacement changes toe angle.
- ✅ Recheck the lug nut torque after 25-50 miles using a 21mm socket and torque wrench.
💰 DIY vs Shop Cost
Shop Cost: $220-$450 per side including parts, labor, and alignment-related labor
DIY Cost: $35-$120 per side for parts only
You Save: $150-$300 by doing it yourself!
Shop labor rates vary but typically run $100-$150/hour. This repair takes a shop approximately 0.8-1.5 hours, plus alignment time.
🎯 Ready to get started?
HowToo makes it easy: same-day/2-day shipping on every part, plus all the tools and specialty tools you need! Check out the parts and tools sections below to add everything to your cart.