


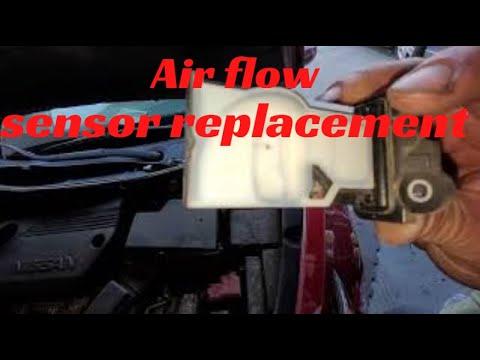







How to Replace the Mass Air Flow Sensor on a 2019-2025 Nissan Altima
Beginner-friendly MAF sensor replacement with tools, parts, safety tips, and testing steps for 2019, 2020, 2021, 2022, 2023, 2024, 2025
How to Replace the Mass Air Flow Sensor on a 2019-2025 Nissan Altima
Beginner-friendly MAF sensor replacement with tools, parts, safety tips, and testing steps for 2019, 2020, 2021, 2022, 2023, 2024, 2025


🔧 Altima - Mass Air Flow Sensor Replacement
This is a beginner-friendly repair: the MAF sensor unplugs and lifts from the intake tube after removing two small screws. The sensor measures incoming air so the engine computer can calculate fueling.
Assumption: These instructions cover replacing the removable MAF sensor itself, not removing the complete air cleaner or turbo inlet assembly. Nissan cautions against striking, disassembling, or touching the sensing element. valvulita.com
Difficulty Level: Beginner | Estimated Time: 20-40 minutes
⚠️ Safety & Precautions
- ⚠️ Park your Altima on level ground and let the engine cool completely.
- ⚠️ Keep dirt, lint, and dropped hardware out of the open intake passage.
- ⚠️ Never touch or wipe the delicate sensing element inside the MAF sensor.
- ⚠️ Pull electrical connectors by their plastic bodies, never by the wires.
- ⚠️ Disconnect the negative battery cable before unplugging the sensor.
- ⚠️ Don’t overtighten the mounting screws. The intake housing is plastic, and plastic always loses that argument.
🔧 Required Tools
You'll need the following tools for this repair:
- 10mm socket
- 1/4-inch drive ratchet
- Phillips #2 screwdriver
- Torx T20 screwdriver
- Small flat-blade screwdriver
- OBD-II scan tool
- Clean lint-free cloth
- Nitrile gloves
- Safety glasses
🔩 Required Parts
HowToo sells all the parts you need for this repair:
- Direct-fit mass air flow sensor - Qty: 1
- MAF sensor seal or O-ring - Qty: 1, if not included with the sensor
The matching MAF sensor choices are now displayed in the parts sidebar. Compare the new sensor’s connector, mounting flange, and sensing-tube orientation with the original before installation.
📋 Before You Begin
- 📋 Shift into Park, apply the parking brake, and switch off every electrical accessory.
- 📋 Open the hood and locate the MAF sensor in the intake tract near the air-filter housing.
- 📋 Photograph the sensor’s orientation and electrical connector before disturbing anything.
- 📋 Use the 10mm socket and 1/4-inch drive ratchet to loosen the negative battery-terminal nut.
- 📋 Remove the negative cable and position it where it cannot spring back onto the terminal.
- 📋 Wait at least two minutes before unplugging the MAF connector.
🔨 Step-by-Step Instructions
Follow these steps in order:
Step 1: Clean Around the Sensor
- Use the clean lint-free cloth to wipe loose dust from the sensor, connector, and surrounding intake housing.
- Do not spray cleaner into the installed sensor or intake passage.
- Clean outside first, then open the intake.
Step 2: Disconnect the Electrical Connector
- Press the connector’s plastic release tab with your finger.
- If the tab is difficult to move, use the small flat-blade screwdriver very gently to help depress it.
- Pull the connector straight from the sensor by its plastic body.
- Inspect the connector for bent terminals, moisture, corrosion, or damaged wiring.
Step 3: Identify the Mounting Screws
- Check the heads of the two small sensor screws.
- Use the Phillips #2 screwdriver if each screw has a cross-shaped head.
- Use the Torx T20 screwdriver if each screw has a six-point star-shaped head.
- Use only the driver that fits fully and tightly so the small screw heads aren’t stripped.
Step 4: Remove the Old MAF Sensor
- Use the correct screwdriver to loosen and remove both screws counterclockwise.
- Place the screws somewhere secure so they cannot fall into the engine compartment.
- Hold the sensor by its plastic body and pull it straight from the intake housing.
- If the seal sticks, gently rock the sensor while pulling. Do not pry against the housing.
- Temporarily cover the opening with the clean lint-free cloth.
Step 5: Inspect the Intake and Connector
- Use the safety glasses and visually inspect the opening for dirt, oil residue, cracks, or a damaged sealing surface.
- Inspect the nearby intake tube and clamps for loose connections or splits that could admit unmetered air.
- Do not push the cloth into the intake or use compressed air around the opening.
Step 6: Prepare the New Sensor
- Compare the original and replacement sensors side by side.
- Confirm that the connector, mounting holes, sensor depth, and installation direction match.
- Verify that the new seal or O-ring is correctly seated and isn’t twisted.
- Keep your fingers and tools away from the sensing element.
Step 7: Install the New MAF Sensor
- Remove the covering cloth and account for both mounting screws.
- Insert the new sensor straight into the opening in the original orientation.
- Ensure the mounting flange sits flat without forcing it down.
- Start both screws clockwise by hand before using a screwdriver.
- Use the correct Phillips #2 screwdriver or Torx T20 screwdriver to tighten the screws evenly.
- Torque: No verified KR20DDET screw specification is available here. Tighten only until lightly snug.
- Stop immediately when the sensor flange is seated. Do not crush the seal or crack the housing.
Step 8: Reconnect the Sensor
- Align the electrical connector and push it straight onto the sensor until its lock clicks.
- Gently pull the connector body to confirm it is locked.
- Check that the harness isn’t stretched, pinched, or touching a hot component.
Step 9: Reconnect the Battery
- Place the negative cable fully onto the battery terminal.
- Use the 10mm socket and 1/4-inch drive ratchet to tighten the terminal securely.
- Torque: Tighten to the battery terminal’s original secure fit without distorting the clamp.
- Confirm the terminal cannot rotate by hand.
Step 10: Clear Codes and Test
- Connect the OBD-II scan tool to the diagnostic port beneath the driver’s side of the dashboard.
- Switch the ignition on without starting the engine.
- Read and record stored codes before clearing them.
- Clear MAF-related codes only after recording them, then switch the ignition off.
- Start the engine without pressing the accelerator and let it idle for several minutes.
✅ After Repair
- ✅ Confirm the engine idles steadily and the malfunction indicator light remains off.
- ✅ Listen for hissing around the intake tube, which can indicate an air leak.
- ✅ Take a gentle 10-15 minute test drive through several engine speeds.
- ✅ Rescan for pending or stored trouble codes after the drive.
- ✅ If P0101 or another MAF code returns, inspect the intake for leaks and diagnose the wiring before replacing more parts.
- ✅ A new MAF sensor normally requires no programming. Avoid cleaning the throttle body during this job unless you’re prepared to perform the appropriate idle-air learning procedure.
💰 DIY vs Shop Cost
Shop Cost: $260-$425 USD, including diagnosis, parts, and labor
DIY Cost: $134-$196 USD for the currently listed sensor choices
You Save: Approximately $65-$290 by doing it yourself!
Shop labor and diagnostic rates vary. The physical replacement generally takes a professional less than one hour.
🎯 Ready to get started?
HowToo makes it easy: same-day/2-day shipping on every part, plus all the tools and specialty tools you need! Check out the parts and tools sections below to add everything to your cart.
