









How to Replace the Mass Air Flow (MAF) Sensor on a 2019-2021 Cadillac XT4
Step-by-step DIY instructions with required tools, torque specs, safety tips, and code-clearing guidance for 2019, 2020, 2021
How to Replace the Mass Air Flow (MAF) Sensor on a 2019-2021 Cadillac XT4
Step-by-step DIY instructions with required tools, torque specs, safety tips, and code-clearing guidance for 2019, 2020, 2021


🔧 XT4 - Mass Air Flow Sensor Replacement
This is a straightforward sensor swap at the engine air-intake duct. Remove the electrical connector, replace the sensor without touching its sensing element, then check the intake for leaks.
Difficulty Level: Beginner | Estimated Time: 20-40 minutes
Assumption: This procedure covers the original sensor installed in the factory air-cleaner outlet duct. The replacement sensor itself wasn’t confirmed in the current parts results, so don’t substitute the displayed ambient-temperature sensor.
⚠️ Safety & Precautions
- ⚠️ Turn the ignition completely off and keep the key fob away from your XT4.
- ⚠️ Let the engine cool before working around the turbocharger and intake plumbing.
- ⚠️ Never touch, brush, or wipe the new sensor’s sensing element.
- ⚠️ Don’t allow dirt, screws, or tools to fall into the open intake duct.
- ⚠️ Battery disconnection normally isn’t required for this repair.
🔧 Required Tools
You'll need the following tools for this repair:
- Torx T20 screwdriver
- 1/4-inch drive inch-pound torque wrench
- 1/4-inch drive Torx T20 bit socket
- Plastic trim tool
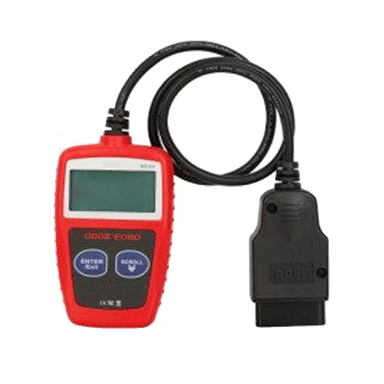
- OBD-II scan tool
- Clean microfiber towel
- Nitrile gloves
- Safety glasses
🔩 Required Parts
HowToo sells all the parts you need for this repair:
- Vehicle-specific mass air flow sensor - Qty: 1
- Mass air flow sensor seal - Qty: 1, if not included
The current parts list shows intake boots and hoses, but no confirmed sensor for your XT4. Match the replacement by vehicle application and connector design before installation.
📋 Before You Begin
- 📋 Park your XT4 on level ground, select Park, apply the parking brake, and open the hood.
- 📋 Turn off the ignition and wait at least two minutes before unplugging the sensor.
- 📋 Find the sensor mounted in the intake duct between the air-filter housing and engine.
- 📋 Compare the new and old sensors before opening the intake. The connector, mounting flange, seal, and sensing-element length must match.
- 📋 Photograph the sensor’s installed direction. Airflow orientation matters.
🔨 Step-by-Step Instructions
Follow these steps in order:
Step 1: Gain Access to the Sensor
- Put on the safety glasses and nitrile gloves.
- If the decorative engine cover blocks access, lift it evenly by hand from its rubber mounting points.
- Use the clean microfiber towel to remove loose dust around the sensor and intake duct.
- Keep dirt outside the intake.
Step 2: Disconnect the Electrical Connector
- Look for a colored connector-position lock. This is a small secondary lock that prevents accidental disconnection.
- Use the plastic trim tool to slide the lock back gently, if fitted.
- Press the connector release and pull the connector straight off by its plastic body.
- Don’t pull on the wires. If it resists, push the connector inward first, depress the release again, and then remove it.
- Inspect the connector for bent pins, moisture, oil, or green corrosion.
Step 3: Remove the Old Sensor
- Use the Torx T20 screwdriver to loosen the sensor mounting screws evenly.
- Keep control of both screws so they can’t fall into the engine compartment.
- Pull the sensor straight out. Rock it very slightly if its sealing ring is stuck.
- Don’t pry against the plastic intake duct.
Step 4: Inspect the Intake
- Use the clean microfiber towel only on the outside edge of the sensor opening.
- Check the intake duct for splits, loose clamps, damaged seals, or a poor air-box connection.
- Unmetered air entering through a crack can set the same lean-running or airflow codes as a failed sensor. Air leaks love impersonating expensive electronics.
- Don’t spray cleaner into the open duct.
Step 5: Install the New Sensor
- Confirm the new sensor seal is installed correctly and isn’t twisted.
- Hold the sensor by its plastic housing. Don’t touch the exposed sensing element.
- Align it in the same direction as the original and insert it straight into the duct.
- Start both screws by hand to prevent cross-threading.
- Use the 1/4-inch drive Torx T20 bit socket and inch-pound torque wrench to tighten the screws evenly.
- Torque to 1.5 Nm (13 lb-in). If the replacement manufacturer supplies a different specification, follow that specification.
- Don’t overtighten the screws. The mounting surface is plastic.
Step 6: Reconnect the Sensor
- Push the electrical connector onto the sensor until the release tab clicks.
- Re-engage the secondary connector lock by hand.
- Pull lightly on the connector body to confirm it’s fully seated.
- Reinstall the decorative engine cover by aligning its mounts and pressing down evenly by hand.
Step 7: Clear Codes and Verify Operation
- Turn the ignition on without starting the engine.
- Connect the OBD-II scan tool and record any stored codes before clearing them.
- Clear the engine codes, then start the engine without pressing the accelerator.
- Let it idle for approximately five minutes while checking for a warning light, rough idle, whistling, or intake leaks.
- No separate battery registration or sensor programming is normally required.
✅ After Repair
- ✅ Confirm the engine idles smoothly and the Check Engine light remains off.
- ✅ Take a 10-15 minute drive using light and moderate acceleration.
- ✅ Rescan for pending codes after the drive.
- ✅ If an airflow code returns, inspect the air filter, intake duct, connector terminals, and charge-air plumbing before replacing more parts.
- ✅ Some fuel-trim monitors may need several normal trips to complete after codes are cleared.
💰 DIY vs Shop Cost
Shop Cost: $180-$400 (parts + labor)
DIY Cost: $70-$220 (parts only)
You Save: $110-$180 by doing it yourself!
Local labor and imported-part pricing can vary considerably. This repair takes a shop approximately 0.3-0.6 hour.
🎯 Ready to get started?
HowToo makes it easy: same-day/2-day shipping on every part, plus all the tools and specialty tools you need! Check out the parts and tools sections below to add everything to your cart.
