

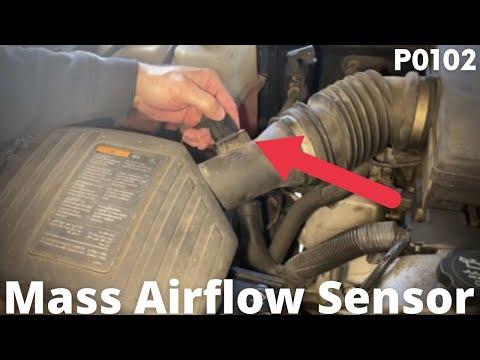






How to Replace the Mass Air Flow (MAF) Sensor on a 2016-2022 GMC Canyon (Trim: Denali | Engine: Inline 4 2.8L | Body: Crew Cab Pickup)
Step-by-step DIY instructions with required tools, parts, torque specs, and safety tips for 2016, 2017, 2018, 2019, 2020
How to Replace the Mass Air Flow (MAF) Sensor on a 2016-2022 GMC Canyon (Trim: Denali | Engine: Inline 4 2.8L | Body: Crew Cab Pickup)
Step-by-step DIY instructions with required tools, parts, torque specs, and safety tips for 2016, 2017, 2018, 2019, 2020


🔧 Canyon - Mass Air Flow Sensor Replacement
This is a straightforward replacement. The MAF sensor sits in the intake duct near the engine air-filter housing and measures the air entering the engine.
Difficulty Level: Beginner | Estimated Time: 20-30 minutes
Assumption: These instructions cover the stock intake system. Fastener style can vary, so compare the replacement sensor before removing the original.
⚠️ Safety & Precautions
- 🧊 Let the engine cool completely before working under the hood.
- 🔌 Disconnect the negative battery cable before unplugging the sensor.
- 🧤 Never touch the small sensing elements inside either sensor.
- 💨 Keep dirt, tools, and cleaning spray out of the open intake duct.
- 🚫 Don’t clean the connector with brake cleaner or carburetor cleaner.
🔧 Required Tools
You'll need the following tools for this repair:
- 10mm socket
- 1/4-inch drive ratchet
- Torx T20 screwdriver
- Torx T25 screwdriver
- Inch-pound torque wrench
- Plastic trim pick
- Clean microfiber cloth
- Nitrile gloves
- Safety glasses
🔩 Required Parts
HowToo sells all the parts you need for this repair:
- Hitachi Original Equipment MAF sensor - Qty: 1
I'd put the Hitachi on the counter first. Correct calibration matters more than saving a few dollars on an airflow sensor.
📋 Before You Begin
- 🅿️ Park your Canyon on level ground, select Park, and apply the parking brake.
- 🗝️ Switch the ignition off and remove the key from the vehicle.
- ⏱️ Wait at least two minutes so the engine-control modules can power down.
- 🔍 Compare the new sensor's connector, mounting holes, seal, and sensing probe with the original.
- 🧹 Wipe loose dirt away from the sensor and surrounding intake duct.
🔨 Step-by-Step Instructions
Follow these steps in order:
Step 1: Disconnect the Battery
- Open the hood and locate the battery.
- Use the 10mm socket and 1/4-inch drive ratchet to loosen the negative battery-terminal clamp.
- Lift the negative cable from the battery and position it where it cannot spring back onto the terminal.
Step 2: Locate the MAF Sensor
- Follow the intake duct away from the engine air-filter housing.
- Identify the sensor with an eight-pin electrical connector mounted directly in the intake airflow path.
- Make sure you’re replacing the MAF sensor, not a smaller pressure or temperature sensor farther along the intake system.
Step 3: Disconnect the Electrical Connector
- Use the plastic trim pick to release the connector's secondary lock, if fitted.
- Press the main release tab and pull the connector straight away from the sensor.
- Pull on the connector body, never the wires.
- Inspect the terminals for moisture, corrosion, bent pins, or oil contamination.
Step 4: Remove the Original Sensor
- Test-fit the Torx T20 screwdriver in the mounting screws. Use the Torx T25 screwdriver instead if it fits fully without play.
- Remove both sensor mounting screws while supporting the sensor with your free hand.
- Pull the sensor straight out of the intake duct. Don’t twist the sensing probe against the opening.
- Cover the intake opening with the clean microfiber cloth.
- Don’t drop a screw into the intake.
Step 5: Inspect the Intake Opening
- Use the clean microfiber cloth to wipe only the outside sealing surface.
- Check the intake duct for cracks, loose clamps, damaged seals, or dust trails downstream of the air filter.
- Remove the cloth before installing the replacement sensor.
Step 6: Install the New Sensor
- Verify that the new seal is seated correctly on the sensor.
- Align the airflow direction and mounting holes exactly like the original sensor.
- Insert the sensor straight into the intake duct without forcing it.
- Start both mounting screws by hand to prevent cross-threading.
- Use the correct Torx screwdriver and tighten the screws evenly.
- Use the inch-pound torque wrench to tighten the screws to 2.5 Nm (22 in-lbs). Stop if the intake housing begins to distort.
Step 7: Reconnect the Wiring
- Push the electrical connector straight onto the sensor until the main latch clicks.
- Reinstall the secondary connector lock, if equipped.
- Gently pull on the connector body to confirm it’s locked.
Step 8: Reconnect the Battery
- Place the negative battery cable back onto the battery terminal.
- Use the 10mm socket and 1/4-inch drive ratchet to tighten the clamp securely.
- Confirm that the terminal cannot rotate by hand. Don’t overtighten the clamp.
✅ After Repair
- 🚗 Start the engine without pressing the accelerator.
- ⏱️ Let it idle for five minutes while checking for warning lights, intake leaks, or unstable idle.
- 👂 Listen for a whistle or hiss that could indicate an intake duct left loose.
- 🛣️ Take a gentle 10-minute drive so the engine computer can adapt to the new airflow readings.
- 💡 A stored MAF fault code may need to be cleared with an OBD-II scan tool. Recheck the diagnosis if the code returns.
- 🔎 Inspect the air filter and intake duct if the old sensor was dirty. A new sensor won’t cure unfiltered air getting into the engine.
💰 DIY vs Shop Cost
Shop Cost: $180-$350 equivalent, depending on local parts and labor pricing
DIY Cost: Approximately $70-$100 for the sensor
You Save: Approximately $80-$250 by doing it yourself!
Labor rates vary by region. This repair normally takes a shop approximately 0.3-0.5 hour.
🎯 Ready to get started?
HowToo makes it easy: same-day/2-day shipping on every part, plus all the tools and specialty tools you need! Check out the parts and tools sections below to add everything to your cart.