







How to Replace the Mass Air Flow (MAF) Sensor on a 2010-2022 Honda Insight (Trim: LX | Engine: Inline 4 1.5L)
Step-by-step instructions with required tools, parts, 13 in-lb torque spec, and safety tips for 2010, 2011, 2012, 2013, 2014
How to Replace the Mass Air Flow (MAF) Sensor on a 2010-2022 Honda Insight (Trim: LX | Engine: Inline 4 1.5L)
Step-by-step instructions with required tools, parts, 13 in-lb torque spec, and safety tips for 2010, 2011, 2012, 2013, 2014


🔧 Insight - Mass Air Flow Sensor Replacement
This is an easy call. The MAF sensor sits in the air-cleaner outlet and takes about 20 minutes to replace. Honda identifies it as the combined MAF Sensor/IAT Sensor 1, meaning it also measures incoming-air temperature. downloads.laboratoryb.org)
Difficulty Level: Beginner | Estimated Time: 0.25-0.5 hours
⚠️ Safety & Precautions
- ⚠️ Switch the Insight completely off and move the key fob at least 10 feet away.
- ⚠️ Wait for the engine and intake components to cool before working.
- ⚠️ Do not touch the sensing element inside the new sensor.
- ⚠️ Do not pull the connector by its wires.
- ⚠️ Do not touch orange high-voltage cables or connectors.
- ⚠️ Disconnecting the 12-volt battery is not required for this repair.
🔧 Required Tools
You'll need the following tools for this repair:
- Phillips No. 2 screwdriver
- 1/4-inch drive inch-pound torque wrench
- Phillips No. 2 torque bit socket
- Plastic trim pick
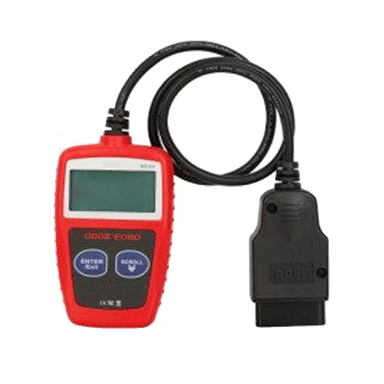
- OBD-II scan tool
- LED work light
- Nitrile gloves
- Safety glasses
🔩 Required Parts
HowToo sells all the parts you need for this repair:
- Mass air flow sensor with integrated intake-air-temperature sensor - Qty: 1
- MAF sensor gasket - Qty: 1
I'd put the Hitachi Astemo MAF sensor on the counter first at $85.33. Hitachi is the strongest value among the current new-sensor choices. Tiny sensor, big opinions from the engine computer.
📋 Before You Begin
- 📋 Park on level ground, select Park, and apply the electric parking brake.
- 📋 Switch the power mode off and open the hood.
- 📋 Confirm the replacement connector and screw locations match the original sensor.
- 📋 Take a quick photo of the original sensor orientation before removing it.
- 📋 No infotainment service mode, battery registration, or hybrid-system isolation is required.
🔨 Step-by-Step Instructions
Follow these steps in order:
Step 1: Locate the MAF sensor
- Use the LED work light to find the sensor installed at the air-cleaner outlet near the intake hose.
- Identify the electrical connector and two small retaining screws.
- Do not confuse it with the MAP sensor mounted closer to the engine. Honda treats the MAF, MAP, and second IAT sensor as separate components, so the others do not need removal. downloads.laboratoryb.org
Step 2: Disconnect the electrical connector
- Press the connector release tab with your finger.
- If the tab is stubborn, use the plastic trim pick gently. A trim pick is a nonmetallic prying tool that helps release plastic locks without shorting terminals.
- Pull the connector straight away by its plastic housing.
- Inspect the terminals for water, corrosion, bent pins, or damaged wiring.
Step 3: Remove the original sensor
- Use the Phillips No. 2 screwdriver to loosen both retaining screws.
- Keep firm downward pressure so the screwdriver does not strip the soft screw heads.
- Lift the sensor straight out of the air-cleaner housing.
- Remove the old gasket if it remains stuck to the housing.
- Keep dirt out of the open air passage.
Step 4: Inspect the mounting area
- Use the LED work light to check that the sealing surface is clean.
- Do not spray cleaner into the open intake or electrical connector.
- Check the nearby intake hose for cracks, loose clamps, or gaps that could create an unmetered-air leak.
Step 5: Install the new sensor
- Fit the new gasket to the sensor unless it arrives preinstalled.
- Hold the sensor only by its plastic body. Never touch or clean the sensing element.
- Place it into the housing in the same direction as the original.
- Start both screws by hand with the Phillips No. 2 screwdriver to prevent cross-threading.
- Use the inch-pound torque wrench and Phillips No. 2 torque bit socket to tighten both screws evenly.
- Torque to 1.5 Nm (13 in-lbs). The published removal-and-installation information lists 1.5 Nm for the MAF/IAT sensor fasteners. downloads.laboratoryb.org
- Do not tighten these little screws by feel with a large ratchet. The plastic housing loses that argument every time.
Step 6: Reconnect the sensor
- Push the electrical connector onto the new sensor until its lock clicks.
- Gently pull on the connector housing to verify it is locked.
- Use the LED work light to confirm the wiring is not pinched or stretched.
Step 7: Clear the stored fault code
- Switch the power mode on without pressing the brake pedal.
- Connect the OBD-II scan tool beneath the driver-side dashboard.
- Read and record the stored codes before clearing them.
- Clear the codes, disconnect the scan tool, and switch the power mode off.
- No MAF calibration or programming procedure is normally required.
✅ After Repair
- ✅ Start the Insight and confirm the READY indicator appears normally.
- ✅ Let it operate for several minutes and watch for warning messages or an unstable idle.
- ✅ Inspect the intake housing and connector one more time.
- ✅ Take a 10-15 minute road test with light and moderate acceleration.
- ✅ Rescan for pending codes after the road test.
- ✅ If the original code returns, inspect the connector, wiring, air filter, intake leaks, and diagnostic data before replacing anything else.
Honda lists the MAF sensor as part of the emissions-controlled intake system. Depending on where the vehicle was originally registered and operated, emissions-warranty coverage may be worth checking before paying for the repair. owners.honda.com
💰 DIY vs Shop Cost
Shop Cost: $160-$399 (parts + labor)
DIY Cost: $54-$100 (parts only)
You Save: Approximately $60-$300 by doing it yourself!
Shop labor rates vary but typically run $100-$150/hour. This repair takes a shop approximately 0.3-0.6 hours. Published estimates place this repair near $160-$399. repairpal.com
🎯 Ready to get started?
HowToo makes it easy: same-day/2-day shipping on every part, plus all the tools and specialty tools you need! Check out the parts and tools sections below to add everything to your cart.