

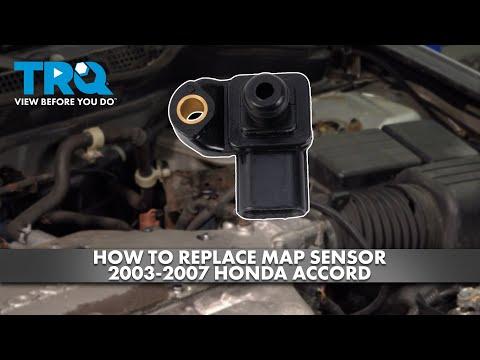







How to Replace the MAP/IAT Sensor (MAF Alternative) on a 2007 Honda Accord
Step-by-step instructions to identify the correct sensor, needed tools/parts, and key torque specs for 2005, 2006, 2007
How to Replace the MAP/IAT Sensor (MAF Alternative) on a 2007 Honda Accord
Step-by-step instructions to identify the correct sensor, needed tools/parts, and key torque specs for 2005, 2006, 2007


🔧 Accord - Airflow Sensor Replacement (MAF vs MAP/IAT)
Your Accord’s 2.4L engine typically does not use a traditional MAF sensor. Instead, it uses a MAP sensor (measures intake manifold pressure) and an IAT sensor (measures intake air temperature). I’ll show you how to replace either one—pick the section that matches what you see under the hood.
Difficulty Level: Beginner | Estimated Time: 0.3-0.8 hours
⚠️ Safety & Precautions
- ⚠️ Work on a cool engine (avoid burns near the intake/throttle area).
- ⚠️ Turn ignition fully OFF and remove the key before unplugging sensors.
- ⚠️ If you disconnect the battery, you may lose radio presets.
- ⚠️ Don’t pull on wires—only press the connector lock tab.
🔧 Required Tools
You'll need the following tools for this repair:
- 10mm socket
- 1/4" drive ratchet
- 1/4" drive extension (3")
- Small flathead screwdriver
- Torque wrench (inch-pound or small ft-lb)
- Nitrile gloves
- Safety glasses
- Shop towels
🔩 Required Parts
HowToo sells all the parts you need for this repair:
- MAP sensor - Qty: 1
- MAP sensor O-ring (seal) - Qty: 1
- Intake Air Temperature (IAT) sensor - Qty: 1
- IAT sensor O-ring (seal) - Qty: 1
- Dielectric grease - Qty: 1
📋 Before You Begin
- 🅿️ Park on level ground, set the parking brake, and open the hood.
- 🔌 Optional: Disconnect the negative battery terminal using a 10mm socket.
- 🧼 Wipe dirt around the sensor with shop towels so nothing falls into the intake.
- 🧠 An O-ring is a small rubber sealing ring. Replace it if flattened or torn.
🔨 Step-by-Step Instructions
Follow these steps in order:
Step 1: Identify which sensor you’re replacing
- Look for a small sensor with an electrical connector on the intake manifold near the throttle body: that’s usually the MAP sensor.
- Look for a sensor inserted into the plastic intake tube/air box duct: that’s usually the IAT sensor.
Step 2: Unplug the electrical connector
- Press the connector lock tab with your thumb; if it’s stubborn, gently help the tab with a small flathead screwdriver.
- Pull the connector straight off the sensor (don’t yank the wires).
- Wiggle gently; don’t force it.
Step 3A: Replace the MAP sensor (intake manifold-mounted)
- Remove the retaining bolt using a 10mm socket, 1/4" drive ratchet, and 3" extension.
- Pull the MAP sensor straight out. If it sticks, gently twist while pulling by hand.
- Remove and replace the O-ring (the rubber seal) on the sensor.
- Install the new MAP sensor straight into the port (don’t pinch the O-ring).
- Reinstall the bolt and Torque to 12 Nm (9 ft-lbs) using a torque wrench.
Step 3B: Replace the IAT sensor (intake tube/duct-mounted)
- If the IAT is a twist-lock style: rotate it counterclockwise by hand and pull it out. If needed, use a small flathead screwdriver gently on the locking tab.
- If it’s held by a small bolt (less common): remove it with a 10mm socket and 1/4" drive ratchet.
- Replace the IAT O-ring if the new sensor doesn’t include one.
- Install the new IAT sensor and lock it in place (hand snug). Do not over-tighten.
Step 4: Reconnect and protect the connector
- Apply a tiny amount of dielectric grease to the connector seal (it helps prevent corrosion; it’s non-conductive).
- Push the connector on until it clicks.
Step 5: Reconnect battery (if disconnected)
- Reconnect the negative terminal using a 10mm socket.
✅ After Repair
- ✅ Start the engine and let it idle for 2–3 minutes.
- ✅ Confirm idle is steady and the throttle response feels normal.
- ✅ If you had a check-engine light, clear codes with a scan tool, or drive a few trips and see if it returns.
- ✅ Check that no tools or rags are left near the intake belt/fan area.
💰 DIY vs Shop Cost
Shop Cost: $150-$350 (parts + labor)
DIY Cost: $40-$180 (parts only)
You Save: $110-$170 by doing it yourself!
Shop labor rates vary but typically run $100-$150/hour. This repair takes a shop approximately 0.5-1.0 hours.
🎯 Ready to get started?
HowToo makes it easy: same-day/2-day shipping on every part, plus all the tools and specialty tools you need! Check out the parts and tools sections below to add everything to your cart.