

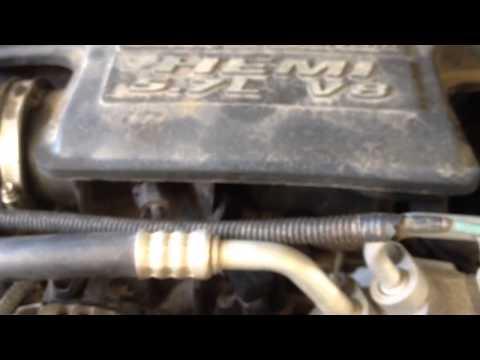






How to Replace the MAP Sensor on a 2012-2023 Jeep Grand Cherokee 5.7L HEMI (Engine: V8 5.7L)
MAF correction, step-by-step instructions, required tools, torque specs, and testing tips for 2012, 2013, 2014, 2015, 2016, 2017, 2018, 2019, 2020, 2021, 2022, 2023
How to Replace the MAP Sensor on a 2012-2023 Jeep Grand Cherokee 5.7L HEMI (Engine: V8 5.7L)
MAF correction, step-by-step instructions, required tools, torque specs, and testing tips for 2012, 2013, 2014, 2015, 2016, 2017, 2018, 2019, 2020, 2021, 2022, 2023


🔧 Grand Cherokee - MAP Sensor Replacement
Important correction: Your Grand Cherokee’s 5.7L HEMI does not use a mass air flow (MAF) sensor. It calculates airflow using a manifold absolute pressure (MAP) sensor, which measures intake-manifold pressure.
This procedure replaces the MAP sensor mounted near the front of the intake manifold. Replace it only after checking the connector, wiring, and related diagnostic trouble codes.
Difficulty Level: Beginner | Estimated Time: 15-30 minutes
⚠️ Safety & Precautions
- ⚠️ Let the engine cool before reaching around the intake manifold.
- ⚠️ Keep dirt and loose objects out of the sensor opening.
- ⚠️ Do not use compressed air or tools inside the intake opening.
- ⚠️ Battery disconnection is not normally required; keep the ignition completely off while unplugging the sensor.
🔧 Required Tools
You'll need the following tools for this repair:
- Torx T20 bit socket
- 1/4-inch-drive ratchet
- 1/4-inch-drive inch-pound torque wrench
- Plastic trim removal tool
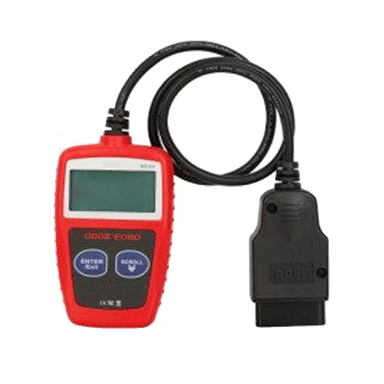
- OBD-II scan tool
- Clean lint-free shop towels
- Nitrile mechanic gloves
- Safety glasses
🔩 Required Parts
HowToo sells all the parts you need for this repair:
- Intake manifold MAP sensor - Qty: 1
- MAP sensor O-ring - Qty: 1 if not included with sensor
📋 Before You Begin
- 🅿️ Park your Grand Cherokee on level ground, select Park, apply the parking brake, and switch the ignition off.
- 🌡️ Allow the engine to cool completely.
- 🔑 Move the key fob away from the vehicle so the ignition cannot be switched on accidentally.
- 📟 Use an OBD-II scan tool to record stored codes before clearing anything. An OBD-II scan tool plugs into the diagnostic connector beneath the dashboard and reads engine fault codes.
- 🧹 Clean loose dirt from the top of the intake manifold with a clean lint-free shop towel.
🔨 Step-by-Step Instructions
Follow these steps in order:
Step 1: Remove the Engine Cover
- Wear safety glasses and nitrile mechanic gloves.
- Grip the engine cover near its mounting points and pull straight upward to release the rubber retainers.
- If a retainer is stubborn, use a plastic trim removal tool gently. Do not pry against wiring or plastic intake components.
- Set the cover away from the work area.
Step 2: Locate the MAP Sensor
- Find the small electrical pressure sensor installed in the upper intake manifold near the throttle-body area.
- Confirm that it has one electrical connector and one retaining screw. This is the MAP sensor, not a MAF sensor.
- Use a clean lint-free shop towel to remove dirt surrounding the sensor.
Step 3: Disconnect the Electrical Connector
- Press the connector’s locking tab with your fingers and pull the connector straight off.
- If necessary, use a plastic trim removal tool to move the lock gently. Do not pull on the wires.
- Inspect the terminals for corrosion, moisture, bent pins, or oil contamination.
- Never force a stuck electrical connector.
Step 4: Remove the Old MAP Sensor
- Use a Torx T20 bit socket and 1/4-inch-drive ratchet to remove the retaining screw.
- Grip the sensor body and gently twist while pulling it straight out of the intake manifold.
- Use a clean lint-free shop towel to cover the opening temporarily.
- Verify that the old O-ring came out with the sensor.
Step 5: Install the New MAP Sensor
- Compare the new and old sensors. The connector, sensing tip, seal, and mounting hole must match.
- Make sure the new O-ring is correctly seated. Do not apply sealant.
- Remove the clean lint-free shop towel from the opening.
- Press the new sensor straight into the manifold by hand. Do not use the retaining screw to pull it into place.
- Start the retaining screw by hand to avoid damaging the plastic threads.
- Use a Torx T20 bit socket and 1/4-inch-drive inch-pound torque wrench to tighten the screw to 3 Nm (27 in-lbs). Do not use foot-pounds.
- The plastic intake manifold is easy to damage.
Step 6: Reconnect the Sensor
- Push the electrical connector onto the sensor until the lock clicks.
- Pull back gently on the connector body to verify that it is secured.
- Check that the wiring is not stretched, pinched, or touching a hot component.
Step 7: Reinstall the Engine Cover
- Align the engine-cover sockets with their mounting posts.
- Press directly above each mounting point by hand until the cover is fully seated.
- Do not strike the cover or use the ratchet to install it.
Step 8: Clear Codes and Verify Operation
- Connect the OBD-II scan tool beneath the dashboard.
- Switch the ignition on without starting the engine.
- Use the OBD-II scan tool to clear the related engine codes.
- Start the engine and allow it to idle. Do not press the accelerator immediately.
✅ After Repair
- ✅ Let the engine idle for approximately five minutes and listen for unstable idle or an intake-air leak.
- ✅ Confirm that the check-engine light remains off.
- ✅ Use the OBD-II scan tool to check that the MAP reading changes smoothly when the engine is gently accelerated.
- ✅ Take a short test drive, then scan again for pending or stored codes.
- ✅ If the original fault returns, inspect the sensor’s 5-volt supply, ground, signal circuit, intake leaks, and throttle body before replacing more parts.
💰 DIY vs Shop Cost
Shop Cost: ₹7,000-₹16,000 (parts + labor)
DIY Cost: ₹3,500-₹11,000 (parts only)
You Save: ₹3,500-₹5,000 by doing it yourself!
Local labor rates and imported-part prices vary. This repair takes a shop approximately 0.3-0.5 hour.
🎯 Ready to get started?
HowToo makes it easy: same-day/2-day shipping on every part, plus all the tools and specialty tools you need! Check out the parts and tools sections below to add everything to your cart.