








How to Replace the MAF Sensor on a 2019-2025 Subaru Forester (Trim: Limited)
Step-by-step instructions with tools, parts, torque specs, OBD-II codes, and safety tips for 2019, 2020, 2021, 2022, 2023, 2024, 2025
How to Replace the MAF Sensor on a 2019-2025 Subaru Forester (Trim: Limited)
Step-by-step instructions with tools, parts, torque specs, OBD-II codes, and safety tips for 2019, 2020, 2021, 2022, 2023, 2024, 2025


🔧 Forester - Mass Air Flow Sensor Replacement
The mass air flow sensor, often called the MAF sensor, measures how much air enters the engine so the engine computer can add the right amount of fuel. On your Forester, it is mounted in the air intake tube near the engine air filter box and is a simple plug-and-screw replacement.
Difficulty Level: Beginner | Estimated Time: 15-30 minutes
⚠️ Safety & Precautions
- ⚠️ Let the engine cool before working near the intake and engine bay.
- ⚠️ Turn the ignition fully OFF and keep the key/fob away from the vehicle while unplugging the sensor.
- ⚠️ Do not touch the sensing wires inside the MAF sensor. They are delicate and can be damaged easily.
- ⚠️ Battery disconnect is not normally required for this repair, but avoid turning the ignition ON while the sensor is unplugged.
🔧 Required Tools
You'll need the following tools for this repair:
- Phillips #2 screwdriver
- 10mm socket
- 1/4-inch drive ratchet
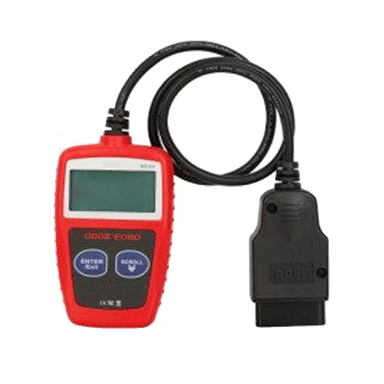
- OBD-II scan tool (specialty)
- Nitrile gloves
- Safety glasses
🔩 Required Parts
HowToo sells all the parts you need for this repair:
- Mass air flow sensor - Qty: 1
- MAF sensor O-ring seal - Qty: 1
- Mass air flow sensor cleaner - Qty: 1
📋 Before You Begin
- 🅿️ Park your Forester on level ground and set the parking brake.
- 🔑 Turn the ignition OFF. Do not leave the vehicle in accessory mode.
- 🧊 Allow the engine bay to cool if the vehicle was recently driven.
- 🧤 Put on nitrile gloves and safety glasses.
- 🔎 An OBD-II scan tool is a small plug-in device that reads and clears engine trouble codes from the diagnostic port under the dash.
🔨 Step-by-Step Instructions
Follow these steps in order:
Step 1: Locate the MAF Sensor
- Open the hood and support it securely.
- Find the engine air filter box on the driver-side/front area of the engine bay.
- The MAF sensor is installed in the black plastic intake tube directly after the air filter box.
- Use a flashlight if needed to see the electrical connector and two small retaining screws.
- Take a quick photo first.
Step 2: Unplug the Electrical Connector
- Press the locking tab on the MAF sensor electrical connector with your thumb.
- Pull the connector straight back by the plastic plug, not by the wires.
- If the connector is tight, gently wiggle it while pulling. Do not pry hard on it.
Step 3: Remove the MAF Sensor Screws
- Use a Phillips #2 screwdriver to remove the two MAF sensor retaining screws.
- Keep downward pressure on the screwdriver so the screw heads do not strip.
- If the screws are very tight, use a 10mm socket and 1/4-inch drive ratchet only if your replacement fasteners or sensor housing uses 10mm hex-head screws.
- Set the screws aside in a safe place.
Step 4: Remove the Old MAF Sensor
- Pull the MAF sensor straight upward out of the intake tube by its plastic body.
- Do not twist hard and do not touch the sensing element inside the lower part of the sensor.
- Check that the old O-ring seal comes out with the sensor.
- If the O-ring stays in the intake tube, remove it carefully by hand.
Step 5: Prepare the New MAF Sensor
- Compare the new MAF sensor to the old one. The connector shape and mounting holes should match.
- Make sure the new MAF sensor O-ring seal is seated on the sensor.
- If reusing a known-good sensor after cleaning, spray only the sensing area with mass air flow sensor cleaner.
- Let the cleaner fully air dry before installation. Do not wipe the sensor.
- Never use brake cleaner here.
Step 6: Install the New MAF Sensor
- Insert the new MAF sensor straight into the intake tube.
- Make sure it sits flat against the mounting surface and the O-ring is not pinched.
- Start both screws by hand first to avoid cross-threading.
- Use a Phillips #2 screwdriver to tighten the screws evenly.
- Torque to 1.7 Nm (15 in-lbs). If you do not have an inch-pound torque tool, tighten gently until snug only.
- Small screws strip very easily.
Step 7: Reconnect the Electrical Connector
- Push the electrical connector straight onto the MAF sensor until it clicks.
- Lightly tug the connector by the plastic body to confirm it is locked.
- Look around the air intake tube and air filter box to make sure nothing was left loose.
Step 8: Clear Codes If the Check Engine Light Was On
- Plug the OBD-II scan tool into the diagnostic port under the driver-side dashboard.
- Turn the ignition ON without starting the engine.
- Use the OBD-II scan tool to read and record any codes before clearing them.
- Clear the codes with the OBD-II scan tool.
- Turn the ignition OFF, then unplug the scan tool.
✅ After Repair
- ✅ Start the engine and let it idle for 2-3 minutes.
- 👂 Listen for air leaks, hissing, rough idle, or stumbling.
- 🚗 Take a short test drive with gentle acceleration first.
- 🔍 Recheck that the connector is fully seated if the engine runs poorly or the check engine light returns.
- 🧰 If codes return, scan again. Common MAF-related codes include P0101, P0102, and P0103.
💰 DIY vs Shop Cost
Shop Cost: $180-$350 (parts + labor)
DIY Cost: $80-$180 (parts only)
You Save: $100-$170 by doing it yourself!
Shop labor rates vary but typically run $100-$150/hour. This repair takes a shop approximately 0.3-0.6 hours.
🎯 Ready to get started?
HowToo makes it easy: same-day/2-day shipping on every part, plus all the tools and specialty tools you need! Check out the parts and tools sections below to add everything to your cart.