

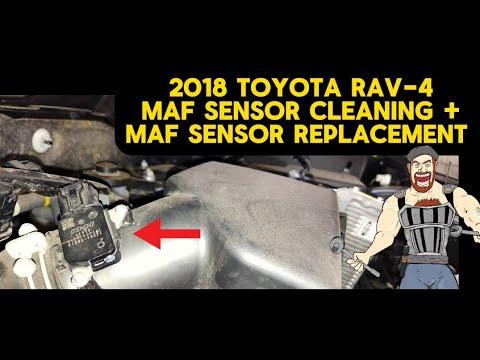







How to Replace the MAF Sensor on a 2018 Toyota RAV4 2.5L
Step-by-step DIY MAF sensor replacement with tools, torque specs, safety tips, and ECU relearn instructions for 2006, 2007, 2008
How to Replace the MAF Sensor on a 2018 Toyota RAV4 2.5L
Step-by-step DIY MAF sensor replacement with tools, torque specs, safety tips, and ECU relearn instructions for 2006, 2007, 2008


RAV4 - Mass Air Flow (MAF) Sensor Replacement 🚗
This guide is for your 2018 RAV4 2.5L. The MAF is easy to reach and a good first DIY job.
Quick Questions ❓
Before we start, reply with:
- ✅ Do you have a basic socket set and a small flat screwdriver?
- ✅ Are you planning to replace the whole MAF sensor, not just clean it?
I’ll assume “yes” to both if you don’t answer and give you the full replacement steps.
Safety & Prep ⚠️
- 🧯 Engine off & cool: Let the engine cool for at least 15–20 minutes.
- 🔋 Disconnect battery negative terminal: This helps avoid check-engine lights and accidental shorts.
- Use a 10 mm wrench to loosen the nut on the negative (–) terminal and lift the cable off.
- 😷 Avoid touching the MAF element: The tiny wire/film inside is very delicate.
Tools & Parts Needed 🧰
- 🛠️ Tools
- 10 mm wrench or socket (battery terminal).
- Small flat-head screwdriver (to help release clips if tight).
- Phillips screwdriver or small socket (usually 8 mm) for MAF screws (Toyota often uses Phillips).
- Gloves (optional but helpful).
- 🧩 Part
- MAF sensor for 2018 RAV4 2.5L (OEM-style replacement).
- Make sure the connector shape and mounting holes match your old one.
Locate the MAF Sensor 📍
- 📦 Open the hood and stand in front of the vehicle.
- 📦 Find the air filter box (black plastic box on the driver side, near the front).
- 📦 The MAF sensor is mounted on the plastic tube just after the air filter box, with a small electrical connector plugged into it.
Step-by-Step: Remove the Old MAF 🔧
- 🧲 1. Disconnect the MAF electrical connector
- Press down on the locking tab on the connector.
- Gently pull the connector straight off the sensor body.
- If it’s stuck, use a small flat screwdriver to gently lift the tab while pulling. Do not pry hard on the plastic.
- 🧲 2. Remove the MAF mounting screws
- There are usually two small screws holding the MAF to the air duct.
- Use a Phillips screwdriver (or small socket if they are hex-head) to remove them.
- Keep the screws safe; you will reuse them.
- 🧲 3. Remove the MAF sensor
- Gently pull the sensor straight out of the housing.
- Do not twist or bend the sensor; it should slide out smoothly.
- Do not touch the thin wire or film inside the sensor opening.
Install the New MAF Sensor 🆕
- 🧩 4. Compare old and new sensors
- Check that:
- Mounting holes line up.
- O-ring or seal is present and in good shape.
- Connector shape is identical.
- Check that:
- 🧩 5. Install the new MAF into the housing
- Slide the new sensor into the opening the same way the old one came out.
- Make sure it sits flush and the O-ring is not pinched.
- 🧩 6. Reinstall the screws
- Install the two screws by hand first to avoid cross-threading.
- Tighten them snugly with the screwdriver. Do not over-tighten—they thread into plastic.
- Torque spec (typical Toyota small sensor screws): about 2–3 N·m (18–27 in-lb) – basically just “snug plus a tiny bit.”
- 🧩 7. Reconnect the electrical connector
- Push the connector onto the sensor until you hear or feel a click.
- Gently tug to confirm it’s locked in place.
Reconnect Battery & Reset 🧠
- 🔋 8. Reconnect the battery negative terminal
- Place the negative cable back on the battery post.
- Tighten the 10 mm nut until snug; do not over-tighten.
- 🔁 9. Let the ECU relearn
- Turn the ignition to ON (engine off) for about 10–15 seconds.
- Then start the engine and let it idle for a few minutes.
- During the first drive, the engine computer may adjust fuel trims; idle may feel slightly different at first, then smooth out.
Check Your Work ✅
- 🔍 Look and listen:
- No check engine light after a short drive.
- Idle is smooth, no stalling or surging.
- No air leaks or hissing around the air intake tube.
- 📲 If you have an OBD2 scanner:
- Clear any stored codes related to the MAF (like P0101, P0102, P0103).
- Drive and confirm they do not return.
Tips & Common Mistakes 💡
- 🧠 Do not spray generic cleaners on the new MAF unless it is labeled “MAF cleaner.” Other chemicals can ruin it.
- 🧠 Check the air filter while you’re there. A very dirty filter can shorten MAF life.
- 🧠 If the engine runs worse after replacement, double-check:
- Connector fully seated.
- Correct part number for your RAV4.
- No intake tube left loose or cracked.
Want Parts & Tools? 🛒
Below this answer, HowToo will show you a compatible MAF sensor and any tools you might need. You can add them to your cart directly from the parts section.
If you tell me whether you’re replacing because of a specific code (like P0101, P0171, etc.), I can also help you confirm that the MAF is really the cause before you spend money.
HowToo makes it easy: same-day/2-day shipping on every part, plus all the tools and specialty tools you need! 🚀