








How to Replace the MAF Sensor on a 2017-2023 Honda Civic (Trim: Si | Engine: Inline 4 1.5L)
Step-by-step instructions with required tools, parts, torque specs, and safety tips for 2017, 2018, 2019, 2020, 2022, 2023
How to Replace the MAF Sensor on a 2017-2023 Honda Civic (Trim: Si | Engine: Inline 4 1.5L)
Step-by-step instructions with required tools, parts, torque specs, and safety tips for 2017, 2018, 2019, 2020, 2022, 2023


🔧 Civic - Mass Air Flow Sensor Replacement
Easy job on your Civic. The MAF sensor sits in the intake housing near the air-filter box and is held by two small screws. Replacement takes about 20 minutes, and no programming or battery disconnect is normally required.
Difficulty Level: Beginner | Estimated Time: 15-30 minutes
Assumption: This procedure is for the stock factory intake assembly.
⚠️ Safety & Precautions
- ⚠️ Switch the ignition completely off and keep the key away from the car.
- 🧤 Let the engine cool before reaching around the intake and turbo area.
- 🚫 Never touch, wipe, or probe the sensing element inside the MAF sensor.
- 🔌 Pull the electrical connector by its plastic body, never by its wires.
- 🔋 Battery disconnection is not required for this repair.
🔧 Required Tools
You'll need the following tools for this repair:
- Phillips #2 screwdriver
- 1/4-inch drive inch-pound torque wrench
- Phillips #2 torque-driver bit
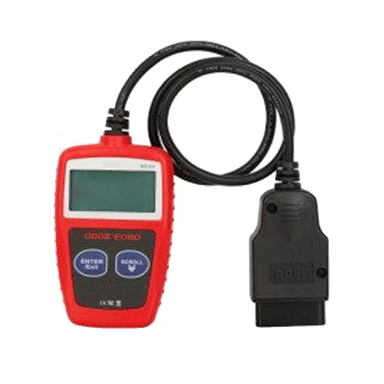
- OBD-II scan tool
- Nitrile gloves
- Safety glasses
- Magnetic parts tray
An inch-pound torque wrench measures the very small tightening force used on delicate plastic parts.
🔩 Required Parts
HowToo sells all the parts you need for this repair:
- Mass air flow sensor with sealing O-ring - Qty: 1
The matching MAF sensor choices are open in the parts sidebar. Use the new seal supplied with the sensor rather than transferring a flattened or damaged old one.
📋 Before You Begin
- 🅿️ Park your Civic on level ground, select neutral, and apply the parking brake.
- 🌡️ Switch the engine off and allow the engine compartment to cool.
- 🧹 Clean loose dust away from the sensor opening so none falls into the intake.
- 📱 No infotainment service mode, scan-tool command, or sensor coding is required.
- 🔍 If a check-engine light is present, record the diagnostic codes before clearing anything.
🔨 Step-by-Step Instructions
Follow these steps in order:
Step 1: Locate the MAF Sensor
- Open the hood and locate the engine air-filter box on the driver's side of the engine compartment.
- Follow the intake passage leaving the air-filter box. The MAF sensor is the small electrical sensor installed in the intake housing.
- Use safety glasses while working over the open engine compartment.
Step 2: Disconnect the Electrical Connector
- Press the locking tab on the MAF electrical connector with your thumb.
- Pull the connector straight away by its plastic body.
- Inspect the connector for bent terminals, moisture, corrosion, or damaged wiring.
- Wiggle the plug, never pull the wires.
Step 3: Remove the Mounting Screws
- Use the Phillips #2 screwdriver to loosen the two MAF sensor mounting screws counterclockwise.
- Support the screwdriver firmly so it doesn't slip and damage the screw heads.
- Finish removing each screw with your fingers and place it in the magnetic parts tray.
Step 4: Remove the Old Sensor
- Grip the sensor by its outer plastic body and pull it straight out of the intake housing.
- If the O-ring is holding it, gently rock the plastic body while pulling upward.
- Do not use a screwdriver to pry against the intake housing.
- Confirm the old O-ring came out with the sensor. Do not leave it inside the opening.
Step 5: Inspect the Intake Opening
- Use a clean, gloved finger only around the outside edge to check for dirt or pieces of the old seal.
- Do not push a cloth, tool, or chemical into the open intake passage.
- If the sensor is visibly oily, inspect the air filter and intake system before assuming the MAF alone caused the problem.
Step 6: Install the New MAF Sensor
- Verify the new sealing O-ring is correctly seated on the replacement sensor.
- Hold the new sensor only by its plastic body.
- Align the sensor and lower it straight into the intake opening without touching the sensing element.
- Press gently until the sensor flange sits flat against the housing.
Step 7: Install and Tighten the Screws
- Start both screws by hand to prevent cross-threading.
- Use the Phillips #2 screwdriver to tighten them evenly until the sensor is seated.
- Use the inch-pound torque wrench and Phillips #2 torque-driver bit for final tightening.
- Torque to 3 Nm (27 in-lbs or 2.2 ft-lbs). This low figure is important because overtightening can crack or strip the plastic housing. openlaborproject.com
- Snug wins here. Plastic hates enthusiasm.
Step 8: Reconnect the Electrical Connector
- Push the connector straight onto the new sensor until its lock clicks.
- Pull back lightly on the connector body to verify it is secured.
- Check that the wiring is not stretched, pinched, or resting against a hot component.
Step 9: Clear Stored Codes
- Connect the OBD-II scan tool to the diagnostic port below the driver's side dashboard.
- Switch the ignition on without starting the engine.
- Use the scan tool to record and clear applicable MAF-related diagnostic codes.
- Switch the ignition off and disconnect the scan tool.
✅ After Repair
- ✅ Start the engine and let it idle without pressing the accelerator.
- 👂 Confirm the idle is smooth and listen for an intake whistle that could indicate a sealing problem.
- 🚨 Verify that the check-engine light remains off.
- 🛣️ Take a 10-15 minute test drive using light and moderate acceleration.
- 🔍 Scan again for pending codes after the test drive.
- ⚠️ If a MAF code returns, inspect the connector, intake leaks, air filter, wiring, and diagnostic data before replacing more parts.
💰 DIY vs Shop Cost
Shop Cost: $180-$350 (parts + labor)
DIY Cost: $60-$150 (parts only)
You Save: $120-$200 by doing it yourself!
Shop labor rates vary but typically run $100-$150/hour. This repair takes a shop approximately 0.3-0.5 hours.
🎯 Ready to get started?
HowToo makes it easy: same-day/2-day shipping on every part, plus all the tools and specialty tools you need! Check out the parts and tools sections below to add everything to your cart.