








How to Replace the MAF Sensor on a 2015-2020 Chevrolet Suburban (Trim: Premier | Engine: V8 5.3L)
Step-by-step instructions with required tools, parts, torque specs, and testing tips for 2015, 2016, 2017, 2018, 2019, 2020
How to Replace the MAF Sensor on a 2015-2020 Chevrolet Suburban (Trim: Premier | Engine: V8 5.3L)
Step-by-step instructions with required tools, parts, torque specs, and testing tips for 2015, 2016, 2017, 2018, 2019, 2020


🔧 Suburban - Mass Air Flow Sensor Replacement
The mass air flow (MAF) sensor measures the air entering your Suburban’s engine so the engine computer can deliver the correct amount of fuel. It is mounted in the air-intake duct near the air-filter housing and can be replaced without removing the complete duct.
Difficulty Level: Beginner | Estimated Time: 20-30 minutes
⚠️ Safety & Precautions
- ⚠️ Switch the ignition completely off and keep the key away from the vehicle.
- 🧊 Let the engine cool before reaching into the engine compartment.
- 🚫 Never touch the sensing elements inside the new MAF sensor.
- 🔋 Battery disconnection is not required.
- 💧 Keep dirt, liquids, and tools out of the open air-intake duct.
🔧 Required Tools
You'll need the following tools for this repair:
- Torx T20 screwdriver
- Torx T20 bit socket
- 1/4-inch drive inch-pound torque wrench
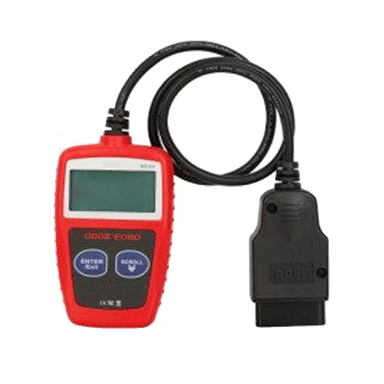
- OBD-II scan tool (specialty)
- ANSI Z87.1 safety glasses
- Nitrile mechanic gloves
🔩 Required Parts
HowToo sells all the parts you need for this repair:
- Mass air flow sensor with sealing ring - Qty: 1
📋 Before You Begin
- 🅿️ Park your Suburban on level ground, shift into Park, and apply the parking brake.
- 🔑 Turn the ignition off and wait at least two minutes before disconnecting the sensor.
- 📍 Open the hood and find the MAF sensor on top of the air-intake duct beside the air-filter housing.
- 🧹 Clear loose dust from around the sensor before removing it.
🔨 Step-by-Step Instructions
Follow these steps in order:
Step 1: Locate and inspect the sensor
- Put on the ANSI Z87.1 safety glasses and nitrile mechanic gloves.
- Locate the small electrical sensor secured to the top of the air-intake duct with two screws.
- Inspect the connector and nearby wiring for broken insulation or obvious damage.
Step 2: Disconnect the electrical connector
- Move the connector’s secondary locking tab back by hand, if fitted.
- Press the release tab and pull the connector straight off by hand.
- Hold the plastic connector housing. Do not pull on the wires.
- Gently wiggle the housing if it sticks.
Step 3: Remove the old MAF sensor
- Use the Torx T20 screwdriver to remove the two sensor mounting screws.
- Place both screws somewhere clean because they will be reused.
- Hold the sensor by its plastic body and lift it straight out by hand.
- Check that the old sealing ring came out with the sensor.
- Do not allow dirt or pieces of the seal to fall into the intake opening.
Step 4: Compare the new sensor
- Compare the old and new sensors by hand.
- Confirm that the connector, mounting holes, sealing ring, and sensor orientation match.
- Verify that the new sealing ring is seated evenly on the sensor.
- Do not touch the sensing elements inside the opening.
- Handle the sensor only by its housing.
Step 5: Install the new MAF sensor
- Lower the new sensor straight into the intake duct by hand in the same direction as the original.
- Make sure it sits completely flat without forcing it.
- Start both mounting screws by hand to avoid damaging the plastic threads.
- Use the Torx T20 bit socket and 1/4-inch drive inch-pound torque wrench to tighten the screws evenly.
- Torque to 2 Nm (18 in-lbs).
- Do not overtighten the screws because the intake duct is plastic.
Step 6: Reconnect the sensor
- Push the electrical connector onto the new sensor by hand until its release tab clicks.
- Move the secondary locking tab into the locked position by hand, if fitted.
- Gently pull on the connector housing by hand to verify it is secure.
Step 7: Clear stored fault codes
- Connect the OBD-II scan tool to the diagnostic connector under the driver-side dashboard.
- Switch the ignition on without starting the engine.
- Use the OBD-II scan tool to record any stored diagnostic trouble codes before clearing them.
- Clear the MAF-related codes with the OBD-II scan tool.
- No MAF sensor programming or dedicated relearn procedure is normally required.
✅ After Repair
- 🚙 Start the engine and let it idle for approximately three minutes without pressing the accelerator.
- 👂 Listen near the sensor for hissing that could indicate an air leak or displaced seal.
- 📊 Confirm that the check-engine light stays off and the engine idles smoothly.
- 🛣️ Take a 10-minute test drive using light and moderate acceleration.
- 🔍 Check again for diagnostic trouble codes with the OBD-II scan tool.
- ⚠️ If the original code returns, inspect the air-filter housing, intake duct, connector terminals, wiring, and vacuum system before replacing more parts.
💰 DIY vs Shop Cost
Shop Cost: $200-$400 (parts + labor)
DIY Cost: $90-$230 (parts only)
You Save: $110-$170 by doing it yourself!
Shop labor rates vary but typically run $100-$150/hour. This repair takes a shop approximately 0.3-0.5 hours.
🎯 Ready to get started?
HowToo makes it easy: same-day/2-day shipping on every part, plus all the tools and specialty tools you need! Check out the parts and tools sections below to add everything to your cart.